
DIY Ugly Christmas Sweater – Gingerbread Boy & Girl Applique Crochet Pattern!
It’s the beginning of November, which means there are only a few more weeks until Thanksgiving, and a few weeks to go before the true craziness of the holiday rush begins! Those few weeks are sure to fly by, which is why I thought it might be helpful to present some holiday applique patterns – all of which I have used to create my own DIY ugly Christmas sweater – before the season gets too busy! These appliques are fun and easy to make, and the possibilities are endless when it comes to arranging them to make your own ugly sweater this year!
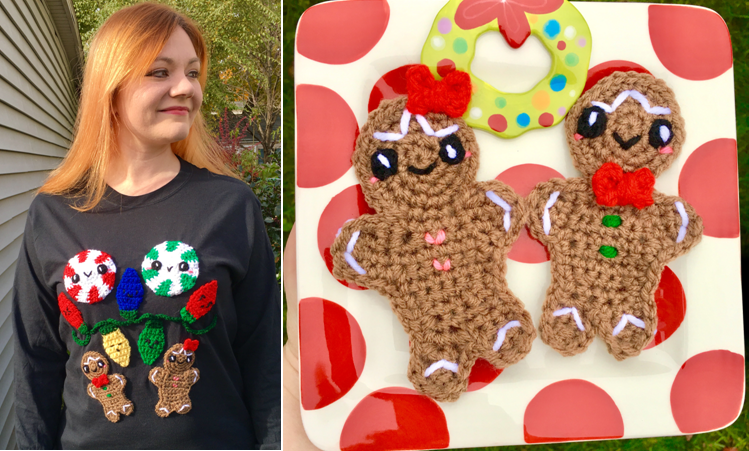
Today I present to you my Gingerbread Boy & Girl applique crochet pattern – and if you’d like to see how they’re attached to fabric, click here to see my post on attaching crocheted appliques to fabric!
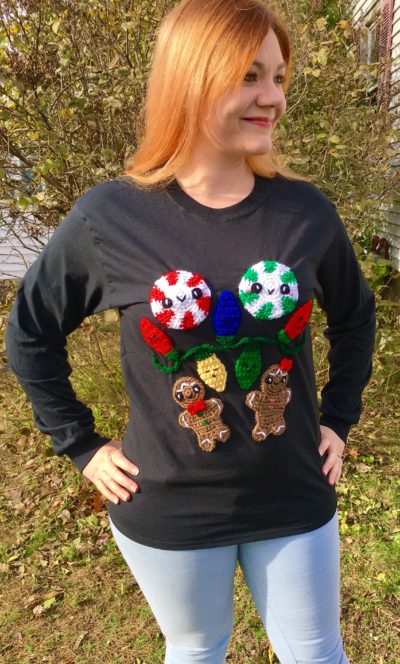
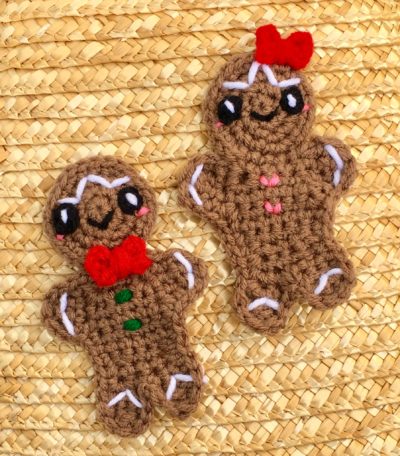
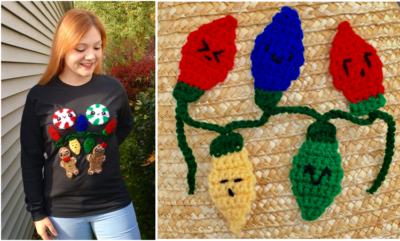
The pattern works up mostly the same for both the Boy and Girl versions, and the pattern tells you when/what to change for the two different versions. As you’ll see below, I attached a whole bunch of crocheted appliques to my sweater, so I made both the Boy & Girl. (By the way – stay tuned for the patterns for the Kawaii Peppermint and String Lights you see on my sweater below!)
The only thing I changed up this time around when attaching them (compared to my post on how to attach crocheted appliques to fabric) was the fabric glue. This time, I used Aleene’s Fabric Fusion. I love this stuff! It dries clear and is non-toxic, so you can make this a fun holiday DIY project with the kiddos. Plus, it dries in 4 hours according to the bottle (mine was much more dry and sewing-ready after an overnight dry, but after a few hours it was not too wet), so you could easily make a few of these in a weekend and not have to worry about them taking forever to dry!
Other than that, I followed that post on how to attach crocheted appliques to fabric exactly (including the sewing), and it came out great! As always, I used a trusty Gildan brand cotton t-shirt. The long-sleeved shirt is perfect for winter, but you could use a short-sleeved one too, if you prefer! I just like the look of the long-sleeved one for holiday photos and such.
To purchase the ad-free PDF version of this pattern, click here to buy it in my shop!
So are you ready to get started on some fun, cute appliques for your DIY ugly Christmas sweater? Then let’s get this holiday party started!
Supplies:
Size G/6 4.00 MM hook (move hook size up/down to make appliqué larger/smaller – I made these appliques for an Adult Unisex Medium t-shirt and the size worked well!)
Yarn Needle
Scissors
Red Heart Super Saver in:
- Café Latte (head/body/arms/legs)
- White (icing/eye sparkle)
- Black (eyes)
- Cherry Red (bow)
- Paddy Green (buttons)
Red Heart Soft Baby Steps in Strawberry (blush, buttons)
Stitch Markers (optional)
Abbreviations:
Beg = beginning
Ch(s) = chains
Rem = remaining
Rep = repeat
Rnd(s) = round(s)
Sc = single crochet
Sc2tog = single crochet 2 together
Sc3tog = single crochet 3 together
St(s) = stitch(es)
Size:
About 5.5” long (move up/down a hook size to make appliqué larger/smaller)
Gauge:
Exact Gauge is not essential to this project.
Instructions
Head
Work in continuous rnds; do not join. You may wish to use a stitch marker and move it up at the end of each rnd.
Rnd 1 – With Brown, Make a magic ring, 6 sc in ring (6 sc)
Rnd 2 – 2 sc in each st around (12 sc)
Rnd 3 – 2 sc in next st, sc in next. Rep around (18 sc)
Rnd 4 – 2 sc in next st, sc in next 2 sts. Rep around (24 sc)
Rnd 5 – Sc in next 4 sts, ch 1, turn. Leave rem sts unworked. Do not fasten off (4 sc)
Body
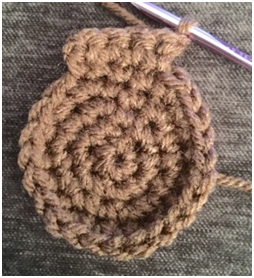
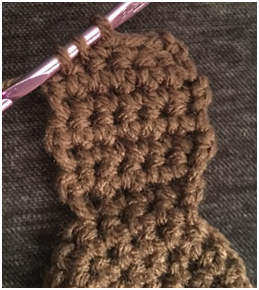
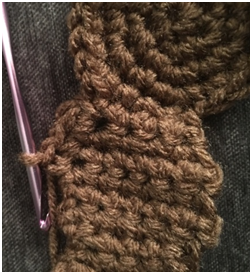
Row 1 – Sc in each st across, ch 1, turn (first photo below). (4 sc)
Row 2 – Rep Row 1 (4 sc)
Row 3 – 2 sc in next st, sc in next 2 sts, 2 sc in last st (second photo below). Ch 1, turn (6 sc)
Row 4 – Sc across. Ch 1, turn (6 sc)
Rows 5 – 7 – Rep Row 4 (6 sc per row)
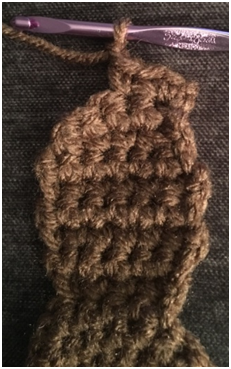
Row 8 – Sc2tog over first 2 sts, sc in next 2 sts, Sc2tog over last 2 sts (third photo below). Ch 1, turn (4 sc)
Row 9 – Sc in each st across. Ch 1, turn. Do not fasten off (4 sc)
Legs
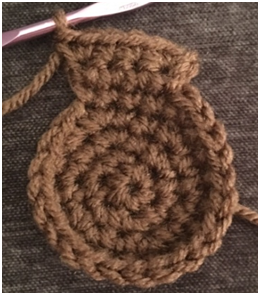
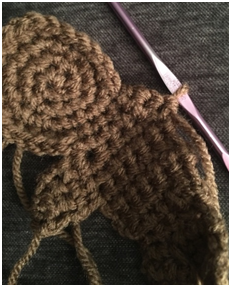
Row 1 – 2 sc in first st, sc in next st. Ch 1, turn, leaving rem sts unworked (first photo below) (3 sc)
Row 2 – Sc across, ch 1, turn (3 sc)
Row 3 – Rep Row 2 (3 sc)
Row 4 – Sc3tog over 3 sts (second photo below). Fasten off (1 sc)
To make second leg, turn piece so that wrong side is facing you, attach Brown yarn at other end of last row of stomach, ch 1, and rep Rows 1-4 (third photo below shows end of first row on second leg). Fasten off, weave in ends.
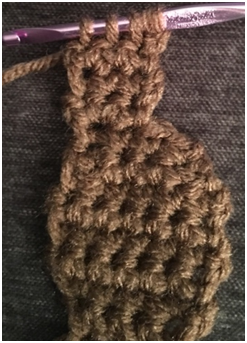
Arms
Join Brown yarn slightly below head and neck area, ch 1.
Row 1 – Sc in 3 sts (first photo below). Ch 1, turn. (3 sc)
Rows 2-3 – Rep Row 1 (3 sc per row)
Row 4 – Sc3tog. Fasten off, weave in ends (1 sc)
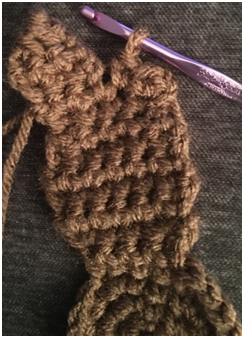
To make second arm, turn piece so that wrong side is facing you, and rep Rows 1 -4 with Brown on other side of body, slightly below head and neck area (second photo below shows row 1 of second arm).
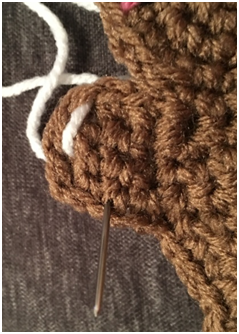
Edging
Attach Brown near head/neck area with right side facing you, ch 1. Evenly sc around to other side, fastening off at head/neck area on other side (do not sc around head). Photo below shows finished edging.
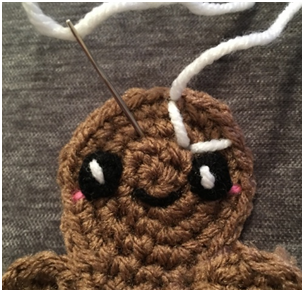
Bow
With Red, Ch 4.
Row 1 – Sc in each ch across. Ch 1, turn (3 sc)
Row 2 – Sc in each st across. Ch 1, turn. (3 sc)
Row 3 – Rep Row 2; do not ch 1 at end of row.
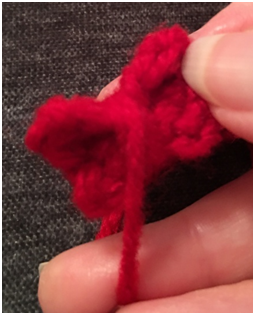
Fasten off, leaving a long tail. Wrap tail around center repeatedly to make bow. Photo below shows yarn wrapped around center of bow.
Eyes
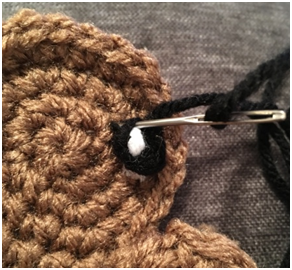
With Black, Ch 3. Sl st to first ch. Fasten off.
Eye Sparkle
With White, make a small vertical line on edge of each eye. Tie off ends on back of Eye.
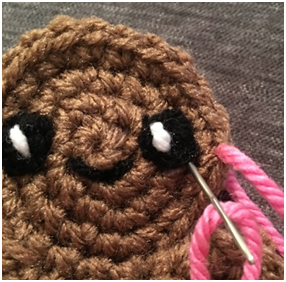
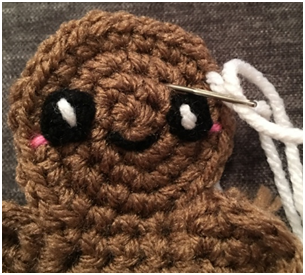
Finishing
Sew eyes to center of Head near outer edges (first photo below). Use rem black yarn tail to make smile (small v between eyes). With Pink, make a small horizontal line near outer edge of each eye for Blush (second photo below). Sew Bow to side of Head for girl, or between bottom of Head and top of Body for boy. For buttons – With Green, sew two small horizontal lines in center of Body for boy (third photo below); or with Pink, make three v shapes in center of Body for girl (fourth photo below). Tie off ends on back of piece.
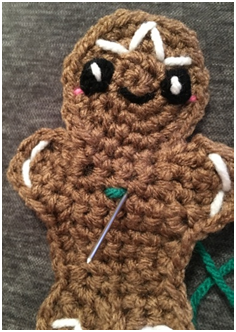
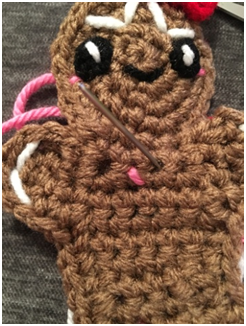
Icing
With White, make three v shapes at top of head, one small sideways v shape at tip of each arm, and one small upside down v shape at tip of each leg. Tie off ends on back of piece.
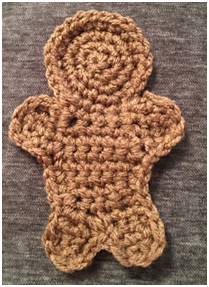
Here are the finished appliques!
Join me again this week for another holiday applique pattern that you can use to DIY your own ugly sweater!!!
COPYRIGHT: This pattern is owned by Crafty Kitty Crochet (Melissa Moore). Any reselling or distribution of this pattern is prohibited. Sale of items made using this pattern is welcomed, but I do ask that credit/a link be provided back to my site, craftykittycrochet.com.
Comments (4)
Make this Holiday Season Sweet: Kawaii Peppermint Applique Crochet Pattern – Crafty Kitty Crochet
November 5, 2019 at 1:40 pm
[…] you’re looking for the other appliques on the sweater, you can find the free patterns for the Gingerbread Boy & Girl here, and the String Lights […]
Light Up Your Ugly Christmas Sweater – String Light Applique Crochet Pattern – Crafty Kitty Crochet
November 5, 2019 at 1:47 pm
[…] I think this applique fills out the sweater so well. I placed mine in the middle of the Gingerbread Boy & Girl and the Kawaii Peppermints (see my post on how to attach crocheted appliques to fabric to learn […]
Snowman Applique / Ornament Crochet Pattern – Crafty Kitty Crochet
November 7, 2019 at 2:30 pm
[…] motif! It would make such a cute ornament, applique for attaching to shirts or other fabric (learn how to make an Ugly Christmas Sweater HERE!), decoration for gift wrap, and more! The design is simple but sweet, and works up really […]
Kawaii Christmas Tree Applique / Ornament – Crafty Kitty Crochet
April 18, 2020 at 4:36 pm
[…] ugly Christmas sweater (learn how to make your own using fun crocheted appliques like this one HERE!). She wanted even more appliques on hers than my Peppermints, Gingerbread Boy, Gingerbread […]