
How to Attach a Crocheted Applique to a T-Shirt
You could say I’ve gone “appli-crazy” lately! Okay, forgive the incredibly bad made-up word pun there, but I have to admit that I’m really having fun with these appliques! They’re fun to make, and it’s so satisfying to be able to wear a t-shirt with a fun crocheted character that you made! (Find my free crocheted applique patterns here to make your own!)
Since attaching a crocheted applique is a bit different than attaching most appliques, I thought it might be helpful to describe how I attach my appliques here on my blog. The specific examples I’m giving here involve how to attach the appliques to t-shirts, but you could use the same process to attach them to other fabrics too! A few ideas are tote bags, blankets (fleece, crocheted, or otherwise), pillowcases, etc.! Have fun and get creative – that’s my motto!
Ready to attach some fun crocheted critters to your wardrobe? Yay! Let’s do it!
Supplies
T-shirt
Permanent fabric glue
***NOTE: I used Aleene’s Permanent Fabric Glue and it worked really well! It took me less than 1 oz to attach my applique, so you could attach a whole bunch with this 4 oz bottle that’s available on Amazon:
Sewing thread in color(s) that match your applique
Sewing needle
Scissors
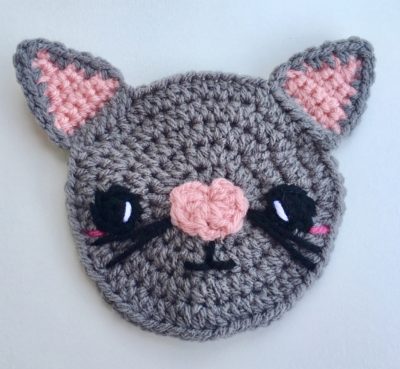
Crafty Kitty Crochet crocheted appliqué (find the free patterns here!)
Wax Paper (optional)
Sewing Chalk (optional)
Straight Pins (optional)
Preparing the shirt
If using a cotton t-shirt, you may choose to pre-shrink the shirt by washing/drawing before applying glue and appliqué. Some shirts, such as
many Gildan brand cotton shirts sold in craft stores, are sold pre-shrunk.
Choose area of fabric you want to glue to. You may choose to mark it with sewing chalk or straight pins to ensure you are gluing to the correct area.
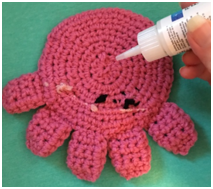
Gluing the applique
Start in center of appliqué, farthest from any edges. Apply a generous amount of glue, spreading out from center area. Apply to centers of
any appendages that stick out from head, body, or main area of appliqué. Do not yet apply to any edges.
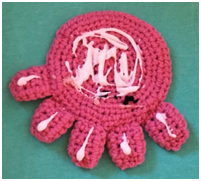
Press and hold appliqué in place on fabric for a few minutes.
Carefully peel back edges of appliqué, and begin to apply small amounts of glue. Do not apply to directly to edges, but rather apply
slightly inside of edges-if applied directly to edges, glue can ooze outside of appliqué and stain the shirt around the appliqué.
Press down firmly on all edges, and let dry according to your fabric glue’s directions (about 24 hours).
You may choose to place a large flat object, such as a book, on top of the appliqué at first, so that it is pressed down flat while drying. It helps to place wax paper inside the shirt so that the fabric does not seep through and stick the two sides of the shirt together; or, after several hours of the appliqué being held flat, hang the fabric with a hanger to finish drying. Let glue dry completely before attempting to secure the appliqué with sewing.
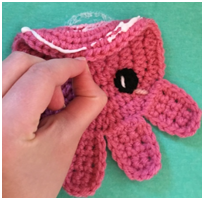
Sewing the applique
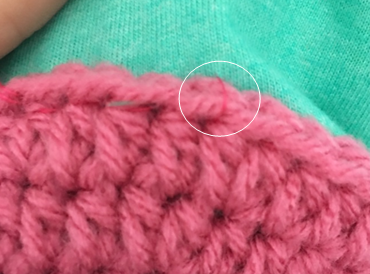
Sew in between the individual crochet stitches, going from front to back of shirt, and vice versa. (The thread shows up this way, but only on the inside of the shirt.)
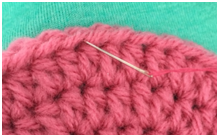
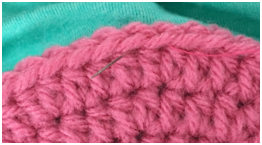
After this method of sewing is complete, you may choose to sew over the edges of the stitches, as well, if the appliqué is noticeably sticking up from the fabric. Carry thread ends to the back of the fabric when finished, and tie several firm knots before fastening off. If you changed thread colors or started another thread throughout the sewing, be sure to tie off these ends, as well.

Note: I recommend washing the shirt according to the directions on your shirt after attaching the appliqué completely, as many fabric glues have a strong odor even after they are finished drying!
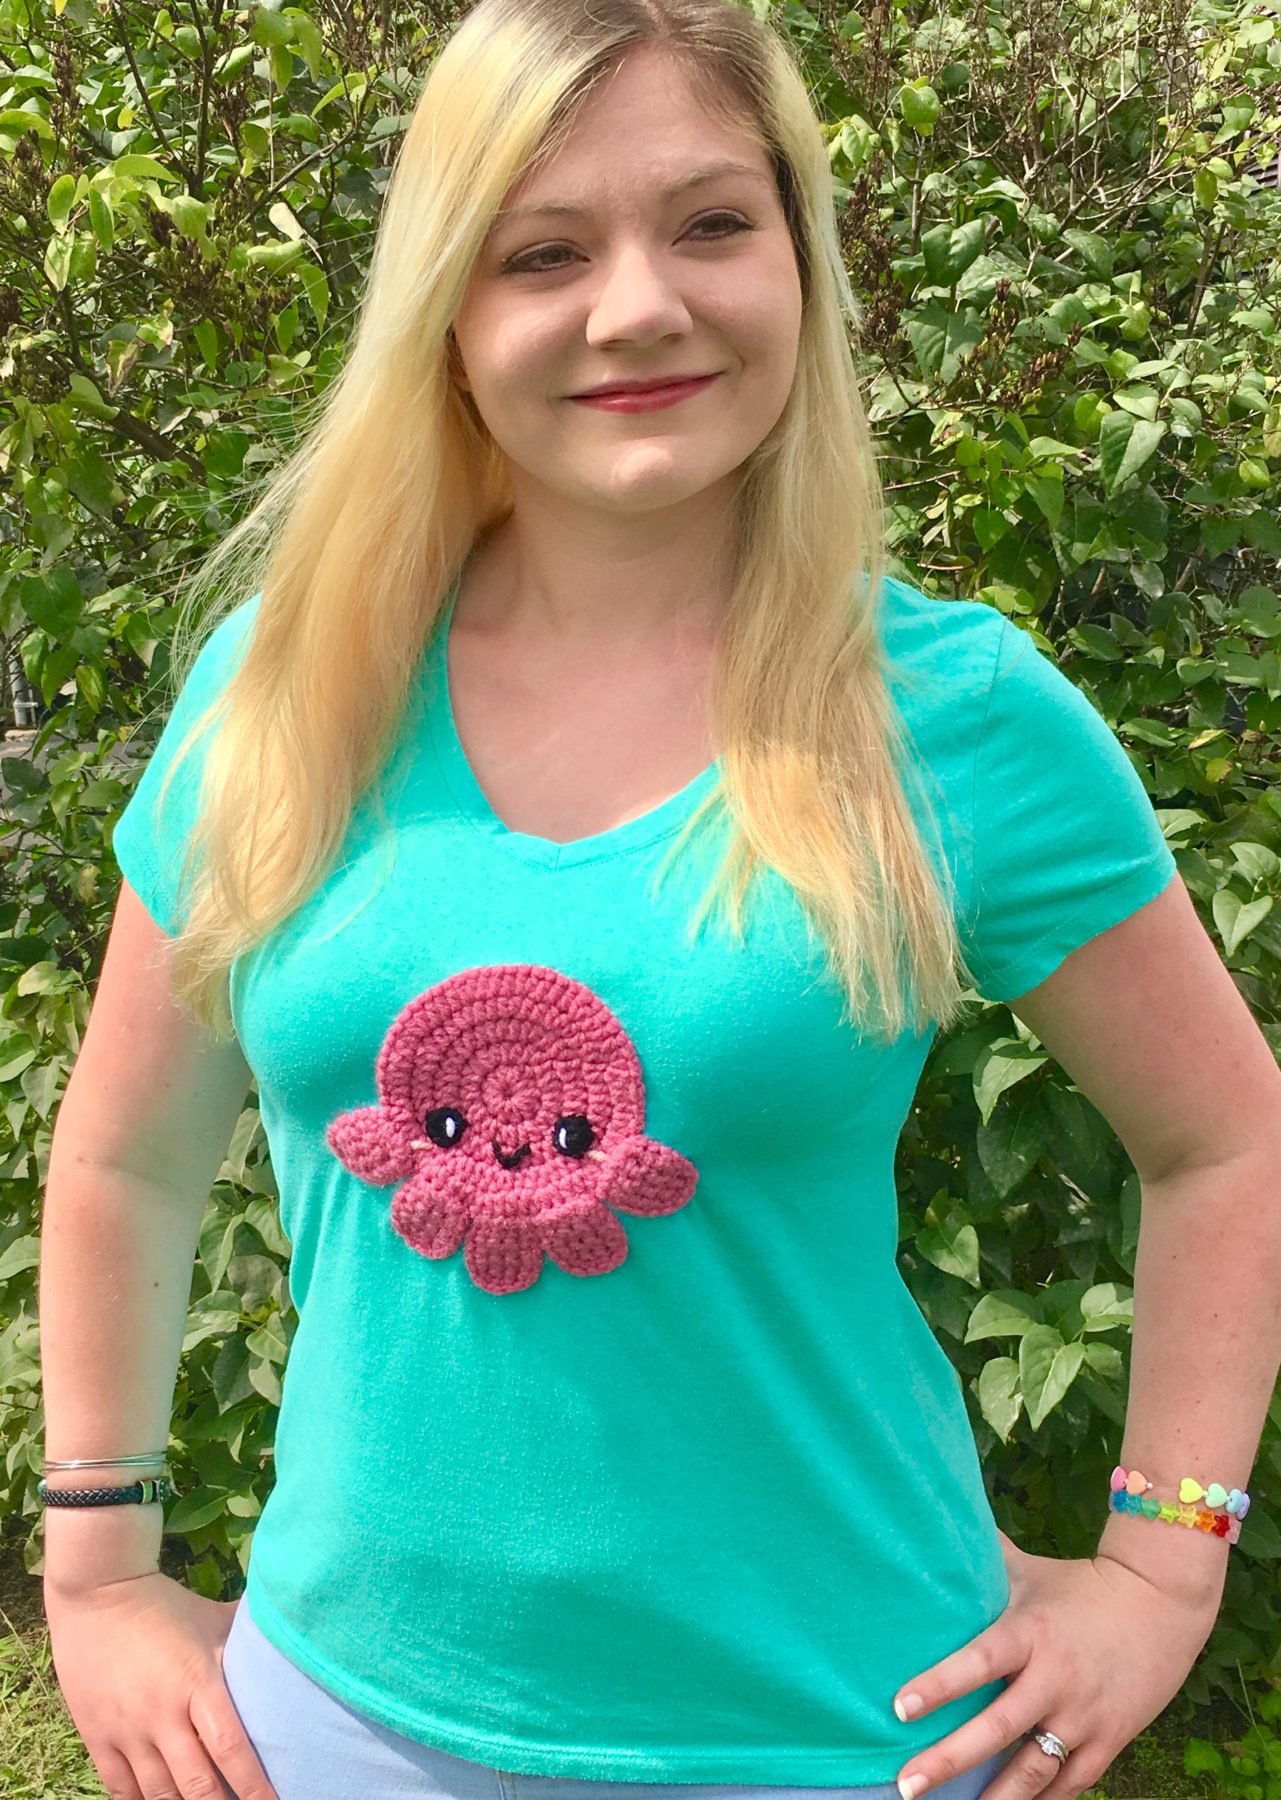
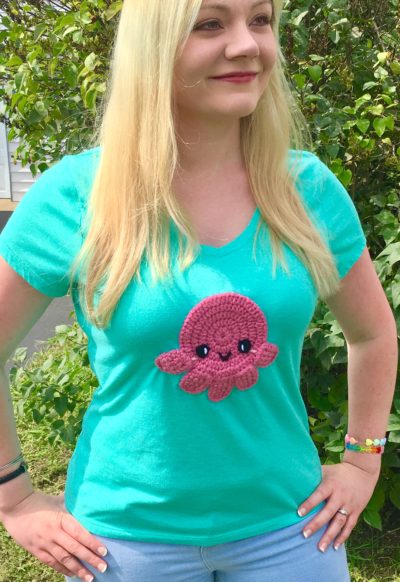
Here is what my Octopus applique looked like on my shirt once it was dry. The great thing about this method of gluing and attaching the applique is that you can wash/dry your shirt many times, but the applique doesn’t peel and holds up pretty well!

COPYRIGHT:
This pattern is owned by Crafty Kitty Crochet (Melissa Moore). Any reselling or distribution of this pattern is prohibited. Sale of items made using this pattern is welcomed, but I do ask that credit/a link be provided back to my site, craftykittycrochet.com.

Comments (7)
Rainbow Jellyfish Applique Crochet Pattern – Crafty Kitty Crochet
January 30, 2019 at 11:19 pm
[…] In addition to it being kawaii to the max, another thing that makes this applique so much fun is how versatile it is. You can adjust the hook size to make the applique larger/smaller, which means you can use it for all kinds of projects! I think this little jellyfish would look so cute on a hat or scarf, or even a baby blanket. Or, how about incorporating some awesome DIY into your wardrobe by attaching this little guy to one of your t-shirts? You can learn how to attach a crocheted applique to fabric (including t-shirts) in my blog post HERE! […]
Make this Holiday Season Sweet: Kawaii Peppermint Applique Crochet Pattern – Crafty Kitty Crochet
November 5, 2019 at 1:39 pm
[…] (By the way, you can learn how to attach these peppermints – and any other crocheted appliques – to …) […]
Light Up Your Ugly Christmas Sweater – String Light Applique Crochet Pattern – Crafty Kitty Crochet
November 5, 2019 at 1:47 pm
[…] I placed mine in the middle of the Gingerbread Boy & Girl and the Kawaii Peppermints (see my post on how to attach crocheted appliques to fabric to learn how), and I love how it […]
Nita
December 18, 2019 at 3:29 pm
I am planning to make a flannel baby blanket and attach small crochet appliques onto it. Will this be possible and will this blanket withstand lots of washing? Also do you recommend crocheting the appliques with DK acrylic or in Cotton? Thanks
Melissa
December 20, 2019 at 4:11 pm
Hi Nita! Those are great questions; I can tell you from personal experience that if you let the glue dry complete on the appliques, and sew around them to secure them, they do withstand lots of washing. As for the yarn, I used acrylic but if you’re going to use cotton, I would just double check the washing/care instructions so that nothing happens to it during the cycle. Thanks so much! ~ Melissa
DIY Ugly Christmas Sweater – Gingerbread Boy & Girl Applique Crochet Pattern! – Crafty Kitty Crochet
April 18, 2020 at 4:23 pm
[…] Today I present to you my Gingerbread Boy & Girl applique crochet pattern – and if you’d like to see how they’re attached to fabric, click here to see my post on attaching crocheted appliques to fabric! […]
Kitty Applique Crochet Pattern ~ Crafty Kitty Crochet
April 18, 2021 at 8:52 pm
[…] (Learn how to attach crocheted appliques to shirts here!) […]