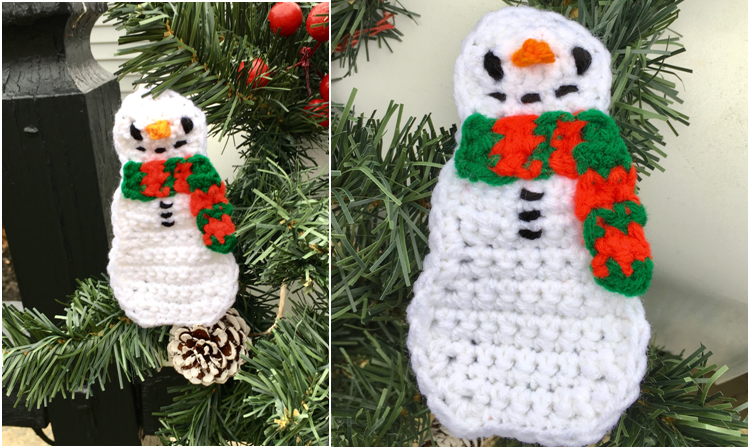
Snowman Applique / Ornament Crochet Pattern
Let It Snow in style this holiday season with this adorable Snowman motif! It would make such a cute ornament, applique for attaching to shirts or other fabric (learn how to make an Ugly Christmas Sweater HERE!), decoration for gift wrap, and more! The design is simple but sweet, and works up really quickly!
This is one of the appliques that I made for a friend’s Ugly Christmas Sweater (learn how to make one HERE!), and I was trying to make something a little different from the Peppermints, Gingerbread Cookies, String Lights, and Christmas Tree appliques that I was planning for her sweater. In the end, I decided on this classic, traditional snowman design. He has all the usual earmarks of a snowman – carrot nose, coal for his eyes/mouth, and even a cute and Christmas-y scarf! You can even get creative with the scarf colors to personalize your own snowman.
As for me, I went with two classic holiday favorites of mine – Red Heart Super Saver in Cherry Red and Paddy Green
!
You would think that in my neck of the woods – upstate New York – the last thing we would want to see is more snow! But there’s just something about a classic snowman that’s hard to beat as far as recognizable winter characters go. Fun fact: my photo shoot with this little snowman was done right before a mini sleet/snow storm hit! He must be an omen of snow or something!
Ready to have some frosty fun? Then let’s get started on this snowman applique!
Supplies
G/6 4.00 mm crochet hook (move hook size up/down to make applique larger/smaller)
Yarn needle
Scissors
Small amounts of Red Heart Super Saver in
- White (body)
- Black (eyes/mouth/buttons)
- Pumpkin (carrot/nose)
- Cherry Red (scarf)
- Paddy Green (scarf)
Abbreviations
ch = chain
sc = single crochet
sc2tog = single crochet 2 together
sl st = slip stitch
st(s) = stitch(es)
Gauge
Exact gauge is not essential to this project.
Size
About 6” in length
Instructions
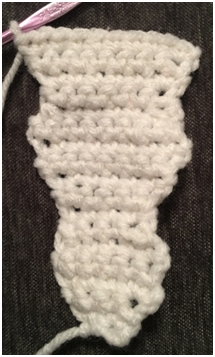
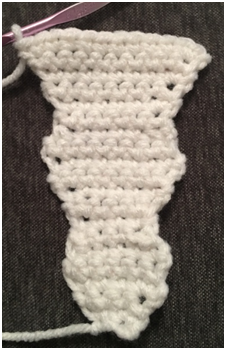
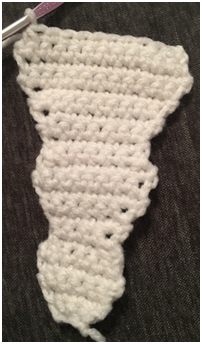
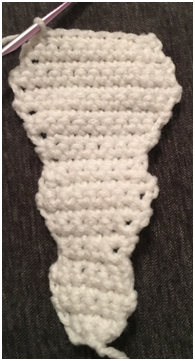
Snowman
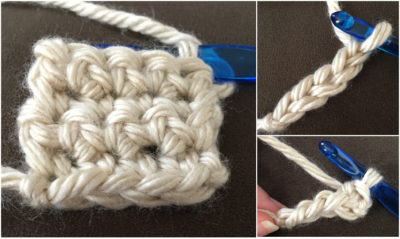
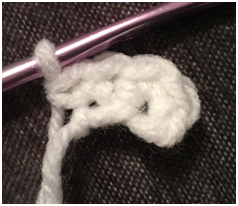
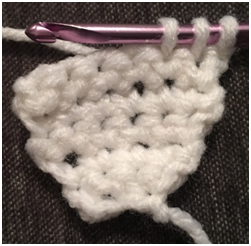
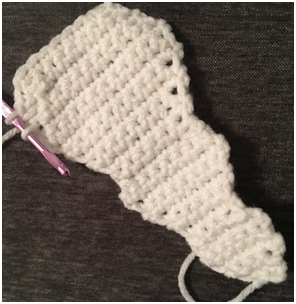
With White, Ch 2.
Row 1 – 2 sc in first st, 2 sc in last st. Ch 1, turn (4 sc)
Row 2 – Sc in each st across. Ch 1, turn (4 sc)
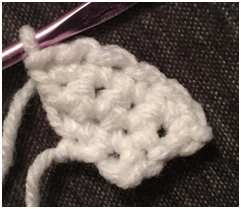
Row 3 – 2 sc in first st, sc in next 2 sts, 2 sc in last st. Ch 1, turn (6 sc)
Rows 4 – 5 – Sc across. Ch 1, turn (6 sc)
Row 6 – Sc2tog over first two sts, sc in next 2 sts, Sc2tog over last two sts. Ch 1, turn (4 sc)
Row 7 – Sc in each st across . Ch 1, turn (4 sc)
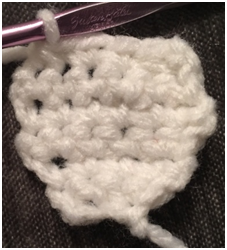
Row 8 – 2 sc in first st, sc in next 2 sts, 2 sc in last st. Ch 1, turn (6 sc)
Row 9 – Sc in each st across. Ch 1, turn (6 sc)
Row 10 – 2 sc in first st, sc in next 4 sts, 2 sc in last st. Ch 1, turn (8 sc)
Rows 11 – 12 – Sc across in each st across. Ch 1, turn (8 sc)
Row 13 – Sc2tog over first two sts, sc in next 4 sts, Sc2tog over last two sts. Ch 1, turn (6 sc)
Row 14 – Sc across. Ch 1, turn (6 sc)
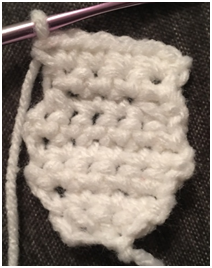

Row 15 – 2 sc in first st, sc in next 4 sts, 2 sc in last st. Ch 1, turn (8 sc)
Row 16 – Sc in each st across. Ch 1, turn (8 sc)
Row 17 – 2 sc in first st, sc in next 6 sts, 2 sc in last st. Ch 1, turn (10 sc)
Row 18 – Sc in each st across. Ch 1, turn (10 sc)
Row 19 – 2 sc in first st, sc in next 8 sts, 2 sc in last st. Ch 1, turn (12 sc)
Rows 20 – 21 – Sc in each st across. Ch 1, turn (12 sc)
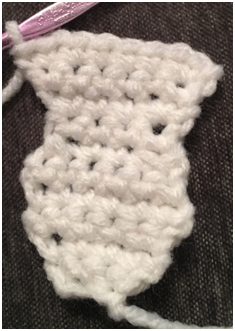
Row 22 – Sc2tog over first 2 sts, sc in next 8 sts, Sc2tog over last 2 sts. Ch 1, turn (10 sc)
Row 23 – Sc in each st across. Ch 1, turn (10 sc)
Row 24 – Sc2tog over first two sts, sc in next 6, Sc2tog over last two sts. Ch 1, turn (8 sc)
Row 25 – Sc in each st across. Ch 1, turn (8 sc)
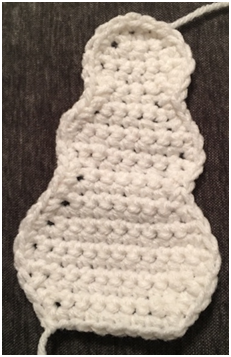
Row 26 – Ch 1, evenly sc around entire piece. Join with sl st to where you started crocheting around entire piece. Fasten off.

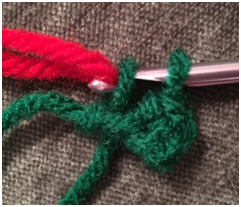
Scarf (make 2 pieces for one whole scarf)
With Green, ch 3.
Row 1 – sc in each st across; switch to red in last st. Ch 1, turn (2 sc)
Row 2 – sc in each st across. Ch 1, turn (2 sc)
Row 3 – sc in each st across; change to Green in last st. Ch 1, turn (2 sc)
Rows 4 – 6 – rep Rows 1 – 3 once more. In last st of Row 6, change to Green. Ch 1, turn. (2 sc per row)
Row 7 – sc in each st across. (2 sc)
Fasten off both colors and leave long tails for sewing.

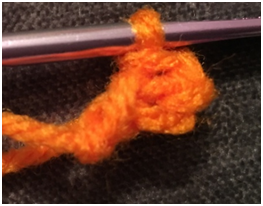
Carrot Nose
With Pumpkin, Ch 3.
Row 1 – sl st in first st, sc in last st. Fasten off, leave long tail for sewing. (1 sc)
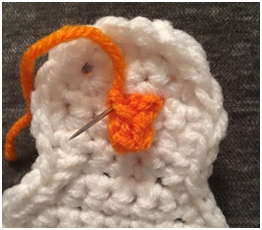
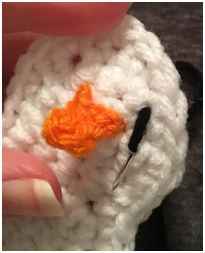
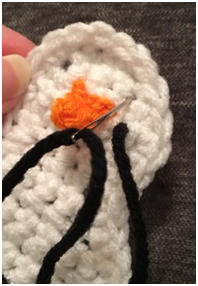
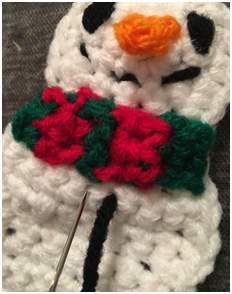
Finishing
With Black, make several vertical lines on each side of top snowball for Eyes. Sew Carrot Nose between Eyes. Make 3 smaller vertical lines below for Mouth. Sew pieces of scarf below head/top snowball – sew one horizontally, and the other vertically to the side, to make Scarf. With Black, make 3 small vertical lines on middle snowball for Buttons. Tie off all ends on back of Snowman.
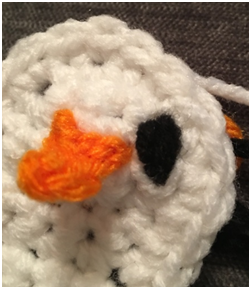
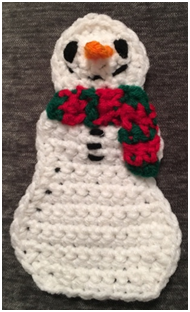
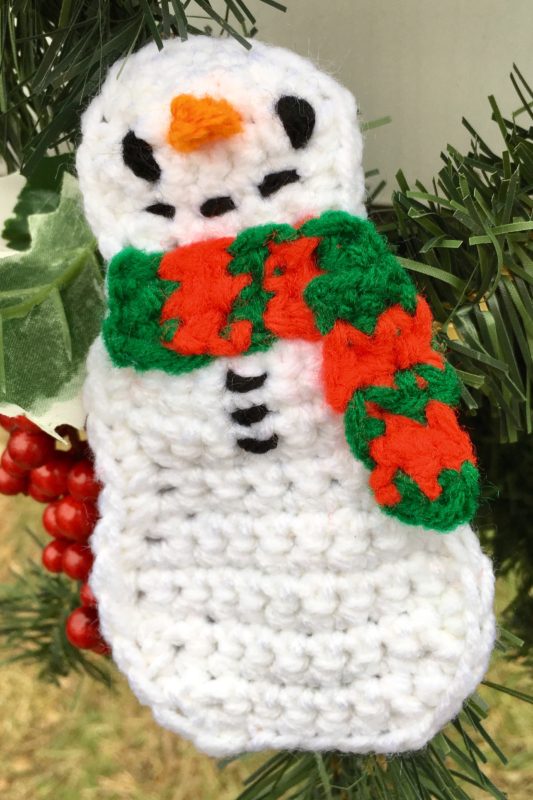
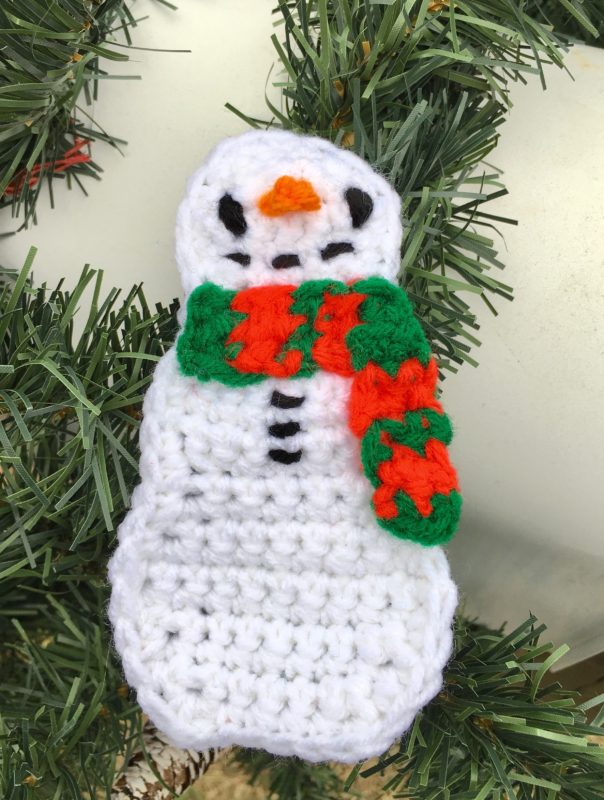
Here is what the finished snowman looks like!
Thank you for crocheting this little snowman with me! I hope he makes your holidays even happier! As we come in to the end of the year, keep an eye out for some more fun patterns, including more cute amigurumi designs! Follow me on social media and subscribe to my email list to keep up to date!
COPYRIGHT: This pattern is owned by Crafty Kitty Crochet (Melissa Moore). Any reselling or distribution of this pattern is prohibited. Sale of items made using this pattern is welcomed, but I do ask that credit/a link be provided back to my site, craftykittycrochet.com.