
12 Weeks of Christmas: North Pole Popcorn Ornament
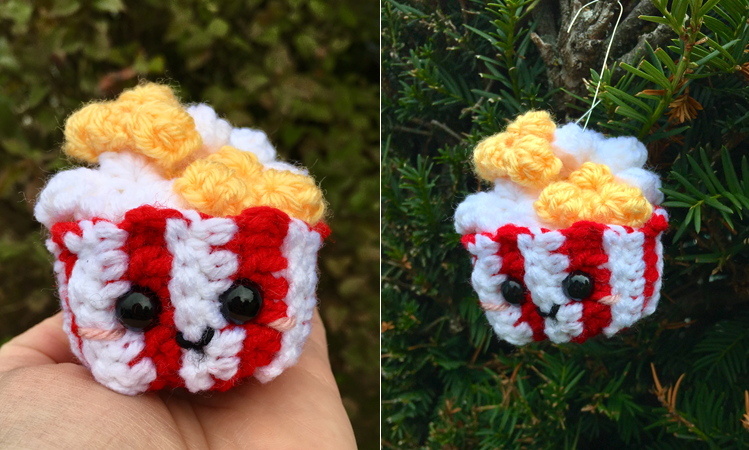
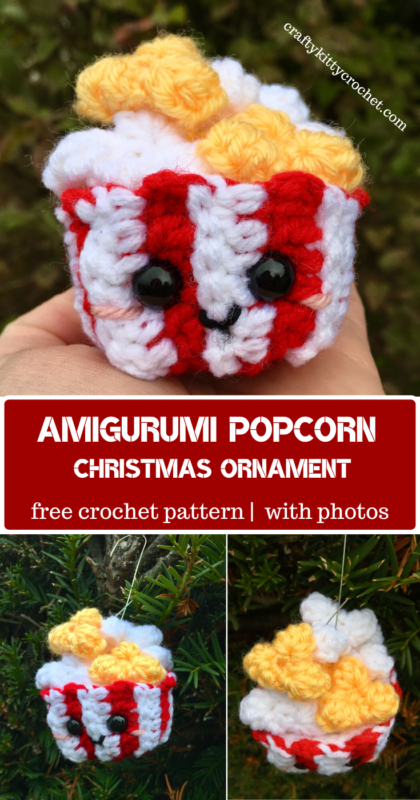
What a cute holiday treat this little amigurumi popcorn Christmas ornament is! It would be an adorable piece of DIY decor for your tree, or how about a unique and adorable holiday gift to someone on your list? The pattern is easy and works up quickly, and has lots of photos to guide you (including a small photo tutorial on the Popcorn Stitch). This North Pole popcorn ornament not only has extra butter, but it has EXTRA FUN!!!!
(Pin it for later!)
As some of you may know, I’ve been having a lot of fun with my 12 Weeks of Christmas series (see the previous two weeks – the Merry Mermaid and the Good Tidings Taco!) and this Popcorn has been no exception! I knew going into this series that lots of my food ornaments would be food themed, but I’ve really been trying to think outside the box and try something outside of my usual pizza or cupcake designs (although those are most definitely going to make an appearance at some point, as well).
I think there’s something about popcorn that has such a festive air to it! It’s delicious and fun to eat, and that’s probably why it pops up (no pun intended) at some of the most fun events you can think of: movie theaters, carnivals, fairs, etc.!
And popcorn definitely has lots of ties to the Christmas holiday. Stringing popcorn around the tree is one of those traditions I’ve always wanted to try, and how about those gift tins of popcorn that come out around the holiday season every year? You know the ones I mean – they’re stacked up in every grocery store and pharmacy as soon as Halloween is over, and they usually have paintings of Santa or snow or cute little puppies on them! I’m getting pretty hungry just thinking about them!
I designed this yarn using one of my all-time favorites when it comes to amigurumi designs, Lion Brand Vanna’s Choice. It’s well-made and soft for an acrylic yarn, but still sturdy enough to handle all your amigurumi projects! I used Scarlet and White for the popcorn bucket and white popcorn (on Amazon HERE and HERE
), and a lovely color of Vanna’s Choice Baby called Duckie for the butter popcorn. Unfortunately, Vanna’s Choice Baby has been discontinued, but there’s a lovely alternative that is an incredibly close shade of yellow in Vanna’s regular line, called Lemon (on Amazon HERE
).
So who’s ready to get popping on this pattern? I know I am – let’s go!
Supplies
Size D-3 / 3.25 mm crochet hook
1 skein each of Lion Brand Vanna’s Choice in:
– Scarlet
– White
1 skein of Lion Brand Vanna’s Choice Baby in Duckie
Small amounts of Lion Brand Vanna’s Choice in Pink and Black for Blush and Smile
1 pair of 10 mm safety eyes
Fiberfill stuffing
Yarn Needle
Scissors
Abbreviations
Beg = beginning
BLO = back loop only
Ch = chain
Dc = double crochet
Pc = popcorn stitch
Rem = remaining
Rep = repeat
Rnd(s) = round(s)
Sc = single crochet
Sl St = slip stitch
St(s) = stitch(es)
Gauge
Exact gauge is not essential to this project.
Size
Approx. 2 inches wide by 2.5 inches tall.
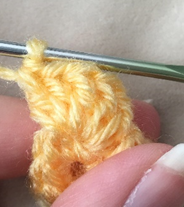
Special Stitches Used
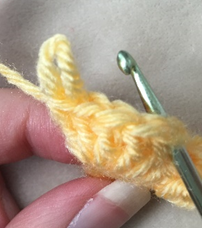
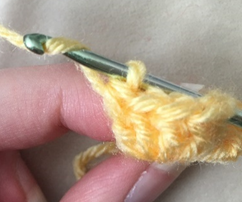
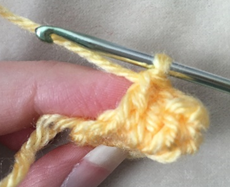
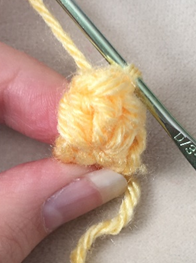
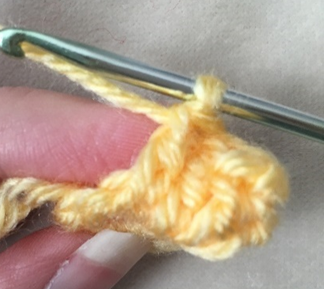
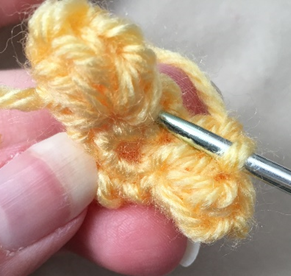
Popcorn Stitch: Make 5 double crochet in one stitch. Remove hook from stitch; insert hook through first double crochet made, and re-insert through loop from fifth double crochet. Yarn over and pull through to finish stitch. Stitch will pucker at top, creating a round, three-dimensional textured stitch.
Instructions
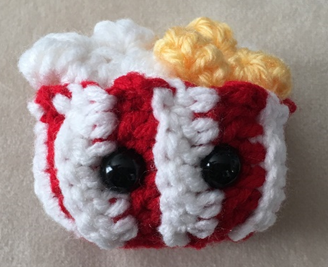
Popcorn Bucket
This piece is worked in continuous rnds for the first 3 rnds. Do not join until advised to do so in pattern. You may wish to use a stitch marker and move it up and the beginning of each new rnd.
Rnd 1 – with Scarlet, make a magic ring. 6 sc in ring (6 sc)
Rnd 2 – 2 sc in each st around. (12 sc)
Rnd 3 – 2 sc in next st, sc in next st; rep around. (18 sc)
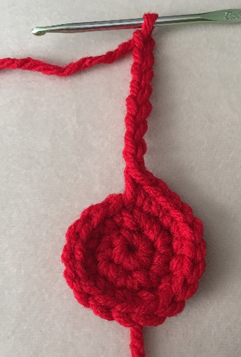
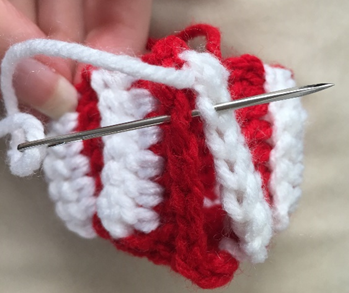
Rnd 4 – ch 8. Dc in 3rd ch from hook, and in each ch across. Join with sl st to back loop of next st from Rnd 3. Sl st in back loop of next st, joining White at the same time. Ch 2, turn. (6 dc)
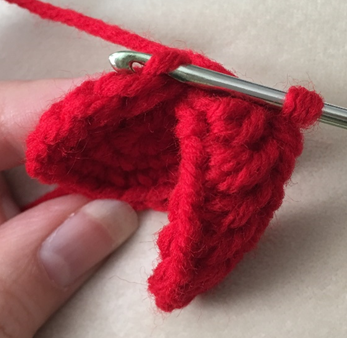
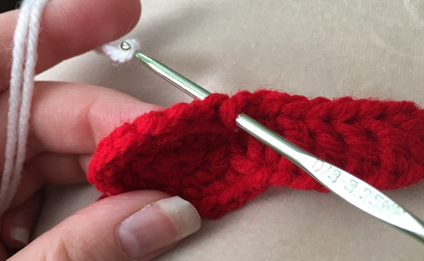
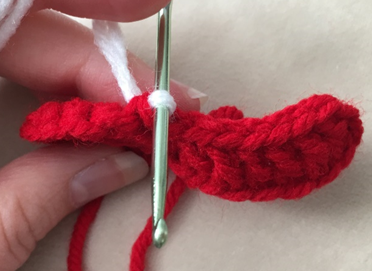
Rnd 5 – working in BLO and carrying Scarlet as you stitch, dc in each st across. Join Scarlet in last st. Ch 2, turn. (6 dc)
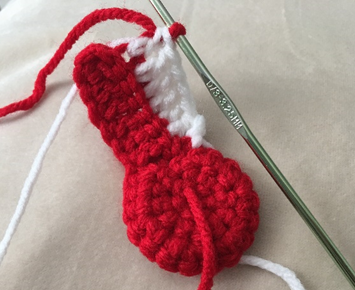
Rnd 6 – working in BLO and carrying White as you stitch, dc in each st across. Join with sl st to back loop of next st from Rnd 3. Sl st in back loop of next st, joining White at the same time. Ch 2, turn. (6 dc)
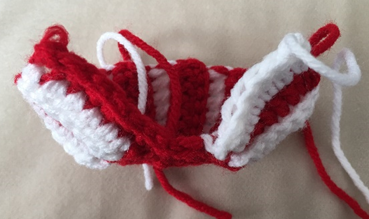
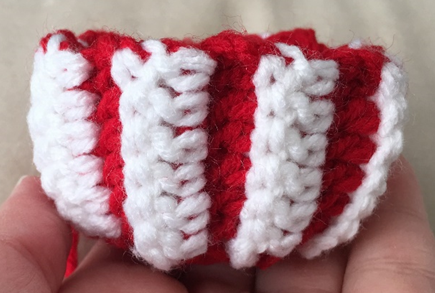
Rnds 7 – 18 – rep Rnds 5 and 6 six more times. (12 dc per rnd)

Rnd 19 – rep Rnd 5 once more; do not carry Scarlet or ch 2 at end of rnd. (12 dc)
Fasten off, leaving long tail for sewing.
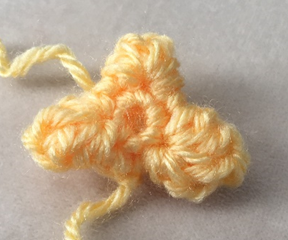
Popcorn (make 3 White and 3 Duckie)
Rnd 1 – With either White or Duckie, make a magic ring. 6 sc in ring. Sl st to first st of rnd. Ch 2 (6 sc)
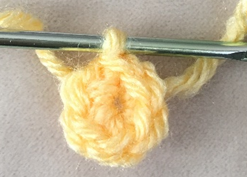
Rnd 2 – Pc in next st, dc in next st. Rep two more times. Sl st to first st of rnd.
Fasten off, leaving long tail for sewing.
Base
This piece is worked in continuous rnds; do not join. You may wish to use a stitch marker and move it up and the beginning of each new rnd.
Rnd 1 – with White, make a magic ring. 6 sc in ring (6 sc)
Rnd 2 – 2 sc in each st around. (12 sc)
Rnd 3 – 2 sc in next st, sc in next st; rep around. (18 sc)
Rnd 4 – 2 sc in next st, sc in next 2 sts; rep around. (24 sc)
Rnd 5 – 2 sc in next st, sc in next 3 sts; rep around. (30 sc)
Fasten off, leaving long tail for sewing.
Finishing
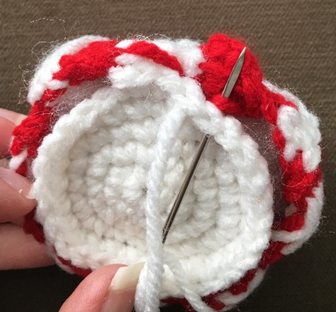
Press both edges of Popcorn Bucket together and sew together, working through back loop of Rnd 20 and front loop of Rnd 1. Fasten off, weave in ends.
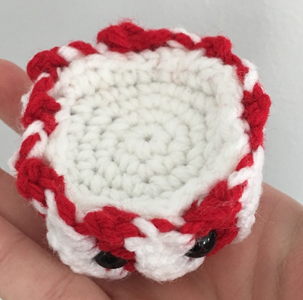
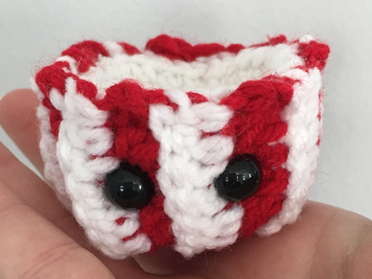
Attach safety eyes to front of Popcorn Bucket. Stuff Popcorn Bucket (do not overstuff). Place Base inside of Popcorn Bucket so that it is slightly below top edges of Bucket. Sew Base to Popcorn Bucket. Slightly squeeze sides of Popcorn Bucket to give it more of a square shape.
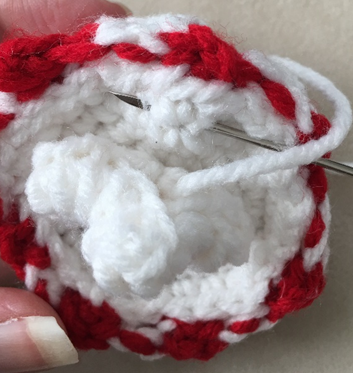
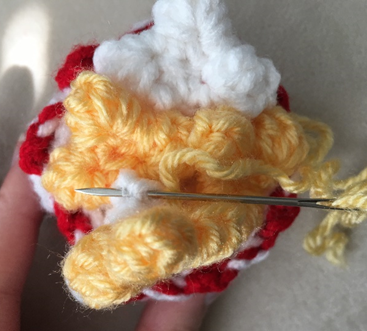
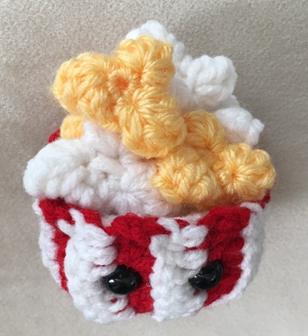
Weave in beg ends on Popcorn, or use to slightly stuff one of the pc sts. Use long tail to sew four Popcorns to Base, stitching through centers of each Popcorn but not through pc sts (this way, Popcorn will stick up slightly instead of being sewn flat). Sew rem two Popcorn on top of other Popcorn, sewing through one or two sts of other Popcorn towards center of piece (also working through centers of Popcorn you are sewing, but not through pc sts). Weave in all ends or tie off and hide ends inside sts.

With Pink on yarn needle, made a small horizontal line on outer edge of each eye for Blush.
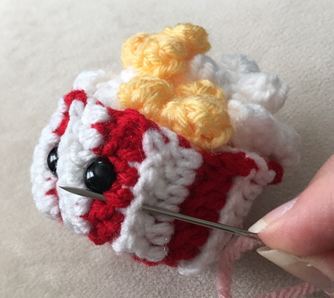
With Black on yarn needle, make a small “V” in between eyes for Smile. Weave in all ends or tie off and hide inside sts.

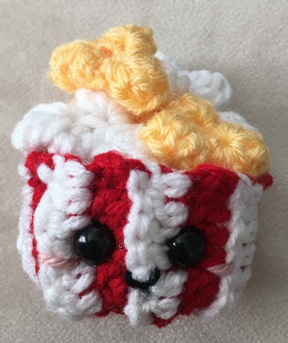
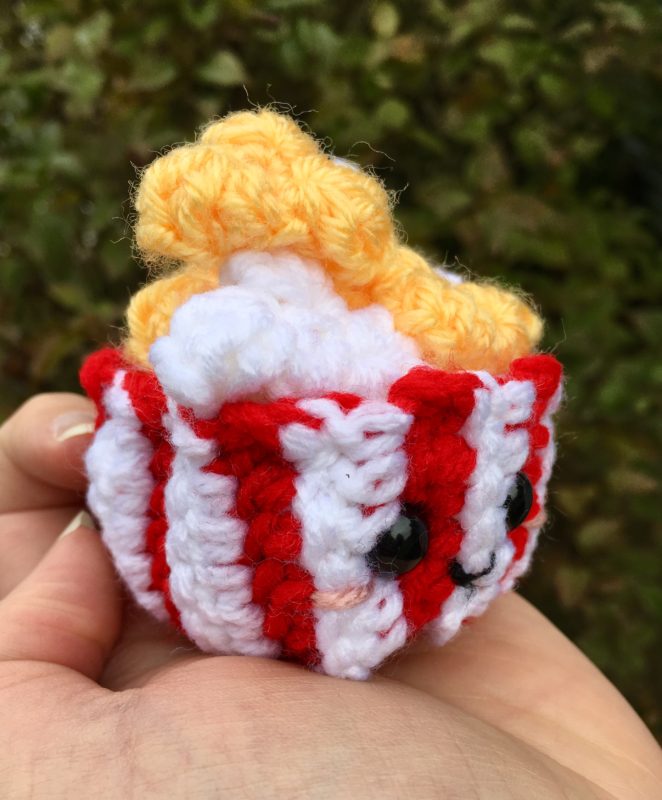
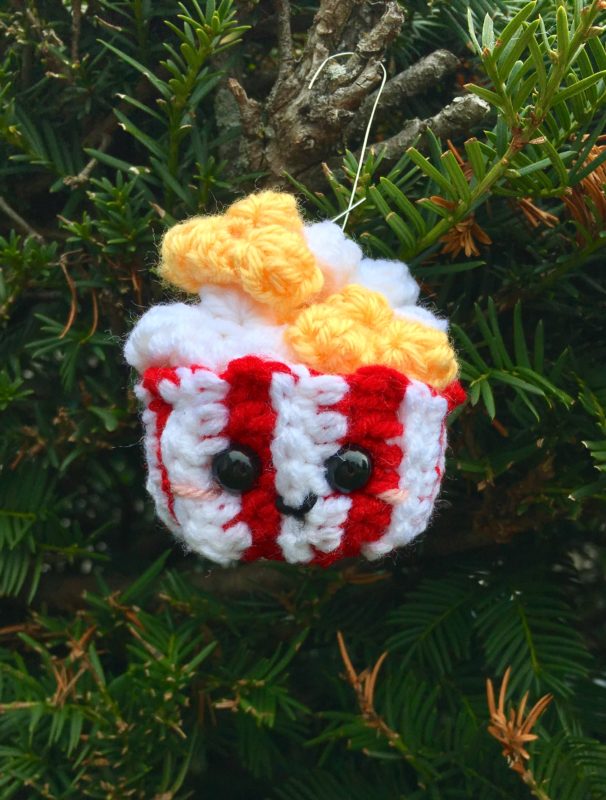
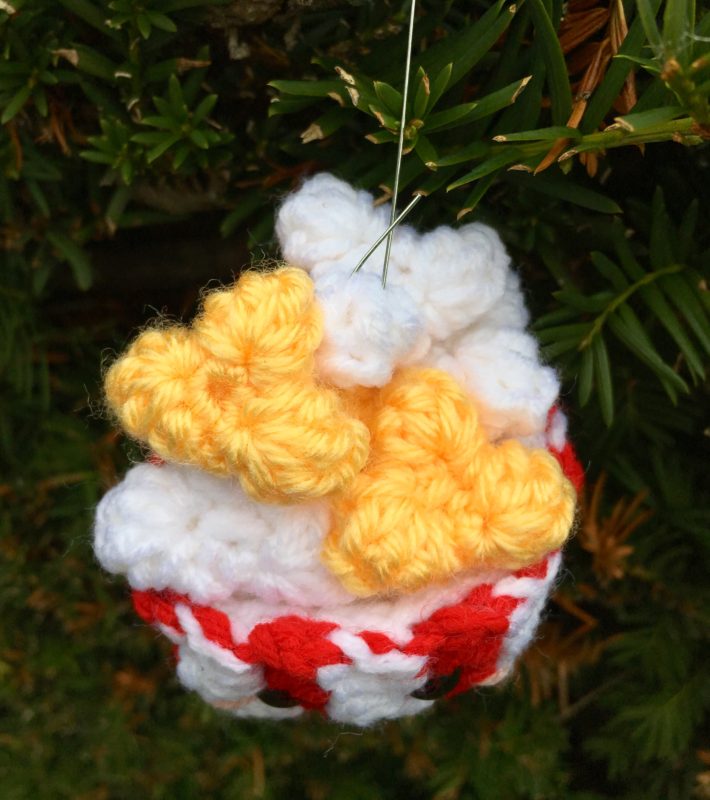
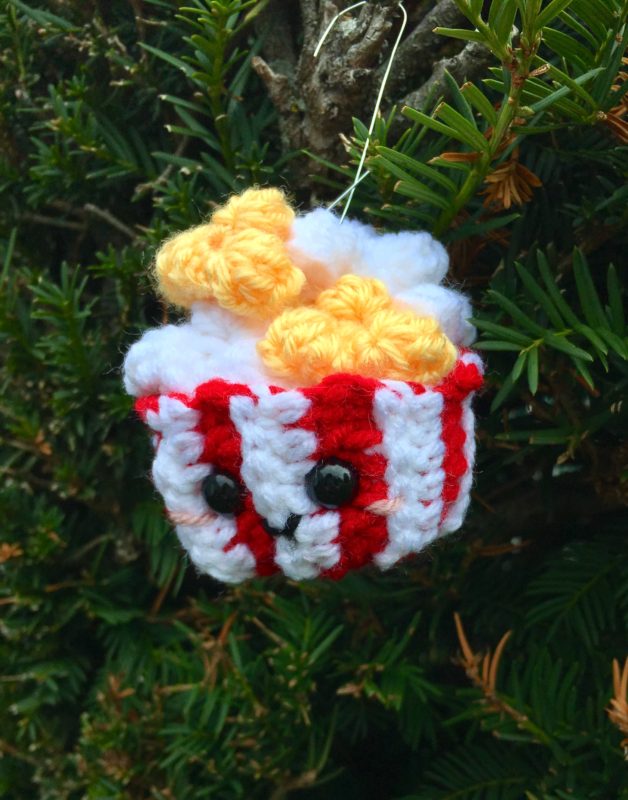
Here is the finished Popcorn!!
I hope you had fun crocheting this Popcorn along with me! If you love fun, free crochet patterns, please be sure to subscribe to my email list and follow me on social media. I have lots more fun patterns like this one coming soon!
Happy Crocheting!
COPYRIGHT: This pattern is owned by Crafty Kitty Crochet (Melissa Moore). Any reselling or distribution of this pattern is prohibited. Sale of items made using this pattern is welcomed, but I do ask that credit/a link be provided back to my site, craftykittycrochet.com.

Comments (4)
12 Weeks of Christmas: Yuletide Toast – Crafty Kitty Crochet
October 25, 2019 at 6:23 pm
[…] This tiny toast not only makes a great ornament, but would also be an adorable DIY keychain or play food accessory. As an ornament, it goes so well with other food-themed ornaments in my 12 Weeks of Christmas event, such as The Good Tidings Taco and The North Pole Popcorn! […]
Alejandra
July 13, 2023 at 7:24 pm
Hola son muy lindos tus patrones yo quiero hacer el balde de las palomitas mas grande ¿como puedo hacerlo? Por favor
Melissa
July 13, 2023 at 7:31 pm
Hola y gracias! 🙂 You could try using a bigger / thicker yarn (like bulky or super bulky) and a bigger hook! That would make the popcorn bigger without having to alter the pattern. Hope that helps!! ~ Melissa
19 Mushy Pop Crochet Patterns – HelthDestiny
February 14, 2026 at 9:11 am
[…] Learn How It’s Made: Festive Popcorn Ornament Delight […]