
12 Weeks of Christmas: Merry Mermaid Ornament
The autumn chill hasn’t quite turned to winter frost yet, but the holidays will be here before you know it! So why not get our countdown started early?
Welcome to my 12 Weeks of Christmas, a special event I’ll be hosting on the blog each week! Expect a new ornament pattern each week, as we continue counting down from now until the mid/late December!
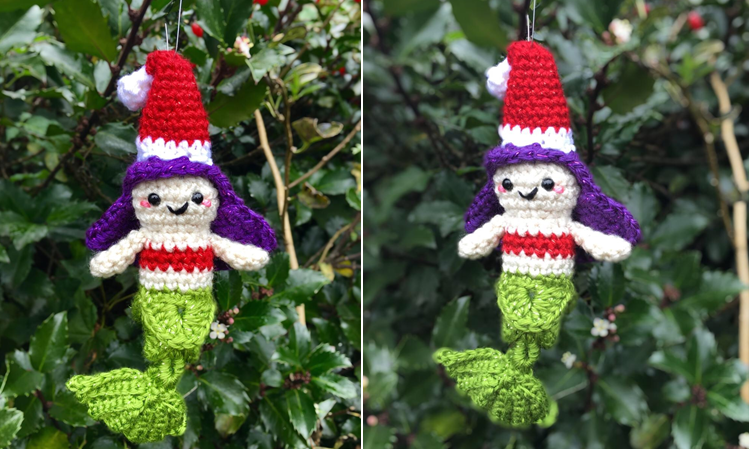
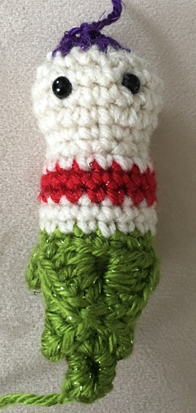
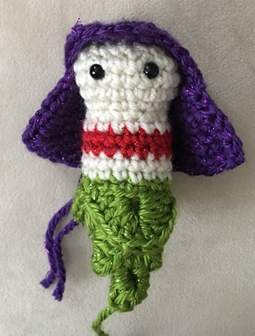
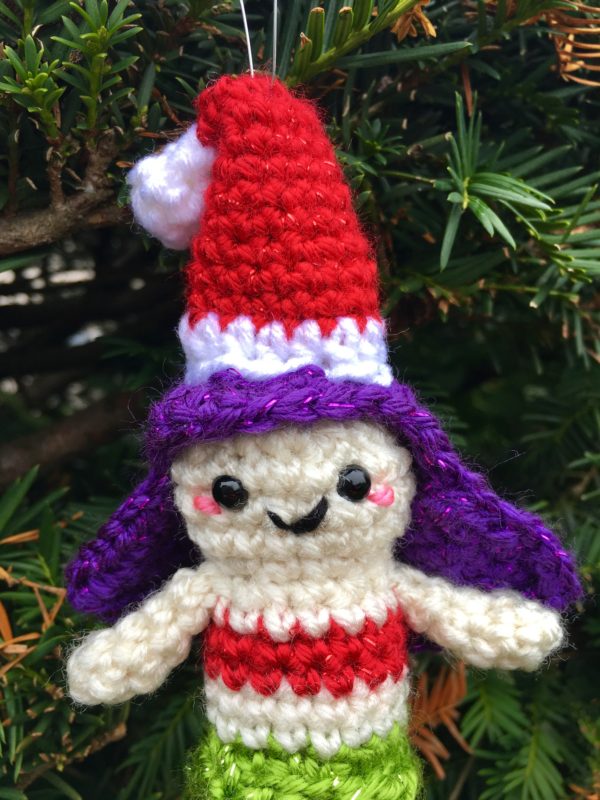
Here is my first of many fun and unique ornament patterns: my Merry Mermaid! This mermaid lives in the winter waters and makes the holidays even more magical with her cuteness! How fun would this be as a gift or decor for the mermaid lover in your life?
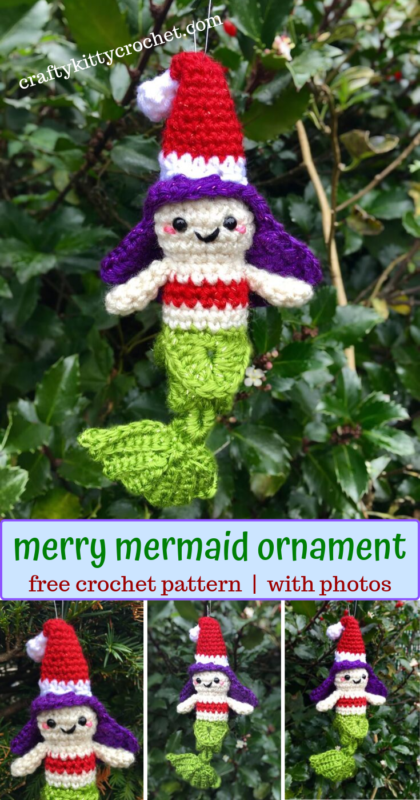
(Pin it for later!)
The pattern is fairly easy and quick to work up, and uses lots of sparkly yarn, which is always a plus! The color scheme is red and green, giving it an automatic Christmas-y vibe. To top it off – literally – this adorable mermaid has a sparkly Santa hat!
The glitter yarn I’ve been mentioning is a favorite of mine, particularly for mermaid projects – Caron Simply Soft Party. It’s a medium weight yarn that has a metallic thread run throughout – so it’s just sparkly enough to look pretty and enchanting, but you can still see the vibrant color of the regular yarn it’s intertwined with, as well. I used Spring Sparkle for the fin/tail (on Amazon HERE), Purple Sparkle for the hair (on Amazon HERE
), and Red Sparkle for the bikini top and Santa hat (on Amazon HERE
!). I am so happy with how it came out! It’s the perfect blend of mermaid and Christmas!
It doesn’t get much cuter or more unique that this kawaii mermaid ornament! It’s cute, fun to make, and is a great heartfelt gift you can give this holiday season! Or, make it a gift-to-self and make one for your very own tree! Since this pattern works up fairly quickly, you can make lots of these Merry Mermaids before the holiday season gets here!
Ready to to make some holiday magic with this pattern? Then let’s get started!
Supplies
Size D-3 / 3.25 mm crochet hook
1 skein each of Caron Simply Soft Party in:
- Purple Sparkle
- Spring Sparkle
- Red Sparkle
Red Heart Super Saver Yarn in: - Aran
- Black (small amount for Smile)
- White (small amount for Hat Puff)
Red Heart Soft Baby Steps in Strawberry (small amount for Blush)
Fiberfill Stuffing
6 mm plastic safety eyes
Yarn Needle
Scissors
Ornament hook or small amount of yarn to hang ornament
Abbreviations
*= indicates the beginning/end of a section to be repeated
BLO = back loop only
Ch = chain
Croc st = crocodile stitch
Dc = double crochet
Hdc = half double crochet
Rem = remaining
Rep = repeat
Rnd(s) (round(s)
Sc = single crochet
Sc2tog = single crochet 2 together
St(s) = stitch(es)
Sl St = slip stitch
YO = yarn over
Gauge
Exact gauge is not essential to this project.
Size
Finished piece measures about 7 inches in length.
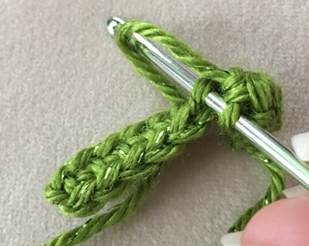
Notes
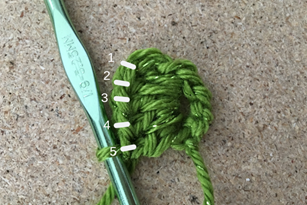
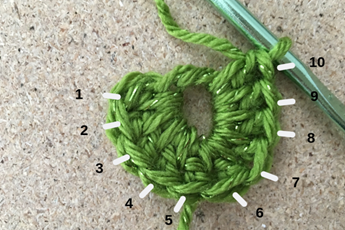
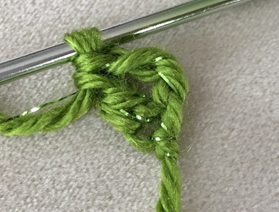
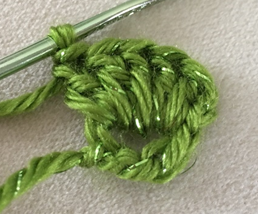
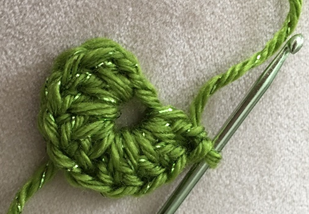
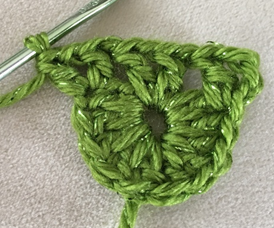
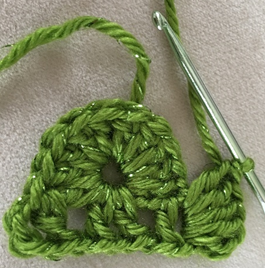
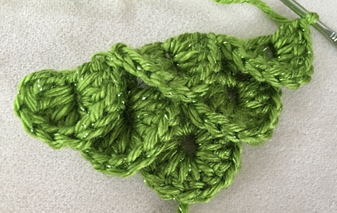
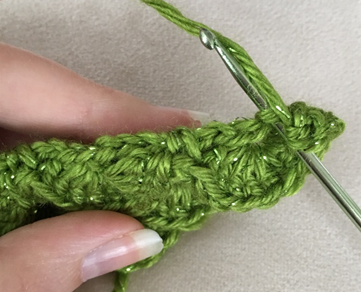
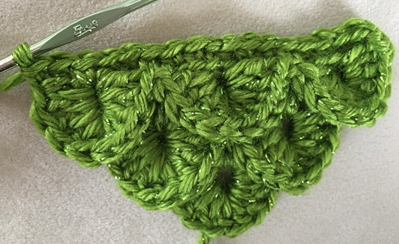
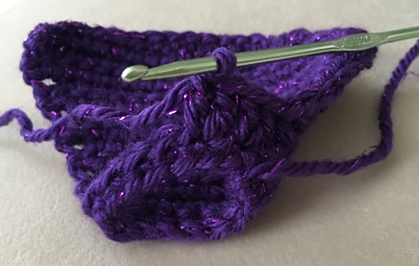
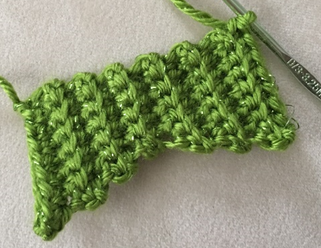
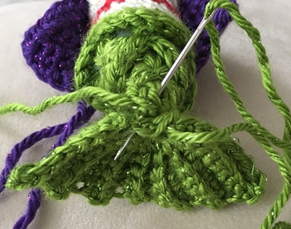
The tail is made using the crocodile stitch (5 dc around each post of a 2dc cluster). It is worked up in alternating rows of 2dc cluster rows, and croc st/sc rows. One increase occurs each row (either a 2dc cluster/dc increase, or croc st/sc increase). At the end of each crocodile stitch row, work will already be turned from creating last croc st. At the end of each 2dc cluster row, work will not be turned until after the first half of the croc in the following row is made. Therefore, instructions do not include a “turn” at the end of each row for Bottom of Body. Here is a diagram of the order in which the double crochet stitches of the crocodile stitch are worked.
Instructions
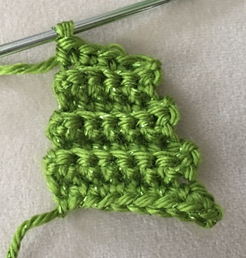
Bottom of Body
Row 1 – With Spring Sparkle, ch 4, Dc in 4th ch from hook – counts as 2dc cluster. Ch 1 (1 dc)
Row 2 – Croc st around two posts (dc from last row, and ch from Ch 4 of last row), working up towards the top of second post while creating second half of croc st. Ch 4. (1 croc st)
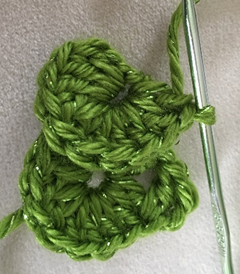
Row 3 – Dc in same st – counts as 2dc cluster. Ch 1. [Dc, ch 1, dc] in center of croc st below, (2dc cluster made) ch 1. In outer edge of last croc st, [dc, ch 1, dc]. Ch 1 (3 2dc clusters made)
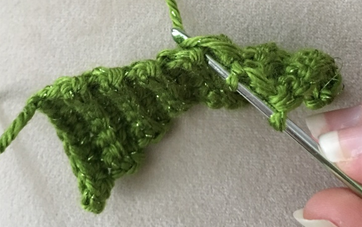
Row 4 – Croc st around first 2dc cluster, turning work while creating second half of croc st. Sc in next 2dc cluster, croc st around last 2dc cluster. Ch 4 (2 croc sts, 1 sc)
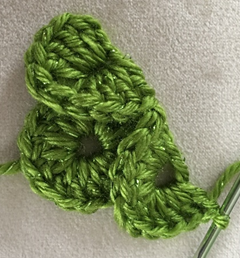
Row 5 – Dc in same st, ch 1. [Dc, ch 1, dc] in center of next croc. Ch 1. In next sc, [dc, ch 1, dc]. Ch 1, [dc, ch 1, dc] in center of next croc, ch 1. In outer edge of last croc, [Dc, ch 1, dc]. Ch 1 (5 2dc clusters)
Row 6 – *Croc st around first 2dc cluster, turning work while creating second half of croc st. Sc in next 2dc cluster.* Rep from * to * once more. Croc st around last 2dc cluster. Ch 4 (3 croc sts, 2 sc)
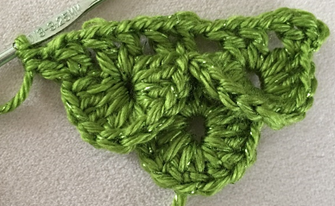
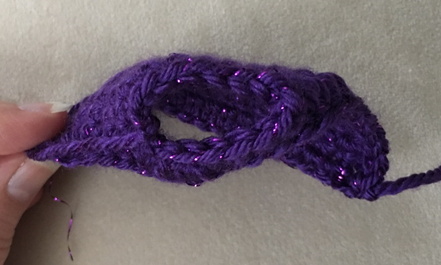
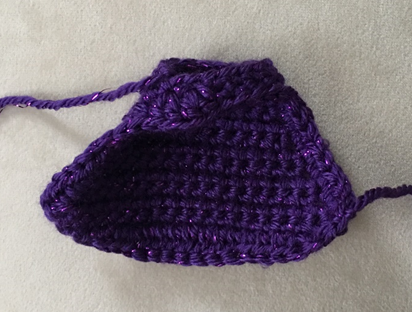
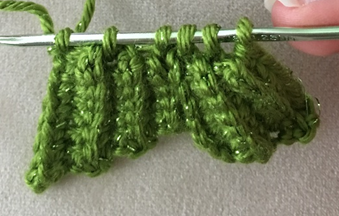
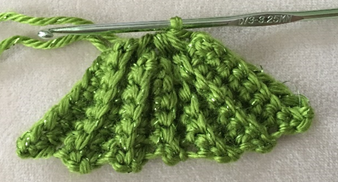
Closing the piece
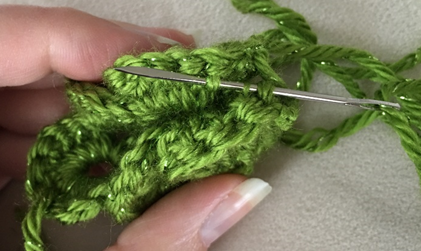
Working across top of piece, sc in BLO of each st of croc sts and in sc sts in between croc sts. (17 sc)
Fasten off, leaving long tail for sewing. Fold piece together and sew together, stitching slightly away from edge of croc sts so that they still stick out when piece is sewing together.
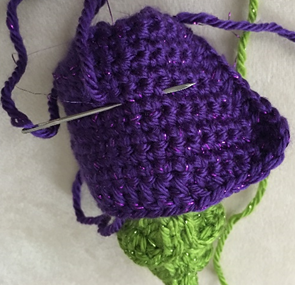
Top of Body
This piece is worked in continuous rnds; do not join. You may wish to use a stitch marker and move it up at the beginning of each new rnd.
Rnd 1 – Attach Aran on back of Bottom of Body, in sc sts made during Cinching, ch 1. Sc in each st around. (17 sc)
Rnd 2 – sc in each st around. Attach Red Sparkle in last st of rnd. (17 sc)
Rnds 3 – 4 – sc in each st around. Attach Aran in last st of rnd (17 sc)
Rnd 5 – sc in each st around. (17 sc)
Rnd 6 – sc2tog over next 2 sts, sc in next st; rep four more times. Sc2tog over next 2 sts. (11 sc)
Rnd 7 – sc in next st, 2 sc in next st; rep four more times. Sc in next st. (16 sc)
Rnd 8 – sc in next 2 sts, 2 sc in next st; rep four more times. Sc in next st. (21 sc)
Rnds 9 – 10 – sc in each st around. Attach safety eyes. (21 sc)
Rnd 11 – sc2tog over next 2 sts, st in next 2 sts; rep four more times. Sc in next st. Attach Purple Sparkle in last st. (16 sc)
Rnd 12 – sc2tog over next 2 sts, sc in next st; rep four more times. Sc in last st. (11 sc)
Rnd 13 – sc2tog 5 times. Leave rem st unworked. (6 sc)
Fasten off.
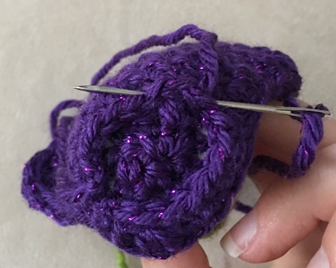
Hair
With Purple Sparkle, Ch 16.
Row 1 – sc in 2nd ch from hook and in each st across. Join with sl st to first st. Ch 1, turn (15 sc)
Row 2 – sc in next 9 sts. Leave rem sts unworked. Ch 1, turn (9 sc)
Row 3 – 2 sc in next st. Sc in next 7 sts. 2 sc in last st. Ch 1, turn (11 sc)
Row 4 – sc in each st across. Ch 1, turn (11 sc)
Row 5 – 2 sc in next st. Sc in next 9 sts. 2 sc in last st. Ch 1, turn (13 sc)
Row 6 – sc in each st across. Ch 1, turn (13 sc)
Row 7 – 2 sc in next st. Sc in next 11 sts. 2 sc in last st. Ch 1, turn (15 sc)
Row 8 – sc in each st across. Ch 1, turn (15 sc)
Row 9 – 2 sc in next st. Sc in next 13 sts. 2 sc in last st. Ch 1, turn (17 sc)
Row 10 – sc in each st across. Ch 1, turn (17 sc)
Row 11 – 2 sc in next st. Sc in next 15 sts. 2 sc in last st. Ch 1, turn (19 sc)
Row 12 – sc in each st across. Ch 1, turn (19 sc)
Rows 13 – 15 – sc in each st across. Ch 1, turn (19 sc)
Row 16 – sc in next 3 sts, hdc in next 3 sts, dc in next 7 sts, hdc in next 3 sts, sc in next 3 sts. (6 sc, 6 hdc, 7 dc)
Edging
Working along side, hdc in each st up one side of Hair, make 2 dc in next 2 sts of top of Hair for bangs, sc in rem sts across top, hdc down other side of Hair.
Fasten off, leaving long tail for sewing.
Arm (make 2)
This piece is worked in continuous rnds; do not join. You may wish to use a stitch marker and move it up at the beginning of each new rnd.
Rnd 1 – With Aran, make a magic ring; 5 sc in ring (5 sc)
Rnd 2 – sc in each st around (5 sc)
Rnd 3 – sc2tog over next 2 sts, sc in next 3 sts. (4 sc)
Rnds 4 – 5 – sc in each st around. (4 sc)
Fasten off, leaving long tail for sewing.
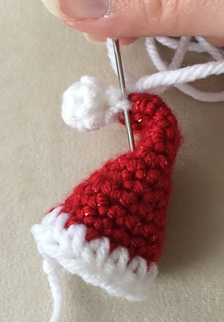
Santa Hat
This piece is worked in continuous rnds; do not join. You may wish to use a stitch marker and move it up at the beg of each new rnd.
Rnd 1 – With Red Sparkle, make a magic ring; 6 sc in ring (6 sc)
Rnds 2 – 3 – sc in each st around. (6 sc)
Rnd 4 – sc in next st, 2 sc in next st; rep around (9 sc)
Rnds 5 – 6 – sc in each st around (9 sc)
Rnd 7 – sc in next 2 sts, 2 sc in next st; rep around (12 sc)
Rnds 8 – 9 – sc in each st around (12 sc)
Rnd 10 – sc in next 3 sts, 2 sc in next st; rep around (15 sc)
Rnds 11 – 12 – sc in each st around. Attach White in last st of rnd (15 sc)
Rnd 13 – hdc in each st around. (15 hdc)
Fasten off, leaving long tail for sewing.

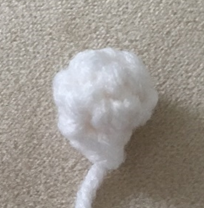
Hat Puff
This piece is worked in continuous rnds; do not join. You may wish to use a stitch marker and move it up at the beginning of each new rnd.
Rnd 1 – With White, make a magic ring; 6 sc in ring (6 sc)
Rnd 2 – sc in each st around. (6 sc)
Rnd 3 – sc2tog around. (3 sc)
Fasten off, leaving long tail for sewing.
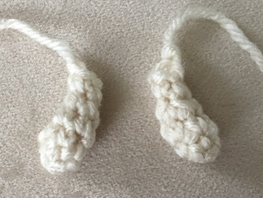
Fin
(This piece is worked entirely in BLO.) With Spring Sparkle, ch 9.
Row 1 – sc in 2nd ch from hook and in each st across. Ch 1, turn (8 sc)
Row 2 – sc in next 7 sts, leave rem st unworked. Ch 1, turn (7 sc)
Row 3 – sc in each st across. Ch 1, turn (7 sc)
Row 4 – sc in next 6 sts, leave rem st unworked. Ch 1, turn (6 sc)
Row 5 – sc in each st across. Ch 1, turn (6 sc)
Row 6 – sc in next 5 sts, leave rem st unworked. Ch 1, turn (5 sc)
Row 7 – sc in each st across. Ch 1, turn (5 sc)
Row 8 – sc in next 4 sts, 2 sc in last st. Ch 1, turn (6 sc)
Row 9 – sc in each st across. Ch 1, turn (6 sc)
Row 10 – sc in next 5 sts, 2 sc in last st. Ch 1, turn (7 sc)
Row 11 – sc in each st across. Ch 1, turn (7 sc)
Row 12 – sc in next 6 sts, 2 sc in last st. Ch 1, turn (8 sc)
Row 13 – sc in each st across.
Cinching
Working across top of Fin, [insert hook in a st, draw up a loop] five times. YO and pull through all 6 loops on hook.
Fasten off, leaving long tail for sewing.
Finishing
Sew Hat Puff to Santa Hat. Fold Hat slightly at tip and use rem yarn tail from Hat Puff to sew in place through middle of Santa Hat (hide yarn tail inside of hat or weave in ends).
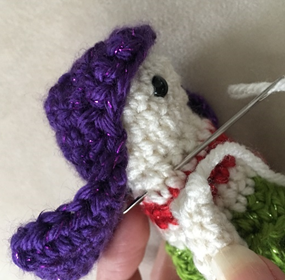
Place Hair on Top of Body, lining up with last rnds of Body so that only Purple Sparkle stitches show. Sew Hair around Purple Sparkle sts of Body, and carry yarn tail further down onto head to secure Hair in place closer to base of neck.
Sew Fin to Bottom of Body.
Place Arms on each side of Top of Body, slightly above Red Sparkle sts. Sew in place.
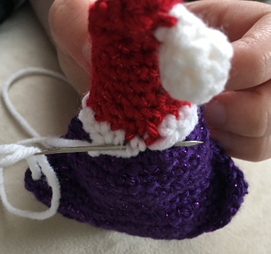
Sew Santa Hat onto Top of Body.
With Black, make small V on face for smile. With Strawberry, sew small horizontal lines at edges of both eyes for Blush.
Weave in all ends or tie off/hide ends inside sts. Attach ornament hook or yarn to top ornament to hang.
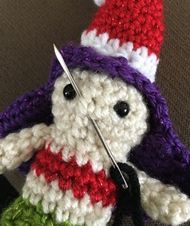
Here is the finished mermaid ornament!


I hope you enjoyed crocheting this Merry Mermaid along with me! If you love free, fun patterns, then please be sure to subscribe to my email list and follow me on social media. I have lots more fun patterns coming soon – including holiday patterns!
Happy Crocheting!
COPYRIGHT:
This pattern is owned by Crafty Kitty Crochet (Melissa Moore). Any reselling or distribution of this pattern is prohibited. Sale of items made using this pattern is welcomed, but I do ask that credit/a link be provided back to my site, craftykittycrochet.com.
Comments (3)
12 Weeks of Christmas: Good Tidings Taco – Crafty Kitty Crochet
October 11, 2019 at 6:49 pm
[…] If you’re just now tuning in for my 12 Weeks of Christmas, please be sure to check out last week’s post, too – The Merry Mermaid Ornament! […]
12 Weeks of Christmas: North Pole Popcorn Ornament – Crafty Kitty Crochet
October 18, 2019 at 7:03 pm
[…] having a lot of fun with my 12 Weeks of Christmas series (see the previous two weeks – the Merry Mermaid and the Good Tidings Taco!) and this Popcorn has been no exception! I knew going into this series […]
Mermaid Messy Bun Hat for Kids – Crochet Pattern – Crafty Kitty Crochet
January 10, 2020 at 8:06 pm
[…] crocheters just love making and wearing them! From there, I decided to make Mermaid Flip Flops, a Mermaid Ornament, and a Mermaid Purse. I even designed a Mermaid Scarf, which was featured by one of my all time […]