
Cherry Blossom Slouchy Hat Crochet Pattern
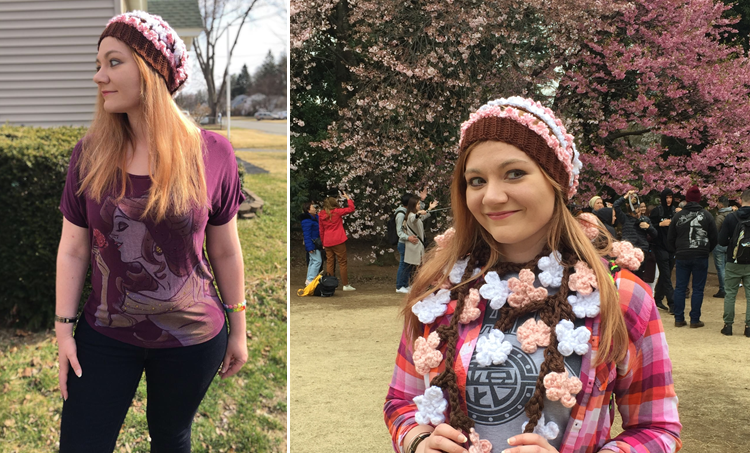
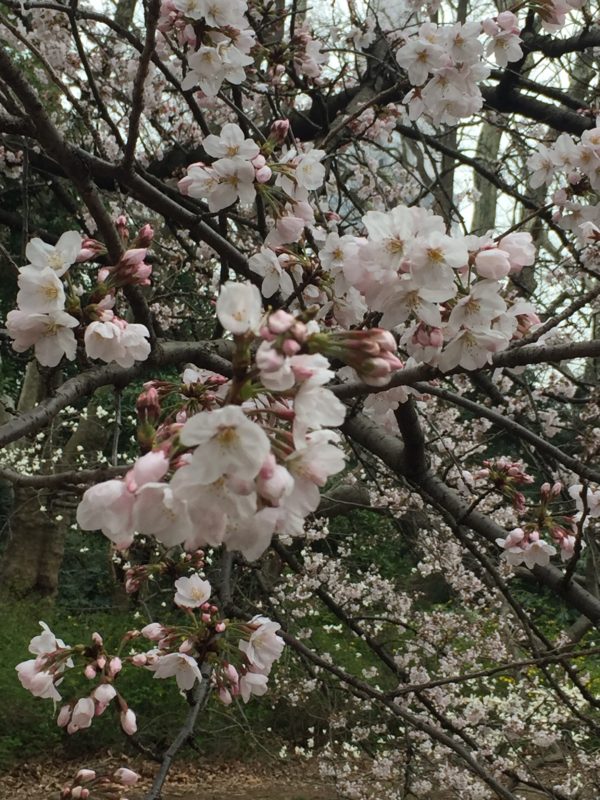
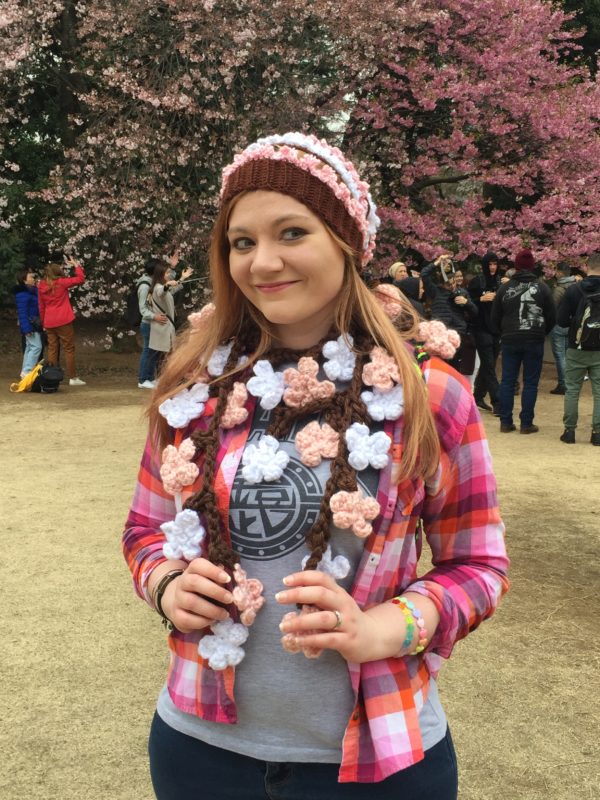
Inspired by the breathtaking “sakura” (cherry blossom) trees of Japan, I introduce to you this Cherry Blossom Slouchy Hat crochet pattern! I recently got back from an amazing trip to Tokyo, and some of my favorite sights were the blossoming sakura trees that we visited at the Shinjuku-Gyoen National Garden.
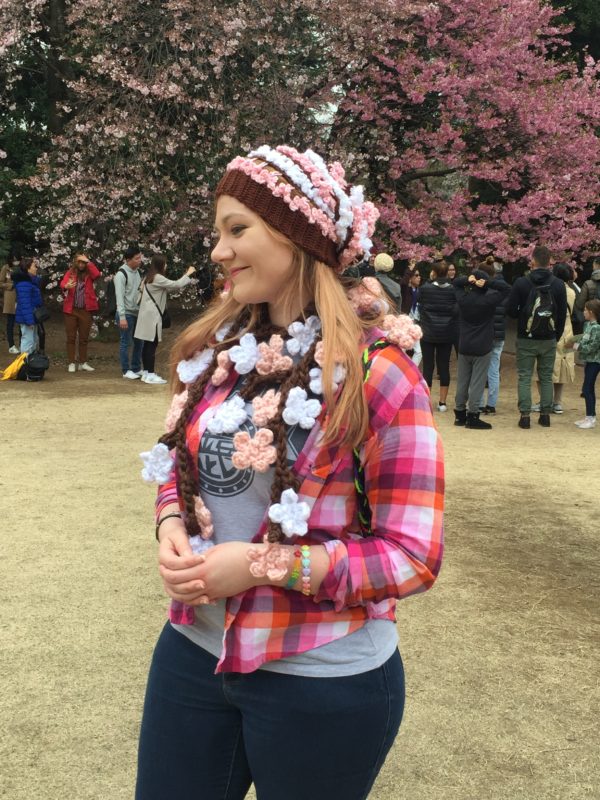
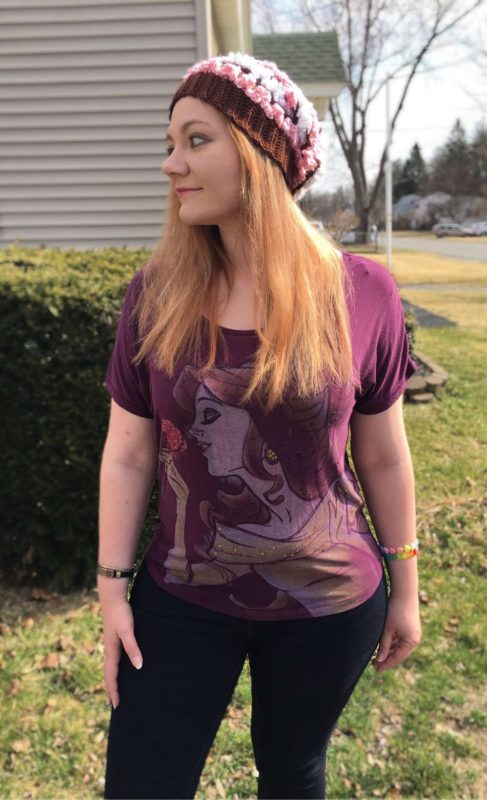
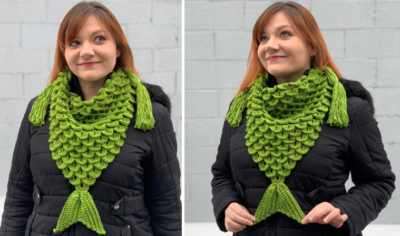
Here’s a photo of me wearing my Cherry Blossom ensemble at said Garden!!! The scarf I’m wearing here is my Cherry Blossom Scarf – find the pattern HERE!
It’s always been a dream of mine to see real cherry blossoms in person! I know there are some very beautiful cherry blossom trees found in the United States, but my goal was to see actual Japanese ones.
Speaking of my trip to Tokyo – lots of you were very excited to hear that I went recently and asked for some photos! I am so happy to share them with you, as there were so many other memorable sights and events there, too! I put together a little slideshow on my YouTube channel that I use for my anime reaction videos, Kamen Rider Hime. Here is the video (skip to 2:50 to skip my intro, it mostly has to do with my reaction videos)!
This hat is perfect for spring not only because of the springtime trees that it’s based on, but also because it’s very light and airy! The blossoms on the hat are made using a repeat of chain stitches into the same stitch, so the hat has beautiful texture without a lot of extra weight. It’s just right for taking a springtime stroll!
When designing this hat, I knew I wanted a yarn with a decent weight but also softness and sheen. I ended up using Caron Simply Soft, which had all of the above! Find all three yarns I used on Amazon (Soft Pink HERE, White HERE
, and Chocolate HERE
!)
Let’s get started on this fabulously floral hat!
Supplies
H/8 5.00 mm crochet hook
1 skein each of Caron Simply Soft in:
- Soft Pink
- White
- Chocolate
Scissors
Yarn Needle
Abbreviations
*= indicates the beginning/end of a section to be repeated
Beg = beginning
BLO = back loop only
Ch = chain
FLO = front loop only
Rep = repeat
Rnd – round
Sc = single crochet
Sk = skip
Sl St – slip stitch
Sp = space
Gauge
9 sc = 2 in (5 cm) and 6 rows of sc rib (when VERY stretched) = 1.75 in (4.5 cm)
Size
Cuff circumference of about 20-21” when stretched; hat length of about 10″ (one size fits most for women / teens)
Instructions
Cuff
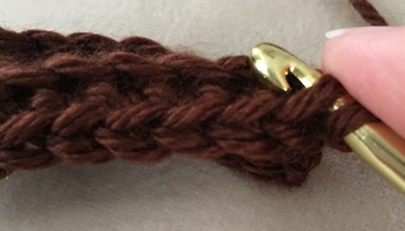
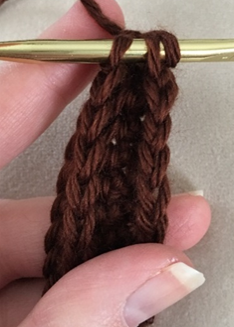
With Chocolate, Ch 10.
Row 1 – Sc in each ch across (9 sc). Ch 1, turn.
Row 2 – Working in BLO, sc across (9 sc). Ch 1, turn.
Rep Row 2 until piece measures about 21″ when VERY stretched (or about 15-16” when unstretched – about 55 rows).
Joining cuff
With right sides facing together, fold cuff and sl st two sides together, working in FLO. Do not fasten off. (9 sl st) Change to Soft Pink. Turn right side out, ch 1.
Hat
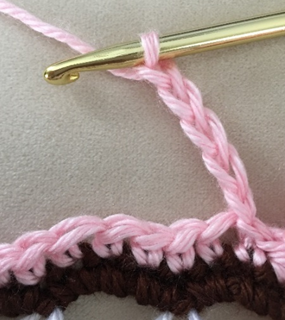
Rnd 1 – Sc evenly 72 sts around cuff. Join with sl st to first sc of Rnd. (72 sc)
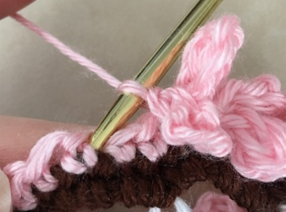
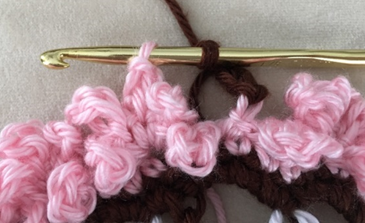
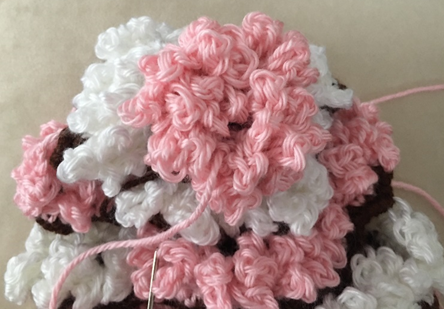
Rnd 2 – *Ch 5, sl st back into same st; rep 4 more times. (Pull first and last ch-5 downward to make cluster look like petals.) Sk 2 sts, Sl st in next. Sl st in next.* Rep from * to * 17 more times. (18 blossoms)
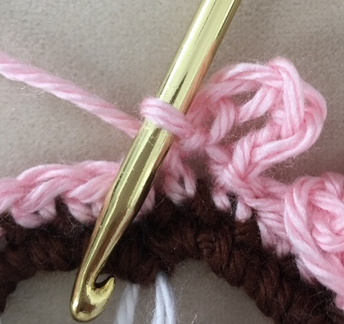
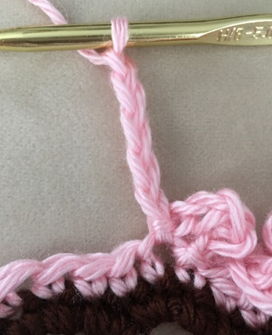
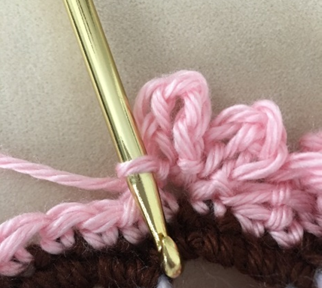
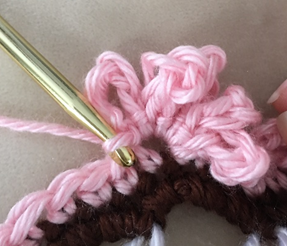
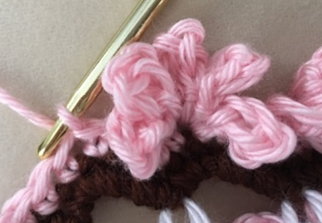
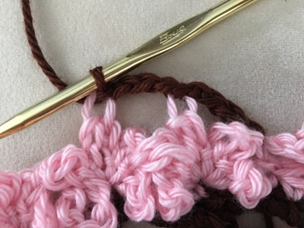
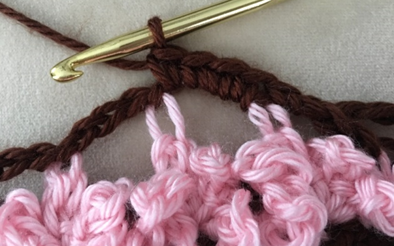
Rnd 3 – Switch to Chocolate, ch 4 (does not count as a ch cluster). Sl st to ch at top of top petal (3rd ch of 3rd ch-5 from previous rnd). *Ch 3, sl st to top of top “petal” (3rd ch of 3rd ch 5 from previous rnd).* Rep from * to * 17 more times. Sl st to 2nd ch of beg ch-4 (last cluster made). Ch 1 (18 ch-3 clusters)
Rnd 4 – Sc 1 in ch-sp. *In next ch-3 sp, 4 sc.* Rep from * to * 17 more times. In last ch-3 sp, 3 sc. Join with sl st to first sc of rnd. Attach White, ch 1 (72 sc)
Rnd 5 – Sc in each st around. (72 sc)


Rnds 6 – 9 – Rep Rnds 2 – 5. At end of Rnd 8, change to Soft Pink.
Rnds 10 – 13 – Rep Rnds 2 – 5. At end of Rnd 12, change to White.
Rnds 14 – 21 – Rep Rnds 6 – 13.
Rnd 22 – Rep Rnd 2. Change to Chocolate at end of Rnd. (18 blossoms)
Decrease Rnds
Rnd 23 – Ch 4 (does not count as a ch cluster). Sl st to ch at top of top petal (3rd ch of 3rd ch-5 from previous rnd). *Ch 2, sl st to top of top “petal” (3rd ch of 3rd ch-5 from previous rnd).* Rep from * to * 17 more times. Sl st to 3rd ch of beg ch-4 (last cluster made). Ch 1 (18 ch-2 clusters)
Rnd 24 – Sc 1 in ch-sp. *In next ch-2 sp, 2 sc.* Rep from * to * 17 more times. In last ch sp, 2 sc. Join with sl st to first sc of rnd. Change to Soft Pink, ch 1 (37 sc)
Rnd 25 – Sc in each st around. (37 sc)
Rnd 26 – *Ch 5, sl st back into same st; rep 4 more times. (Pull first and last ch-5 downward to make cluster look like petals.) Sk 2 sts, Sl st in next st. Sl st in next st.* Rep from * to * 8 more times. Leave last rem st unworked. (9 blossoms)
Fasten off, leaving a long tail for sewing.
Closing the hat
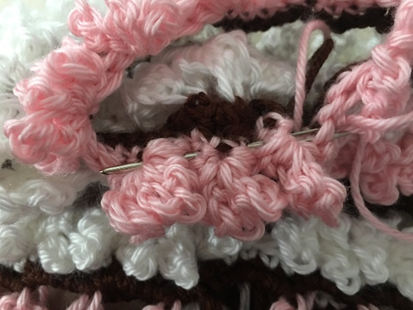
Using long tail from fastening off, thread yarn needle and run it through the sts of Rnd 25. Pull end tightly to cinch, tying knot at center of cinch if necessary. Run end inside of hat.
Weave in all ends.
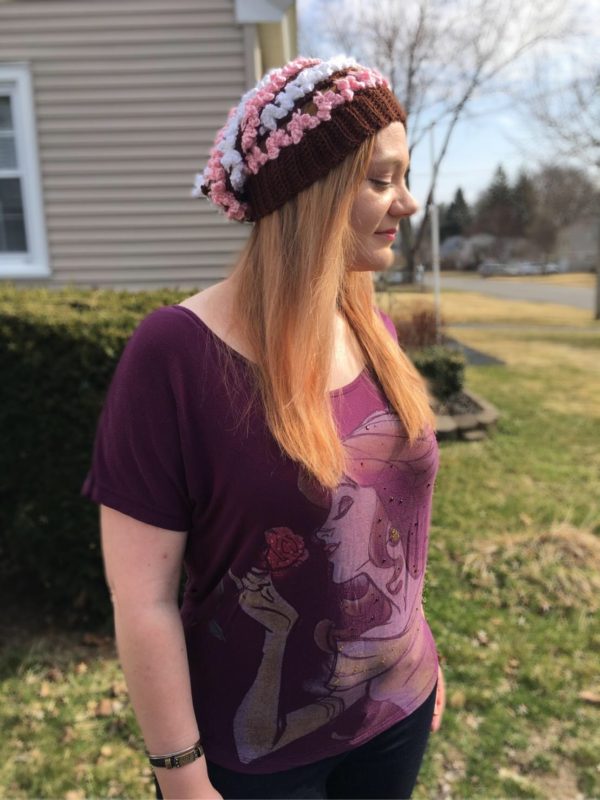
Here is the finished hat!
I hope you enjoyed crocheting this hat along with me! I’ve had a lot of fun sharing my pattern, and the details of my Tokyo trip, with you! Please be sure to subscribe to my email list and follow me on social media to keep up with all my latest patterns. I have some really fun ones coming soon, so stay tuned!
COPYRIGHT:
This pattern is owned by Crafty Kitty Crochet (Melissa Moore). Any reselling or distribution of this pattern is prohibited. Sale of items made using this pattern is welcomed, but I do ask that credit/a link be provided back to my site, craftykittycrochet.com.
Comments (4)
12 Weeks of Christmas: Winter Wonderland Wreath Photo Frame Ornament – Crafty Kitty Crochet
November 1, 2019 at 9:52 pm
[…] Fun fact: the photo I used in my Wreath Ornament you see here is a picture of my husband and me at the Studio Ghibli museum in Tokyo! You can read more about our trip to Tokyo in my Cherry Blossom Hat Crochet Pattern post HERE! […]
Rose Granny Square – Crochet Pattern – Crafty Kitty Crochet
February 7, 2020 at 9:06 pm
[…] looking for other floral crochet patterns, be sure to check out my Sunflower Granny Square, Cherry Blossom Hat, and Cherry Blossom Scarf! I plan on bringing more floral crochet patterns to my blog in the near […]
Spring Sherbet Bunny – Amigurumi Crochet Pattern ~ Crafty Kitty Crochet
March 2, 2021 at 6:10 pm
[…] too, be sure to check out another Amigurumi Bunny pattern of mine, my Amigurumi Sheep, and my Cherry Blossom Hat and Scarf […]
Amigurumi Cherry Blossom Cow – Crochet Pattern ~ Crafty Kitty Crochet
April 1, 2022 at 8:24 pm
[…] got to see some myself in person when I went to Tokyo! (Read more about that when you check out my Cherry Blossom Slouchy Hat and Cherry Blossom Scarf!) So I figured, let’s celebrate the wonder and magic of both spring and […]