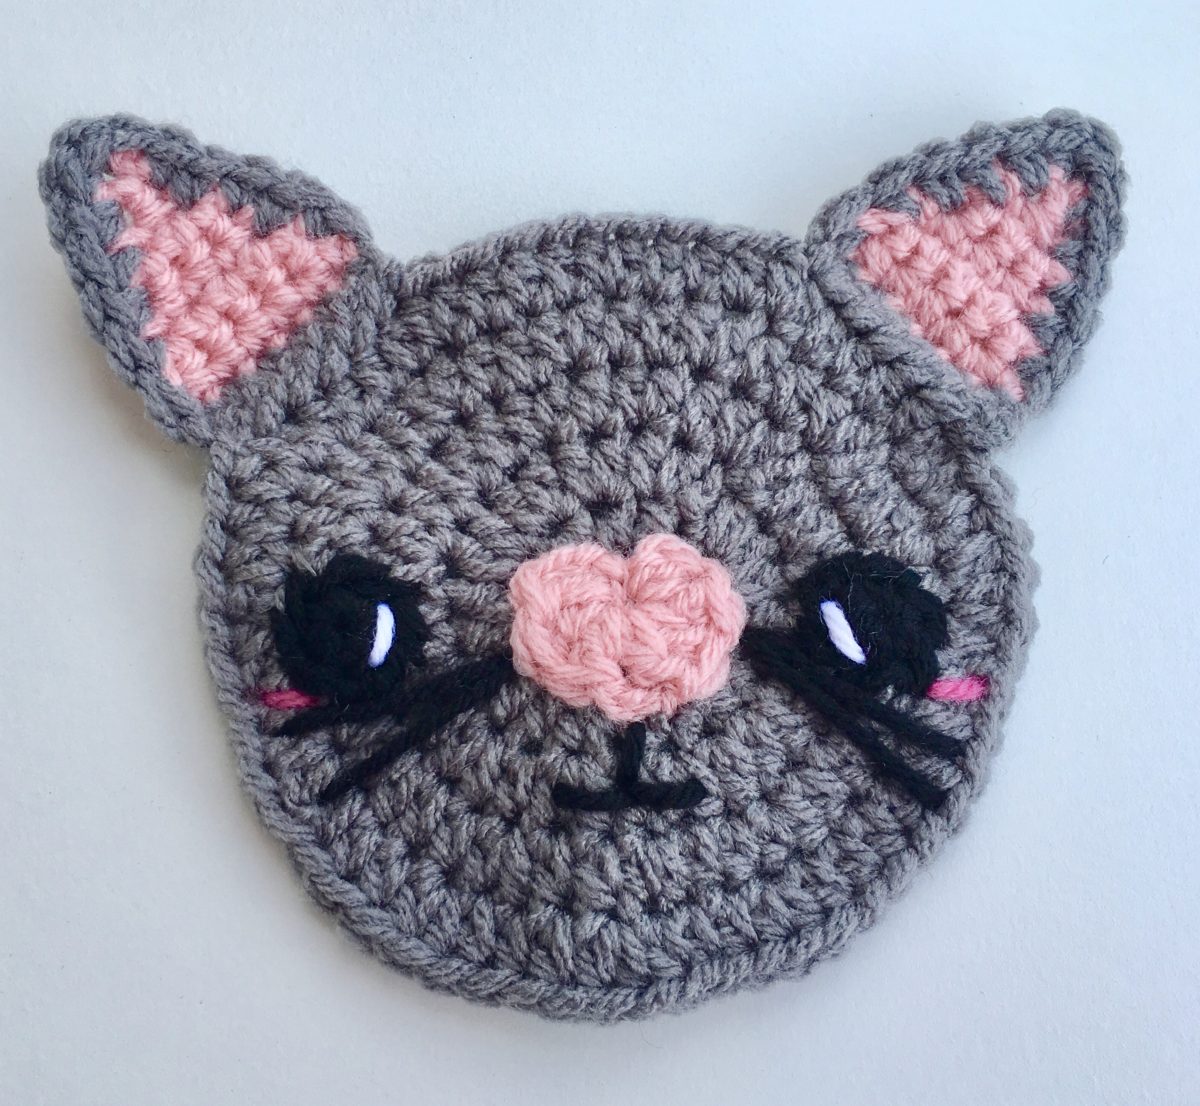
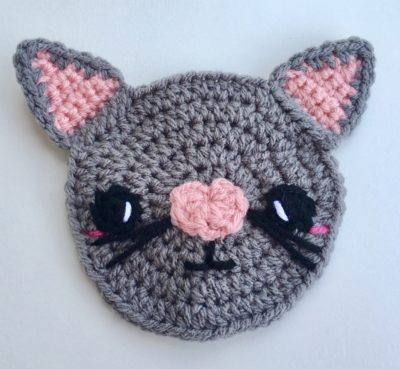
Kitty Applique Crochet Pattern
Continuing with my appli-craze, I decided to make a cat applique inspired by my very own Crafty Kitty Crochet logo! Cat appliques were the first crocheted appliques I ever made – and I was actually trying to mimic my logo for a t-shirt I was making (read the full story here). When I was starting to write patterns for crocheted appliques this year, I knew I absolutely had to publish a pattern for a cat applique, since “kitty” is in my business name, it’s my nickname, and let’s face it – the internet is crazy for cats!!! (Don’t worry dog lovers, I love dogs too, and there’s a puppy applique coming soon!)
So are you ready to start crocheting this applique right meow?
If you’re still reading after that terrible pun, then let’s get crocheting!
(Learn how to attach crocheted appliques to shirts here!)
(Purchase an ad-free PDF copy of this pattern from my shop here!)
Supplies:
Size E/4 (3.50 MM) Crochet Hook for Youth Size; Size F/5 (3.75 mm) for Adult Size; Size G/6 (4.25 mm) for Extra Large Adult Size (you can adjust your hook size up/down even further depending on the size you want)
Yarn Needle
Scissors
(You will not need entire skeins of each color of yarns listed below)
Red Heart with Love in Pewter (Face, ears)
*NOTE! This yarn is incredibly soft, versatile, and easy to work with. An entire skein will make several of these appliques!
You can find it on Amazon:
Vanna’s Choice in Pink (Ears, nose)
Red Heart Super Saver in White (Eye sparkle)
Small amount of Red Heart Soft Baby Steps in Strawberry (blush)
Small amount of Red Heart Super Saver in Black (smile and eyes)
Abbreviations:
Beg = beginning
Ch = chain
Dc = double crochet
Hdc = half double crochet
Rem = remaining
Rep = repeat
Rnd = round
Sc = single crochet
Sc3tog = single crochet 3 together
Sl st = slip stitch
St(s) = stitch(es)
Size:
Size varies depending on size made; Extra Large Adult Size is approx. 6” wide
Gauge:
Exact gauge is not essential to this project.
Instructions
Head
Rnd 1 – With Grey, Ch 3. In 3rd ch from hook, 12 Hdc. Join with sl st to top of first Hdc. Ch 2 (12 Hdc)
Rnd 2 – 2 Hdc in each hdc around. Join with sl st to top of first Hdc. Ch 2 (24 hdc)
Rnd 3 – 2 Hdc in first st, Hdc in next. Rep around. Join with sl st to top of first Hdc. Ch 2 (36 Hdc)
Rnd 4 – 2 Hdc in first st, Hdc in next 2 sts. Rep around. Join with sl st to top of first Hdc. Ch 2 (48 Hdc)
Rnd 5 – 2 Hdc in first st, Hdc in next 3 sts. Rep around. Join with sl st to top of first Hdc. (60 Hdc)
Fasten off, weave in all ends.
Ears (make 2)
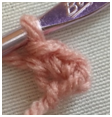
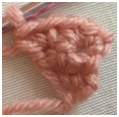
Row 1 – With pink, ch 2. 2 sc in 2nd ch from hook. Ch 1, turn. (See photo below.) (2 sc)
Row 2 – Sc across. Ch 1, turn. (2 sc)
Row 3 – 2 sc in first st, 2 sc in last st. Ch 1, turn. (See photo below.) (4 sc)
Row 4 – Sc across. Ch 1, turn. (4 sc)
Row 5 – 2 sc in first st, sc in next 2 sts, 2 sc in last st. Ch 1, turn. (6 sc)
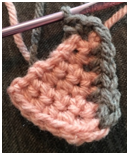
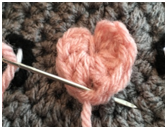
Row 6 – Sc across. In last st, switch to grey. You will now work around entire piece (see photo below). (6 sc)
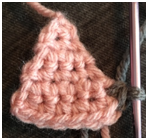
Row 7 – Sc 5 up side. 3 sc in tip (see photo below). 5 sc up other side. Sc across rnd 6. Join with sl st to first grey edging st (19 sc)
Fasten off, leave long tail for sewing. Weave in all other tails on ear.
Eyes (make 2)
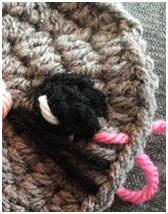
Rnd 1 – With Black, make a magic ring. 5 sc in ring. Join with sl st to first sc in ring. Fasten off, leaving a long tail for sewing.
Eye Sparkle: With White on yarn needle, make a small line near edge of eye. Tie two white yarn ends from sparkle, as well as starting black tail from magic ring of eye, on back of eye.
Nose
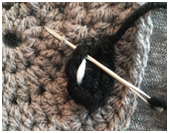
Rnd 1 – Ch 3, 3 dc in 3rd ch from hook. Ch 1. 3 dc back in same 3rd ch. Ch 2, join with sl st to 3rd ch. fasten off, leaving a long tail for sewing. (See photos below.)
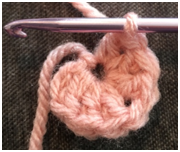

Weave in beg Tail.
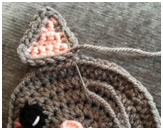
Assembly
See photos below. Sew eyes slightly below center of head. Use rem yarn tails to make whiskers. Use rem tails from whiskers to make smile (small line below nose, with small lines to left and right below that line). Sew ears about 8 sts apart on top of head. Weave in grey ends on back of appliqué; tie the rest of the ends on back of appliqué.
Blush
Insert needle underneath eye, near outer corner. Make a horizontal line that covers about 1 st (see photo below). Carry yarn over to other eye and repeat. Fasten off, and tie a knot on back of appliqué.
Now your applique is all finished!
COPYRIGHT:
This pattern is owned by Crafty Kitty Crochet (Melissa Moore). Any reselling or distribution of this pattern is prohibited. Sale of items made using this pattern is welcomed, but I do ask that credit/a link be provided back to my site, craftykittycrochet.com.