
Kawaii Turtle Applique Crochet Pattern
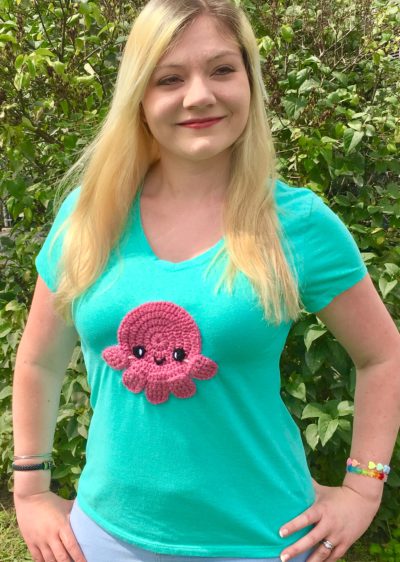
Who else loves crochet SO much that they want it close to their heart at all times? Well, recently I started making patterns for the cutest crocheted appliques I could think of, starting with this Kawaii Turtle! I designed it to be attached to a t-shirt – hence the “close to your heart” statement – but you could attach the appliques to just about anything! A few suggestions I’ve received that I think would be adorable include blankets and tote bags.
My crocheted applique craze started when I decided to wear an old convention shirt of mine this summer. Back when I was selling at craft fairs and comic book conventions on a regular basis, I decided I needed to have some kind of “uniform” – something that customers could immediately identify me by when they saw me at my booth. What better way to advertise my craft than a crocheted applique of my logo displayed on my shirt? It was a hit, and I often had people asking me where they could buy my shirts. A few years later, the shirt still gets the same response! So I decided to go ahead and write up some patterns so that you can wear cute crocheted appliques on your shirts, too!
Ready to proudly display that crochet? Let’s go!
(To purchase an ad-free PDF copy of this pattern in my shop, click here!)
Supplies:
Size E/4 (3.50 MM) Crochet Hook for Youth Size; Size F/5 (3.75 mm) for Adult Size; Size G/6 (4.25 mm) for Extra Large Adult Size (you can adjust your hook size up/down even further depending on the size you want)
Yarn Needle
Scissors
(You will not need entire skeins of each color of yarns listed below)
Caron Simply Soft in Dark Sage (shell)
Red Heart with Love in Minty (Face, legs, tail)
***NOTE: I absolutely love this color and plan on making more projects with it! The yarn is incredibly soft, too.
You can find it on Amazon!
Red Heart Super Saver in White (shell lining and eye sparkle)
Small amount of Red Heart Soft Baby Steps in Strawberry (blush)
Small amount of Red Heart Super Saver in Black (smile and eyes)
Abbreviations:
Beg = beginning
Ch = chain
Hdc = half double crochet
Rem = remaining
Rep = repeat
Rnd = round
Sc = single crochet
Sc3tog = single crochet 3 together
Sl st = slip stitch
St(s) = stitch(es)
Size:
Size varies depending on size made; Youth size is approx. 4” wide
Gauge:
Exact gauge is not essential to this project.
Instructions
Head
(Work in continuous rnds; do not join. You may find it helpful to use a stitch marker at beg of each rnd.)
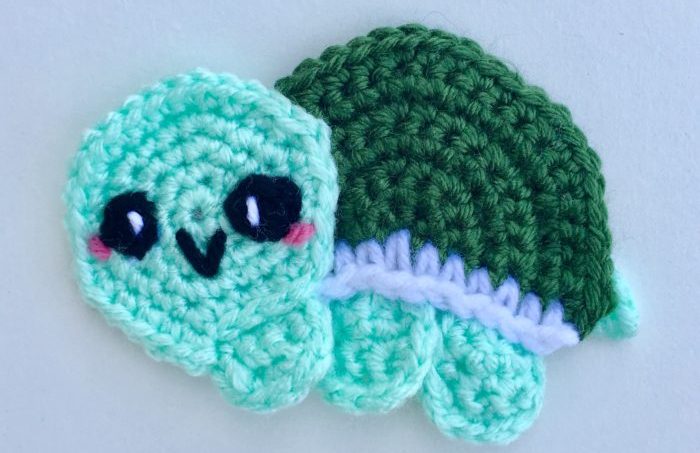
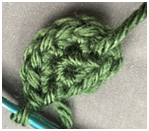
Rnd 1 – Make a magic ring. 6 sc in ring. (6 sc)
Rnd 2 – 2 sc in each st around (12 sc)
Rnd 3 – 2 sc in next st, 1 sc in next st; rep around (18 sc)
Rnd 4 – 2 sc in next st, 1 sc in next 2 sts; rep around (24 sc)
Rnd 5 – 2 sc in next st, 1 sc in next 3 sts; rep around (30 sc)
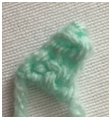
Photo below shows what piece should look like after Rnd 5
Fasten off, leave a long tail for sewing. Weave in end from starting ch.
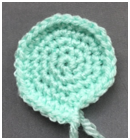
Front facing legs– (legs directly beneath shell – make 2)
Ch 4
Rnd 1 – In 2nd ch from hook, sc across. Ch 1, turn (3 sc)
Rnd 2 – Sc across. Ch 1, turn (3 sc)
Rnds 3 & 4 – Rep Rnd 2 two more times (3 sc per rnd)
Rnd 5 – Sc3tog, ch 1; begin working around entire piece. Sc down side (3 sc), ch 1. Sc across
bottom (3 sc), ch 1. Sc along other side (3 sc), ch 1. Join with sl st to last st from
previous rnd (st produced by sc3tog). (9 sc)
Photo below shows what piece should look like after Rnd 5
Fasten off, weave in ends.
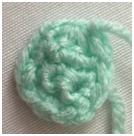
Other leg (leg underneath head – make 1)
Ch 4
Rnd 1 – In 2nd ch from hook, sc across. Ch 1, turn (3 sc)
Rnd 2 – Rep Rnd 1
Rnd 3 – working around piece, sc down side (2 sc), ch 1. Sc across bottom (3 sc),
ch 1. Sc up other side (2 sc), ch 1. Join with sl st to last st from previous rnd. (7 sc)
Photo below shows what piece should look like after Rnd 5
Fasten off, weave in ends.
Shell
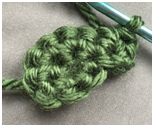
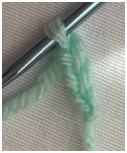
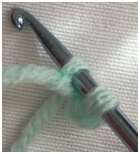
Rnd 1 – Make a magic ring, 6 sc in ring (6 sc)
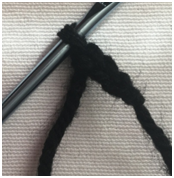
Rnd 2 – 2 sc in next 4 sts, ch 1, turn (leaving rem sts unworked – see first photo below) (8 sc)
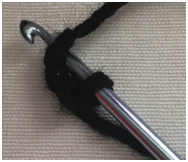
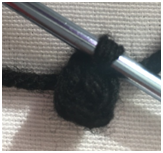
Rnd 3 – 2 sc in next st, sc in next – rep 3 more times, ch 1, turn (see second and third photos below) (12 sc)
Rnd 4 – 2 sc in next st, sc in next 2 sts – rep 3 more times, ch 1, turn (16 sc)
Rnd 5 – 2 sc in next st, sc in next 3 sts – rep 3 more times, ch 1, turn (20 sc)
Rnd 6 – 2 sc in next st, sc in next 4 sts – rep 3 more times, ch 1, turn (24 sc)
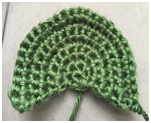
Rnd 7 – 2 sc in next st, sc in next 5 sts – rep 3 more times, ch 1, turn. Switch to white in last st (see fourth photo below) (28 sc).
Shell Edging: Work around bottom edge of shell in white – about 11 sc. Join with sl
st to first sc of Rnd 7 (see fifth photo below). (11 sc)
Fasten off, leaving a long tail for sewing (this will be used to sew on two of the legs)
Weave in all ends except for the one left over from fastening off shell edging.

Tail
Ch 4
Rnd 1 – Sl st in 2nd ch from hook. Sc in next st. Hdc in last st. Fasten off, leaving a long tail for sewing. (Photo below shows what finished tail looks like)
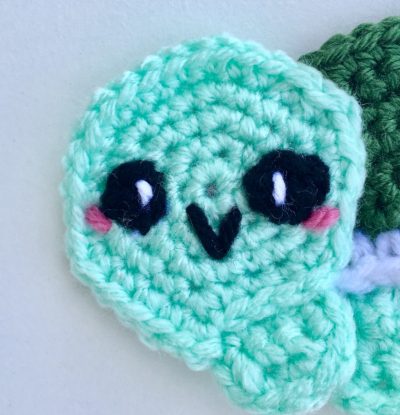
Eyes
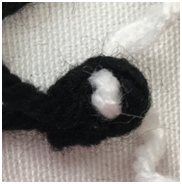
Ch 3, join with sl st to first ch to make a ring. Leave a long tail for sewing. (See three photos below)
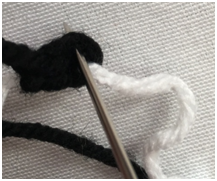
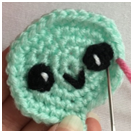
Finishing: thread needle with white yarn, and sew a small line inside of each eye (see two photos below). Tie white ends and rem black end from starting ch into a small knot on back of eye, being careful not to pull too tightly on the line you just made for the eye sparkle. (If you notice your sparkle is a bit smaller after you tie the knot, you can always insert your yarn needle behind the sparkle to pull it out a bit and make it visible again.)
Flower (optional)
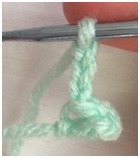
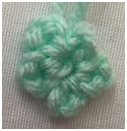
Ch 3, join with sl st to first ch. Rep 4 more times, fasten off, leaving a long tail for sewing (see five photos below). (Suggested placement for flower – either left or right side of head.)

Finishing
Attaching eyes
Place eyes around the center of the head of the Turtle, with each eye almost near the edge of the head. Sew with yarn needle – you may need to sew around each eye a few times to get them to look flat.
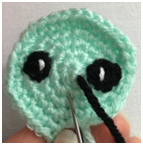
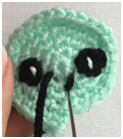
Smile
Use one of the rem black yarn ends to make v-shaped smile below eyes (see two photos below). Tie off black yarn ends on back of appliqué.
Blush
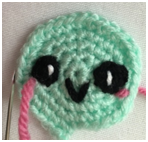
Insert needle underneath eye, near outer corner. Make a horizontal line that covers about 1 st. Carry yarn over to other eye and repeat. (See two photos below.) Fasten off, and tie a knot on back of appliqué.
Assembly
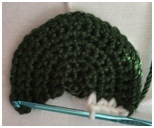
Assemble pieces as pictured:
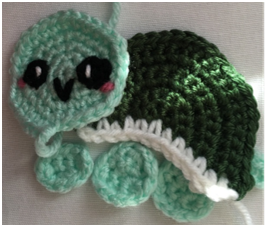
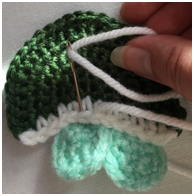
Sew head to small front leg, and use rem tail to sew both pieces to shell. Sew other legs to shell using white tail left over from shell edging (see photo below). Sew tail using rem yarn end. Use rem yarn tail to sew flower if it is being added. Weave in end from head/leg sewing on back of head; weave in end from shell edging/leg sewing on back side of shell edging; weave in end from tail on back of tail.
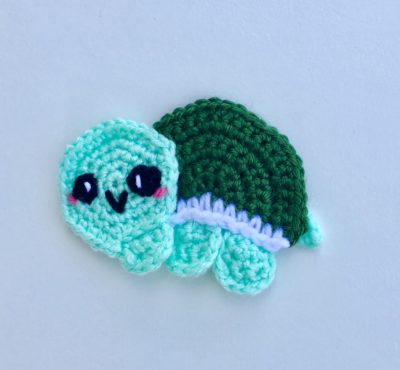
Here is the finished turtle!
COPYRIGHT:
This pattern is owned by Crafty Kitty Crochet (Melissa Moore). Any reselling or distribution of this pattern is prohibited. Sale of items made using this pattern is welcomed, but I do ask that credit/a link be provided back to my site, craftykittycrochet.com.

Comments (2)
Rainbow Jellyfish Applique Crochet Pattern – Crafty Kitty Crochet
January 30, 2019 at 11:16 pm
[…] colors, Red Heart with Love in Minty. I used this yarn for my Turtle Applique (find the pattern HERE!) and loved the color and texture! You can stock up on this lovely yarn on Amazon […]
Kitty Applique Crochet Pattern ~ Crafty Kitty Crochet
April 18, 2021 at 8:51 pm
[…] made – and I was actually trying to mimic my logo for a t-shirt I was making (read the full story here). When I was starting to write patterns for crocheted appliques this year, I knew I absolutely had […]