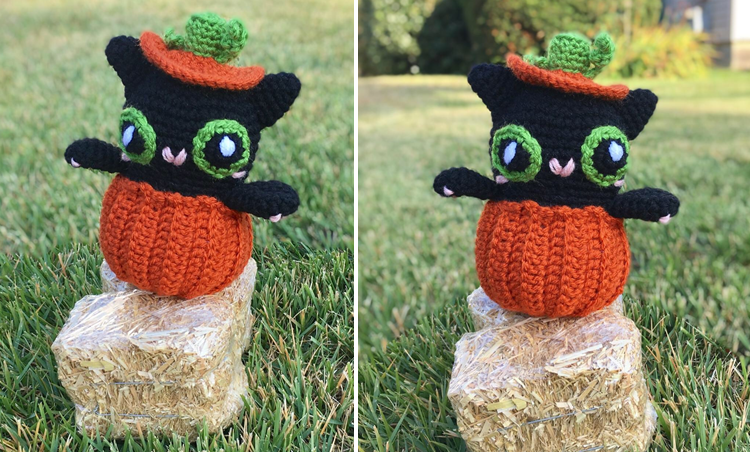
Halloween Pumpkin Kitty – Crochet Pattern
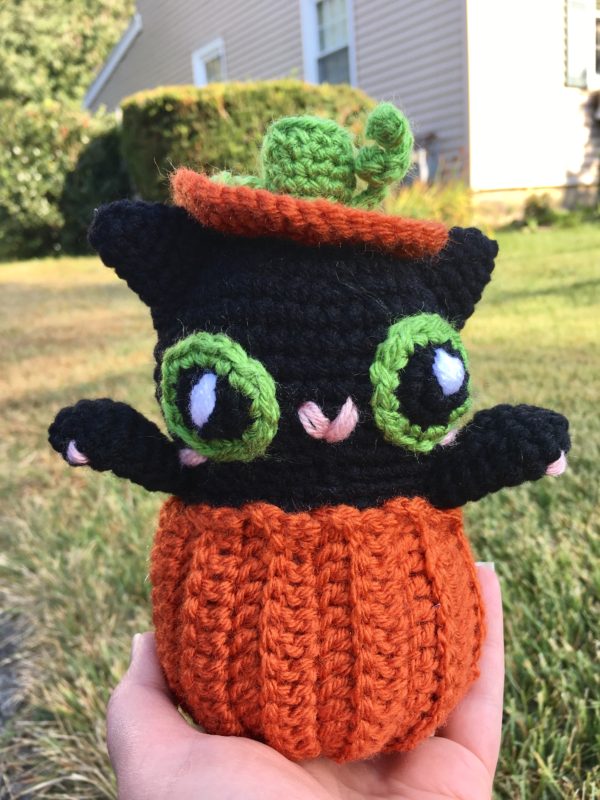
Who says black cats are bad luck?! This Pumpkin Kitty is here to show you how lucky we all are to have black cats in our lives! Combining two icons of Halloween – pumpkins and black cats – this pattern is the perfect amigurumi project for fall. The pattern is easy and has lots of photos to guide you, and the end result is an adorable “kawaii” project that you can be proud to say you DIY’ed!
You may have guessed from the name of my blog, but I am obsessed with all things cats! Sadly, I can not have any cats as pets because my husband is allergic; but I make up for it by decorating my home, craft room, accessories, clothing, etc. with kitties. So when I was trying to come up with a fun amigurumi project for Halloween, I knew it would be something cat-centric!
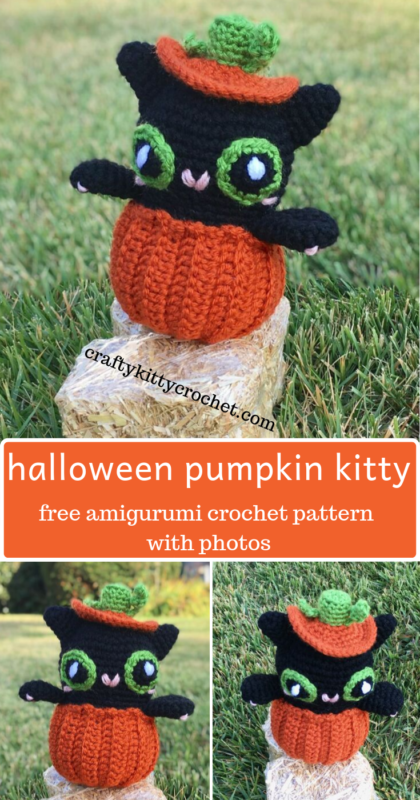
(Pin it for later!)
It seems like representations of black cats are everywhere at Halloween, and I wanted to do something to make my amigurumi project stand out. I got thinking about how cute it would be to have a kitty peeking out of a pumpkin! Eventually, I decided to up the cuteness factor even more by adding the top / lid of the pumpkin to her head. The result was kawaii overload!!!!
I was also very inspired by another kitty-centric project of mine, my Kitty Cupcake that I published for my one year blog anniversary! I guess I’m just a big fan of the image of cats hiding in things and peeking out. It’s cute imagery, and most cat owners will probably tell you that cats really do love their little hiding places!
When designing this pumpkin kitty, I turned to an trusted favorite yarn when it comes to amigurumi projects (and other kinds of projects, for that matter). You guessed it – Vanna’s Choice by Lion Brand Yarn! I’ve been using Vanna’s for years and I don’t think I’ll ever get tired of it. The two colors that really make this project “pop” are the deep orange color Terracotta for the pumpkin (find Terracotta on Amazon HERE), and a bright, verdant green called Fern for the eyes and pumpkin accents (find Fern on Amazon HERE
).
This pumpkin kitty is so fun and versatile – it would make a great Halloween gift and / or part of your Halloween decor. How adorable would it be to set this out where your trick or treaters could see it? Or use it as part of your centerpiece as your Halloween party? Or all of the above?! The possibilities are endless!
So who’s ready to have some spooky fun? I know I am – let’s get started on this pattern!
Supplies
Size D-3 / 3.25 mm crochet hook
1 skein each of Lion Brand Vanna’s Choice in:
- Terracotta
- Black
- Fern
- White
- Pink
Fiber fill stuffing
Yarn Needle
Scissors
Abbreviations
*= indicates the beginning or end of a section to be repeated
Ch = chain
BLO = back loop only
Dc = double crochet
Hdc = half double crochet
Rep = repeat
Rnd = round
Sc = single crochet
Sc2tog = single crochet 2 together
Sl St = slip stitch
St(s) = stitch(es)
Gauge
Exact gauge is not essential to this project.
Size
Measures about 7 inches in length
Instructions
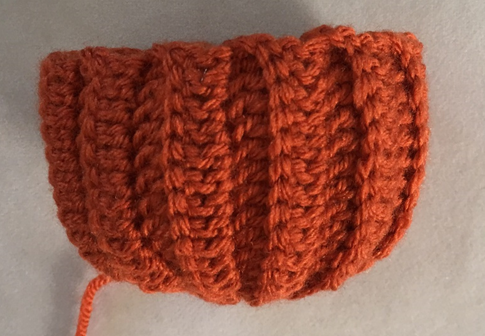
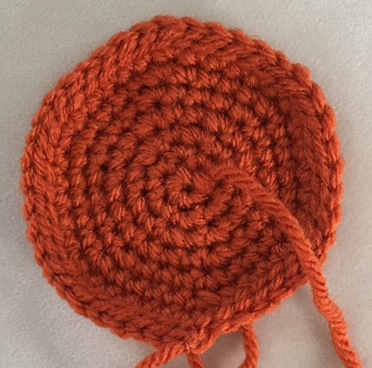
Pumpkin
The first 2 rnds of this piece are worked in continuous rnds; do not join on these rnds. You may wish to use a stitch marker and move it up at the beginning of each new rnd.
Rnd 1 – With Terracotta, make a magic ring. 6 sc in ring (6 sc)
Rnd 2 – 2 sc in each st around (12 sc)
Rnd 3 – Ch 17. Dc in third ch from hook and in next 11 sts. Hdc in next st, sc in last 2 sts. Sl st back into same st where ch was made on Rnd 2. Sl st in next st. Ch 1, turn (12 dc, 1 hdc, 2 sc)
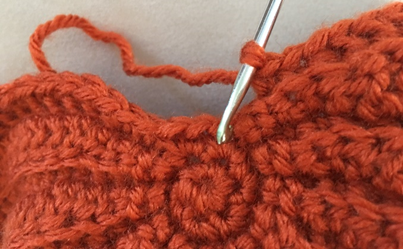
Rnd 4 – Working in BLO, sc in next 2 sts, hdc in next st, dc in next 12 sts. Ch 2, turn (2 sc, 1 hdc, 12 dc)
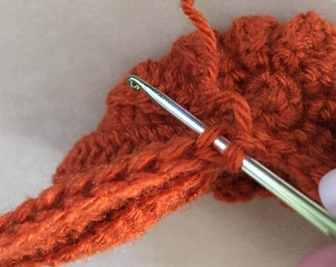
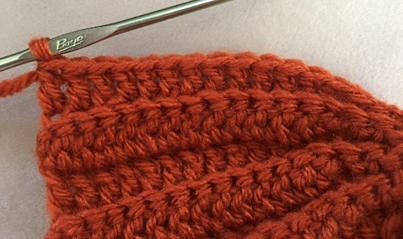
Rnd 5 – Dc in next 12 sts. Hdc in next st, sc in last 2 sts. Sl st back into same st you started in (from Rnd 2). Sl st in next st. Ch 1, turn (12 dc, 1 hdc, 2 sc)
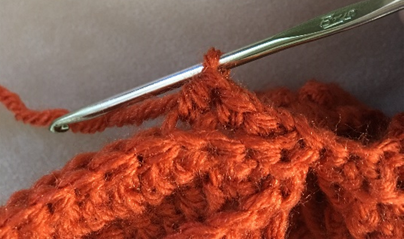
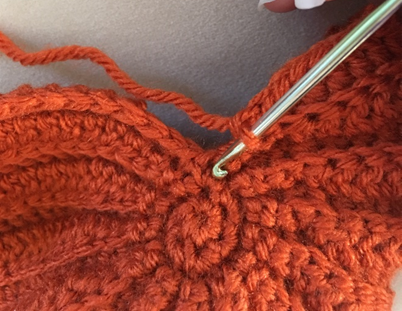
Rnds 6 – 25 – rep rnds 4 & 5 ten more times. At end of Rnd 25, sl st once into Rnd 2 (not twice).
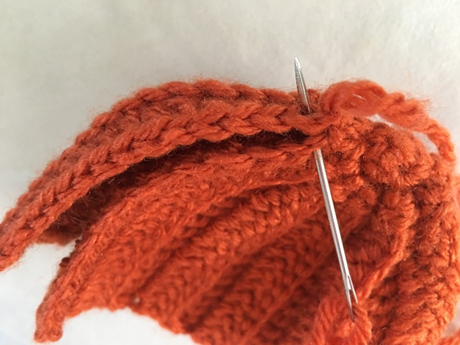
Fasten off, leaving long tail for sewing. Press each end of Pumpkin together, and sew sides together through back loop of side closest to you, and through front loop of other side.
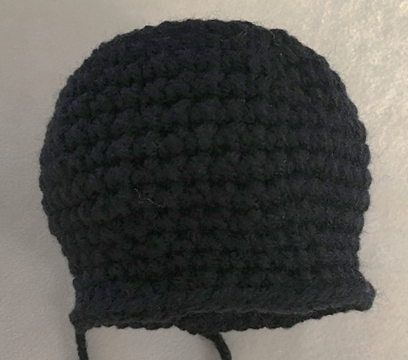
Kitty
This piece is worked in continuous rnds; do not join. You may wish to use a stitch marker and move it up at the beginning of each new rnd.
Rnd 1 – With Black, make a magic ring. 6 sc in ring (6 sc)
Rnd 2 – 2 sc in each st around (12 sc)
Rnd 3 – 2 sc in next st, sc in next st; rep around (18 sc)
Rnd 4 – 2 sc in next st, sc in next 2 sts; rep around (24 sc)
Rnd 5 – 2 sc in next st, sc in next 3 sts; rep around (30 sc)
Rnd 6 – 2 sc in next st, sc in next 4 sts; rep around (36 sc)
Rnd 7 – 2 sc in next st, sc in next 5 sts; rep around (42 sc)
Rnds 8 – 12 – sc in each st around. (42 sc per rnd)
Rnd 13 – sc2tog over next 2 sts, sc in next 5 sts; rep around (36 sc)
Rnd 14 – sc2tog over next 2 sts, sc in next 4 sts; rep around (30 sc)
Rnd 15 – 2 sc in next st, sc in next 4 sts; rep around (36 sc)
Rnd 16 – 2 sc in next st, sc in next 5 sts; rep around (42 sc)
Fasten off, leaving long tail for sewing.
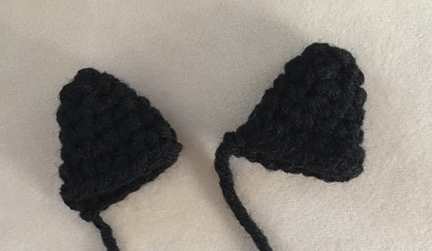
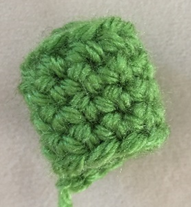
Ears (make 2)
This piece is worked in continuous rnds; do not join. You may wish to use a stitch marker and move it up at the beginning of each new rnd.
Rnd 1 – With Black, make a magic ring. 6 sc in ring (6 sc)
Rnd 2 – sc in each st around. (6 sc)
Rnd 3 – 2 sc in next st, sc in next st; rep around (9 sc)
Rnd 4 – sc in each st around. (9 sc)
Rnd 5 – 2 sc in next st, sc in next 2 sts; rep around (12 sc)
Rnd 6 – sc in each st around. (12 sc)
Fasten off, leaving long tail for sewing.
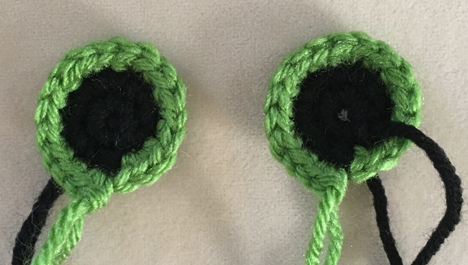
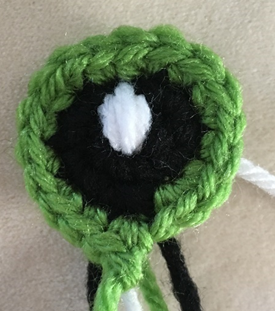
Eyes
This piece is worked in continuous rnds; do not join. You may wish to use a stitch marker and move it up at the beginning of each new rnd.
Rnd 1 – With Black, make a magic ring. 6 sc in ring (6 sc)
Rnd 2 – 2 sc in each st around. Join Fern in last st of rnd, fasten off Black (12 sc)
Rnd 3 – 2 sc in next st, sc in next st; rep around (18 sc)
Fasten off, leaving long tail for sewing.
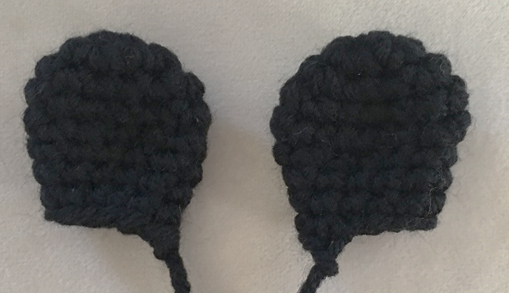
Paws (make 2)
This piece is worked in continuous rnds; do not join. You may wish to use a stitch marker and move it up at the beginning of each new rnd.
Rnd 1 – With Black, make a magic ring. 6 sc in ring (6 sc)
Rnd 2 – 2 sc in each st around (12 sc)
Rnd 3 – 2 sc in next st, sc in next st; rep around (18 sc)
Rnd 4 – sc in each st around (18 sc)
Rnd 5 – sc2tog over next 2 sts, sc in next st; rep around (12 sc)
Rnds 6 – 8 – sc in each st around (12 sc per rnd)
Fasten off, leaving long tail for sewing.
Pumpkin Top
This piece is worked in continuous rnds; do not join. You may wish to use a stitch marker and move it up at the beginning of each new rnd.
Rnd 1 – With Terracotta, make a magic ring. 6 sc in ring (6 sc)
Rnd 2 – 2 sc in each st around (12 sc)
Rnd 3 – 2 sc in next st, sc in next st; rep around (18 sc)
Rnd 4 – 2 sc in next st, sc in next 2 sts; rep around (24 sc)
Rnd 5 – 2 sc in next st, sc in next 3 sts; rep around (30 sc)
Rnd 6 – 2 sc in next st, sc in next 4 sts; rep around (36 sc)
Rnd 7 – 2 sc in next st, sc in next 5 sts; rep around (42 sc)
Rnd 8 – working in BLO, sl st in each st around. (42 sl sts)
Fasten off, leaving long tail for sewing.
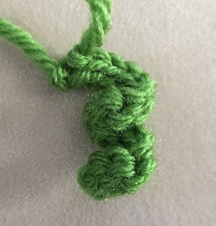
Stem
This piece is worked in continuous rnds; do not join. You may wish to use a stitch marker and move it up at the beginning of each new rnd.
Rnd 1 – with Fern, make a magic ring. 6 sc in ring (6 sc)
Rnd 2 – working in BLO, sc in each st around. (6 sc)
Rnds 3 – 5 – sc in each st around. (6 sc)
Fasten off, leaving long tail for sewing.
Leaf
Row 1 – *Ch 5, sl st into first ch made.* Rep from * to * twice. Ch 3. (3 leaf points and one stem made)
Fasten off, leaving long tail for sewing.

Vine
Row 1 – Ch 15, sl st in 2nd ch from hook and in each ch across. Twist piece to make corkscrew curl shape. (14 sl st)
Fasten off, leaving long tail for sewing.
Finishing
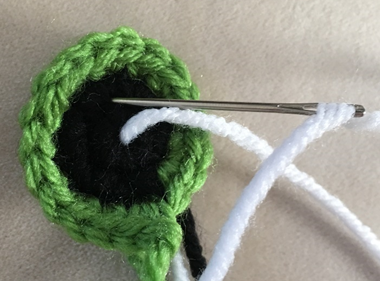
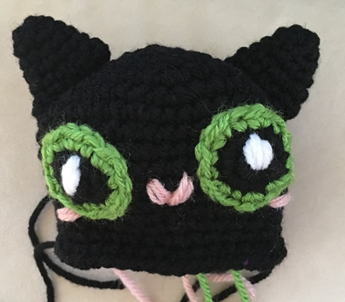
With White, make several vertical lines in center of each Eye. Tie off ends on back of each Eye. Sew Eyes to Kitty.
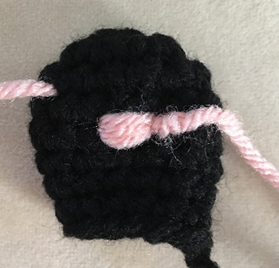
With Pink, make several small horizontal lines on outer corner of each Eye for Blush.
With Pink, make several diagonal lines in each direction to make a heart-shaped Nose.
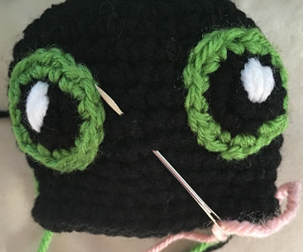
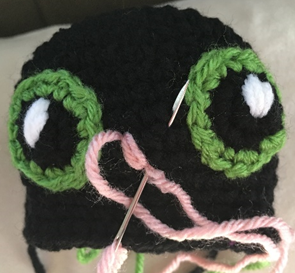
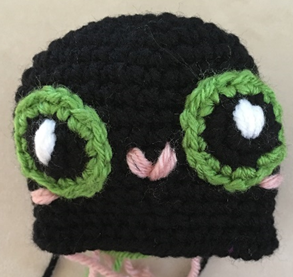
Press Ears flat, line up approximately with Blush and sew to Kitty.
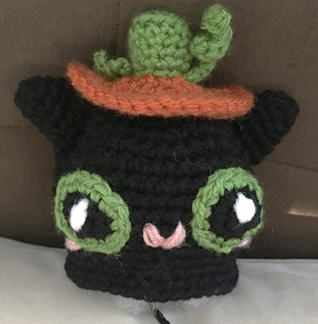
Stuff Stem with stuffing or yarn ends, sew to Pumpkin Top.
Sew Leaf and Vine to Pumpkin Top. Tie off ends or weave on inside of Pumpkin Top.
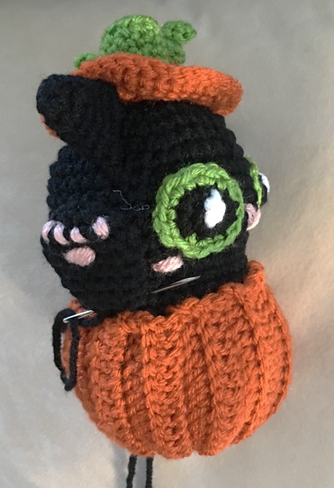
Sew Pumpkin Top to top of Kitty, between Ears.
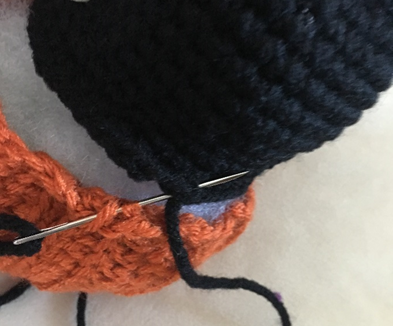
Stuff Pumpkin and Kitty generously and sew Kitty to Pumpkin, working through sts at bottom of Kitty and inside sts of Pumpkin (slightly downward of edge of Pumpkin, so that Kitty looks like it’s inside of Pumpkin as opposed to sewn to edges of Pumpkin).
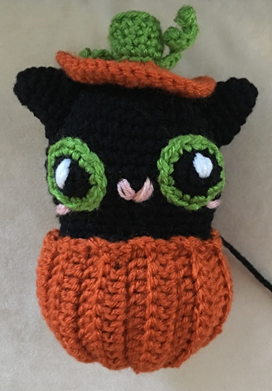
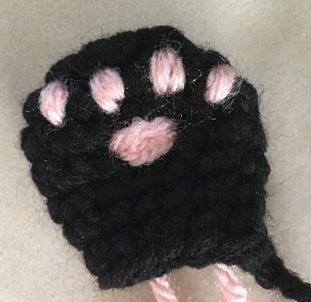
Press each Paw flat and use Pink to sew several small vertical lines, and one large horizontal line, for Paw Prints on each Paw.

Line up Paws with outer edge of each Eye (so that Paws are more towards the side of Kitty) and sew Paws to Kitty.
Weave in or tie off all ends.

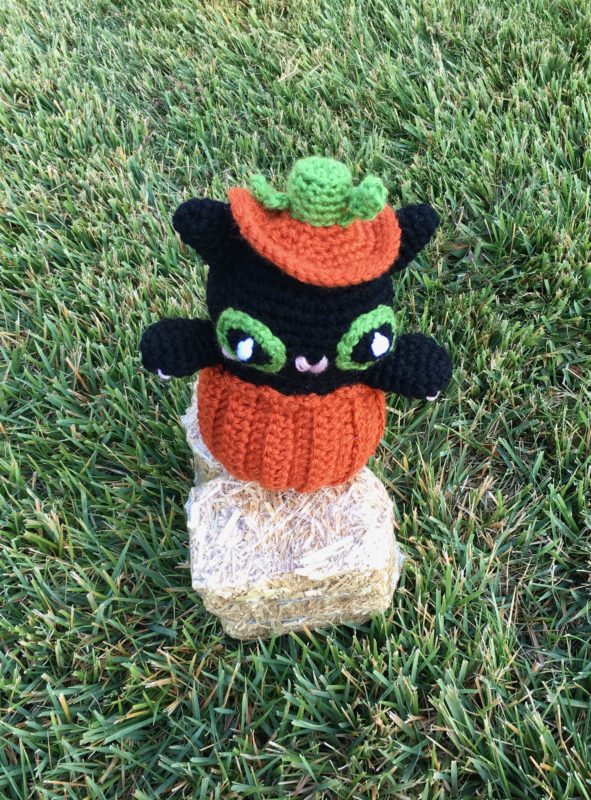
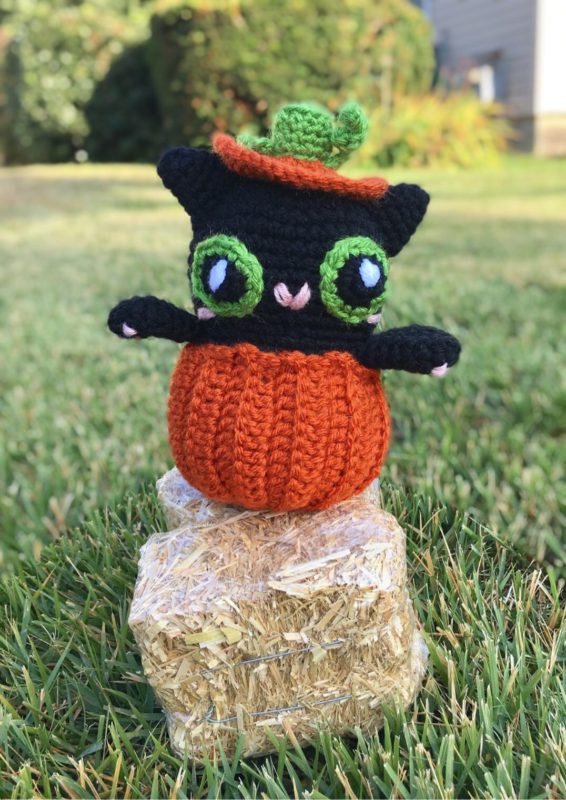
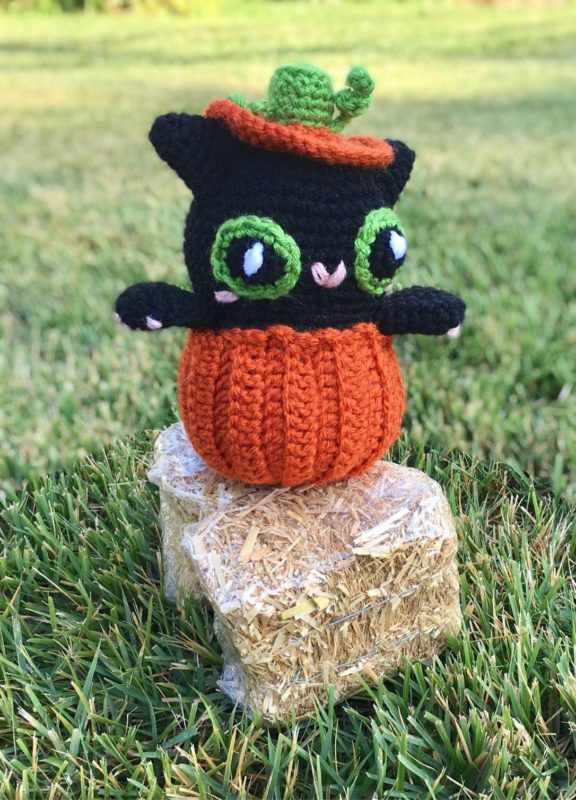
Here’s some photos from my Pumpkin Kitty photo shoot!
I hope you enjoyed crocheting this Pumpkin Kitty along with me! If you love fun, free patterns like this one, please be sure to subscribe to my email list and follow me on social media. I have some more really cute patterns coming soon!
Happy Crocheting!
COPYRIGHT: This pattern is owned by Crafty Kitty Crochet (Melissa Moore). Any reselling or distribution of this pattern is prohibited. Sale of items made using this pattern is welcomed, but I do ask that credit/a link be provided back to my site, craftykittycrochet.com.