
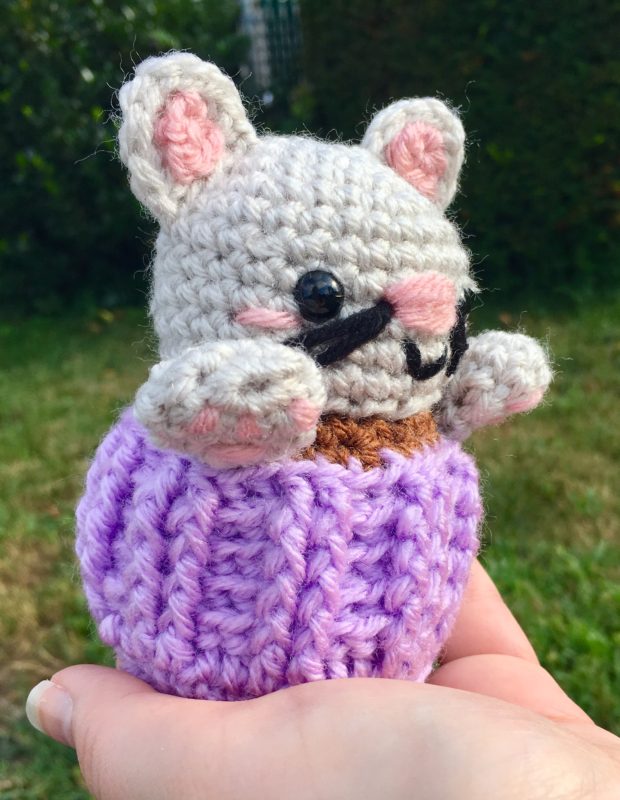
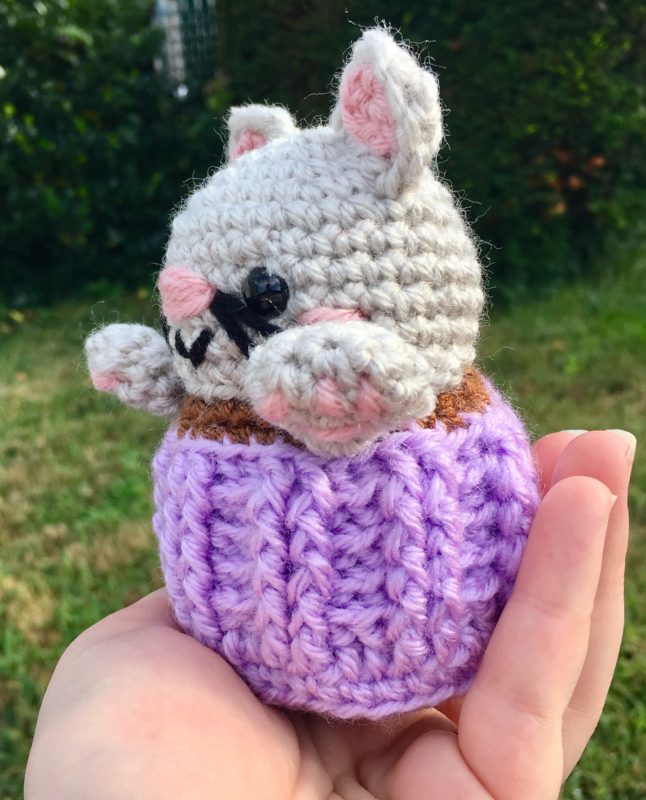
Amigurumi Kitty Cupcake – One Year Anniversary Crochet Pattern!
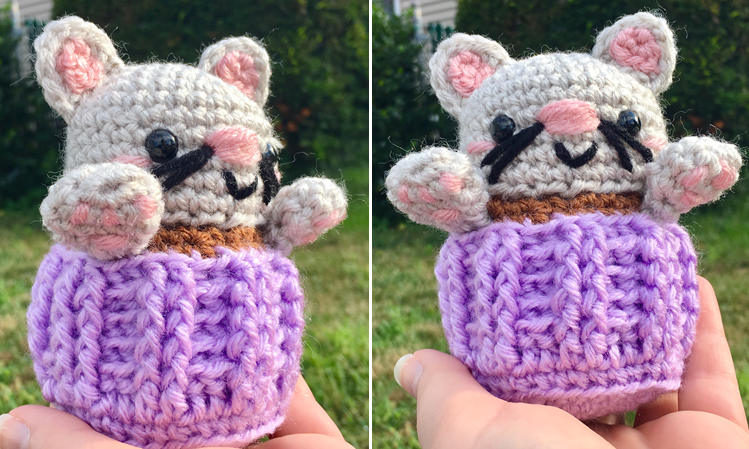
If you love cats and cupcakes, then this pattern is for you! This easy and fun pattern embraces “kawaii” style of animals and food. It’s the perfect pattern for an amigurumi fan! The design is simple and cute, so you can make a whole baker’s dozen of this little kitty cupcakes and still have time for other projects!
The reasoning behind this pattern is that this week marks the one year anniversary of the Crafty Kitty Crochet blog! I started this blog after browsing Pinterest and reading about others’ experiences in crafting and blogging. I love the idea of designing things I love, like amigurumi and unique fashion, and inspiring others to create! That’s where the idea for this pattern came from – a combination of my logo and my favorite dessert, all wrapped up into one amigurumi kawaii creation!
It’s been an amazing year, and I am so grateful to all the makers who have created beautiful things using my patterns, and supported/encouraged me along the way as I found my footing in this wonderful world of blogging. I have learned so much and I am still brimming with fun new crochet ideas, so I truly believe that the best is yet to come for my blog!
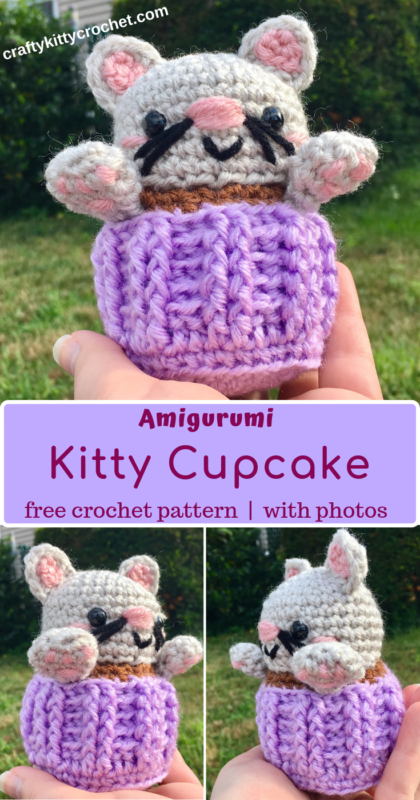
Pin it for later!
I used one of my all time favorite yarns for this project – Vanna’s Choice by Lion Brand! The base of the cupcake is made using Lilac, a colorful pastel purple in honor of my favorite color (purple!). You can find this yarn on Amazon HERE! The kitty portion is made using a favorite colorway of mine, Linen. When creating crocheted versions of my logo, such as the one in the kitty shirt you’ve seen around my blog, I use Linen exclusively. It’s a wonderful combination of eggshell and grey that is just right for capturing my logo. Fun fact: it’s also great for making amigurumi zombies and monsters! The grey color is truly multipurpose! Find Linen on Amazon HERE
!
As a thank you to everyone who reads my blog, I’d like for you to have a FREE PDF copy of this pattern! You can download the free copy of this pattern HERE. Please accept it as a token of my appreciation for making this first year of blogging such an awesome one for me!
So who’s ready to celebrate by making one of this sweet little cat-cakes?! Then let’s go!
Supplies
Size D-3 / 3.25 mm crochet hook
1 skein each of Lion Brand Vanna’s Choice in Lilac, Toffee, Linen, Pink, and small amount of Black for Whiskers and Smile
9 mm safety eyes
Fiberfill stuffing
Scissors
Yarn Needle
Abbreviations
*= indicates the beginning/end of a section to be repeated
beg = beginning
BLO = back loop only
bpdc = back post double crochet
ch = chain
dc = double crochet
fpdc = front post double crochet
sc = single crochet
sl st = slip stitch
st(s) = stitch(es)
rep = repeat
rnd(s) = round(s)
Gauge
Exact gauge is not essential to this project.
Size
About 4.5 inches in length
Notes
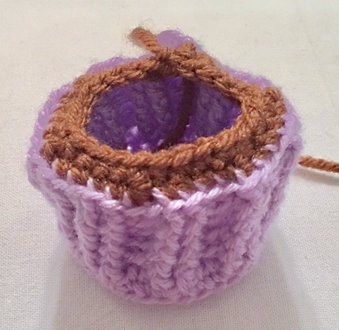
The bottom of the cupcake is made using alternations of the Front Post Double Crochet and the Back Post Double Crochet. These stitches are made around the entire “posts” of the stitches below, instead of being made on top of the stitch like most crochet stitches.
Instructions
Bottom
This piece is worked in continuous rnds until Rnd 8; do not join until that Rnd is reached. You may wish to use a stitch marker and move it up and the beg of each new rnd.
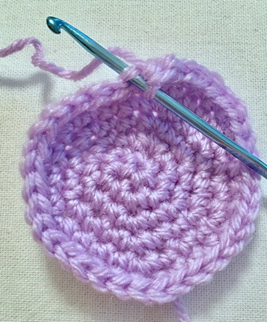
Rnd 1 – With Lilac, make a magic ring, sc 6 in ring. (6 sc)
Rnd 2 – 2 sc in each st around (12 sc)
Rnd 3 – 2 sc in next st, sc in next st; rep around (18 sc)
Rnd 4 – 2 sc in next st, sc in next 2 sts; rep around (24 sc)
Rnd 5 – 2 sc in next st, sc in next 3 sts; rep around (30 sc)
Rnd 6 – 2 sc in next st, sc in next 4 sts; rep around (36 sc)
Rnd 7 – working in BLO, sc around (36 sc)
Rnd 8 – ch 2, dc in each st around. Join with sl st to first st in rnd. Do not turn (36 dc)
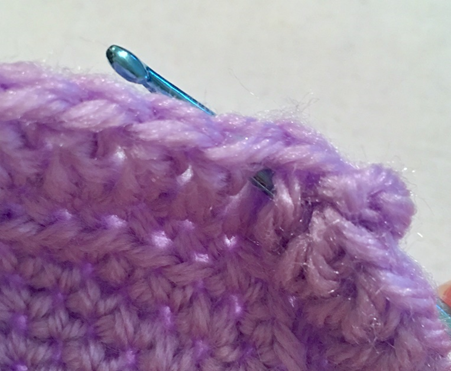
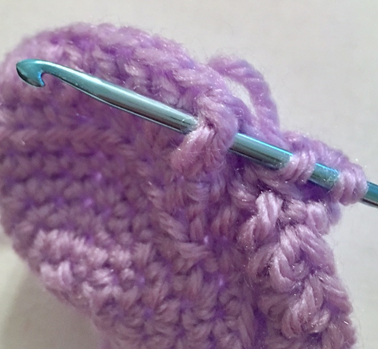
Rnd 9 – ch 2, *bpdc around next 2 dc posts, fpdc around next 2 dc posts.* Rep from * to * 8 more times. Join with sl st to first st of rnd. (18 bpdc, 18 fpdc)
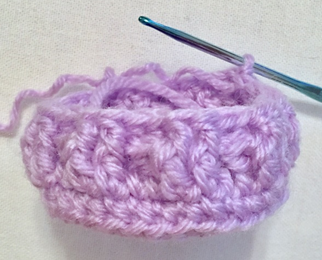
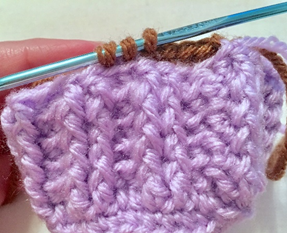
Rnds 10 – 12- rep Rnd 9. At end of Rnd 12, attach Toffee (18 bpdc, 18 fpdc per rnd)
Rnd 13 – working in BLO, sc in next 4 sts, sc2tog over next 2 sts; rep around (30 sc)
Rnd 14 – sc in next 3 sts, sc2tog over next 2 sts; rep around (24 sc)
Fasten off.
Top
This piece is worked in continuous rnds; do not join. You may wish to use a stitch marker and move it up and the beg of each new rnd.
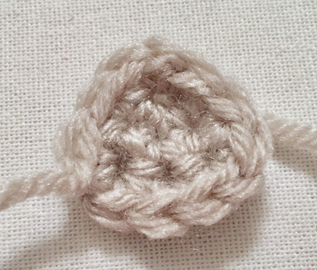
Rnd 1 – With Linen, make a magic ring, sc 6 in ring. (6 sc)
Rnd 2 – 2 sc in each st around (12 sc)
Rnd 3 – 2 sc in next st, sc in next st; rep around (18 sc)
Rnd 4 – 2 sc in next st, sc in next 2 sts; rep around (24 sc)
Rnd 5 – 2 sc in next st, sc in next 3 sts; rep around (30 sc)
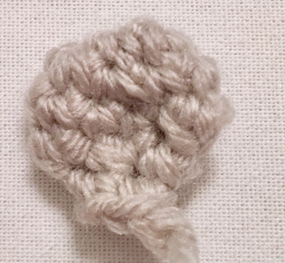
Rnds 6 – 10 – sc in each st around. (30 sc per rnd)
Fasten off, leaving long tail for sewing. Attach safety eyes near center of piece, spaced apart by 5 sts.
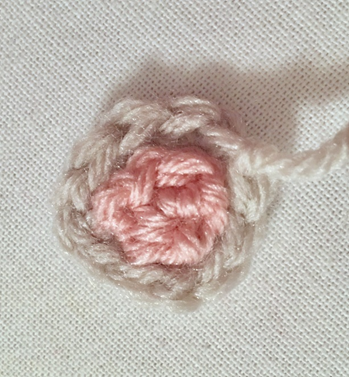
Outer Ear (make 2)
With Linen, ch 2.
Row 1 – sc 3 in 2nd ch from hook. Ch 1, turn (3 sc)
Rows 2 – 3 – sc in each st across, ch 1, turn. Do not turn at end of Row 3 (3 sc)
Edging
Sc 2 up one side of Ear, [sc, ch 1, sc] at tip of Ear, sc 2 down other side of Ear. Join with sl st to first st. (6 sc)
Fasten off, leaving long tail for sewing.
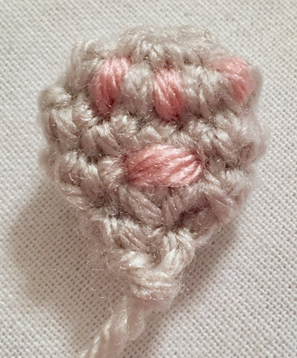
Inner Ear (make 2)
With Pink, ch 2.
Row 1 – sc 3 in 2nd ch from hook. (3 sc)
Fasten off, leaving long tail for sewing.
Paw (make 2)
This piece is worked in continuous rnds; do not join. You may wish to use a stitch marker and move it up and the beg of each new rnd.
Rnd 1 – With Linen, make a magic ring, sc 6 in ring. (6 sc)
Rnd 2 – 2 sc in each st around (12 sc)
Rnd 3 – sc in each st around (12 sc)
Rnd 4 – sc2tog in each st around (6 sc)
Rnd 5 – sc in each st around (6 sc)
Fasten off, leaving long tail for sewing. Use beg tail to lightly stuff inside of Paw.
Finishing
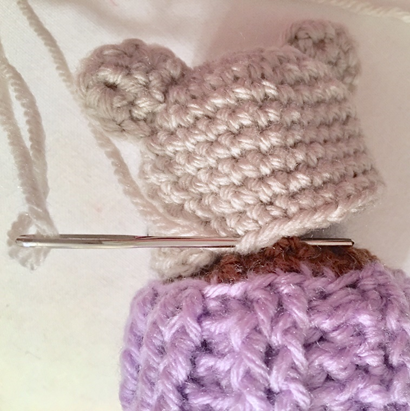
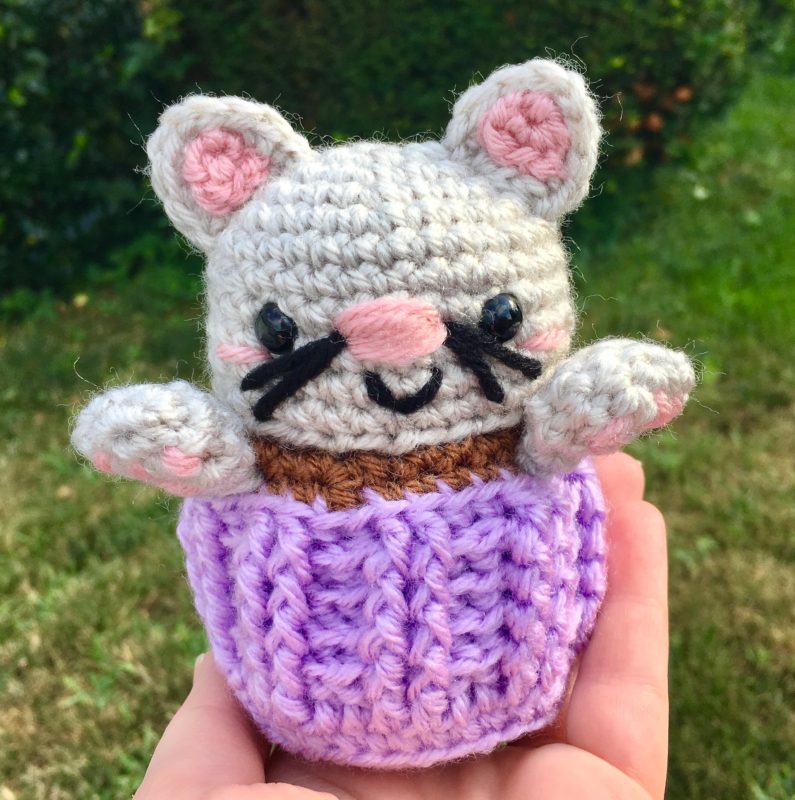
With Pink, sew several horizontal lines in center of Top for Nose. With Black, sew two lines on each side of Nose for Whiskers, and make a small V under Nose for Smile. With Pink, sew horizontal lines in outer corner of each Eye for Blush. Press Paws flat. With Pink, sew 3 vertical lines and several large horizontal lines on each Paw for Paw Pads. Sew Inner Ears to Outer Ears, and sew Ears to Top. Stuff Top and Bottom and sew Top to Bottom. Sew Paws onto Toffee portion of Bottom in front of Top. Weave in all ends or tie off and hide knots inside sts.
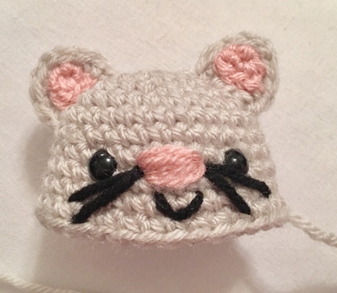
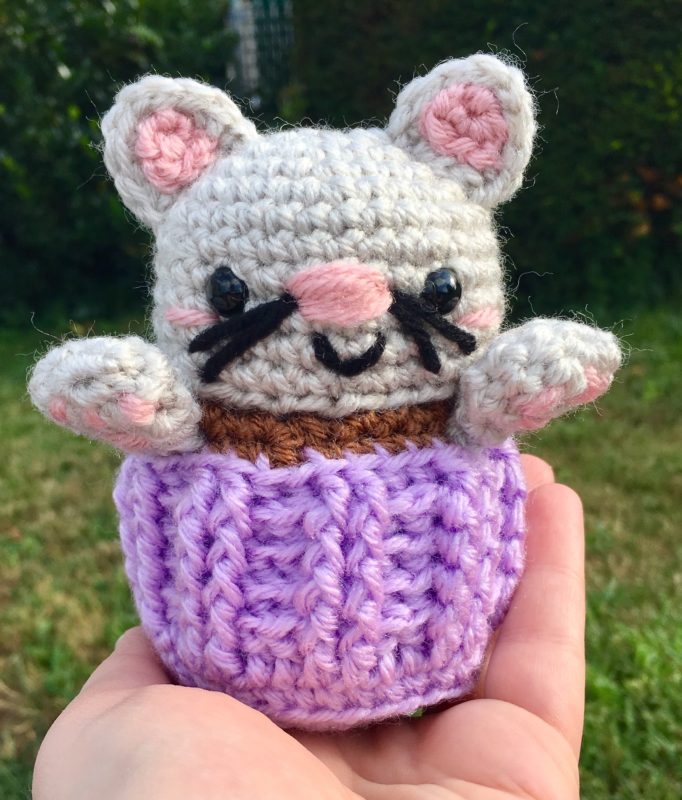
Here is the finished Kitty Cupcake!
I hope you enjoyed crocheting this kitty cupcake along with me! Thank you again for making this first year of my blog such a fun and memorable one! I can’t wait to bring you more fun patterns like this one – please be sure to subscribe to my email list and follow me on social media so that you can stay up to date on all my latest designs!
Happy Crocheting!
COPYRIGHT: This pattern is owned by Crafty Kitty Crochet (Melissa Moore). Any reselling or distribution of this pattern is prohibited. Sale of items made using this pattern is welcomed, but I do ask that credit/a link be provided back to my site, craftykittycrochet.com.
Comments (4)
Halloween Pumpkin Kitty – Crochet Pattern – Crafty Kitty Crochet
September 23, 2019 at 9:53 pm
[…] was also very inspired by another kitty-centric project of mine, my Kitty Cupcake that I published for my one year blog anniversary! I guess I’m just a big fan of the image of […]
Kitty Ice Cream Cone – Two Year Anniversary Crochet Pattern ~ Crafty Kitty Crochet
July 24, 2020 at 3:41 pm
[…] you might remember from last year, I published a Kitty Cupcake Pattern for my one-year anniversary. So I knew I had to keep within the same theme this year! Kitty Ice […]
Amigurumi Ice Cream Cookie Cat – 4 Year Anniversary Pattern ~ Crafty Kitty Crochet
July 28, 2022 at 10:27 pm
[…] for every single person who has used my patterns! Keeping with tradition, as you know from my Amigurumi Kitty Cupcake, Kitty Ice Cream Cone, and Kitty Popsicle, I’d like to present you with this Ice Cream Cookie Cat […]
Swiss Roll Cat – Five Year Anniversary Crochet Pattern ~ Crafty Kitty Crochet
August 1, 2023 at 2:52 pm
[…] I’d love for you to see my other anniversary patterns. They’re all cat/dessert themed – my Kitty Cupcake, Ice Cream Kitty, Kitty Popsicle, and Ice Cream Cookie Cat are all free PDFs as well, and would be […]