
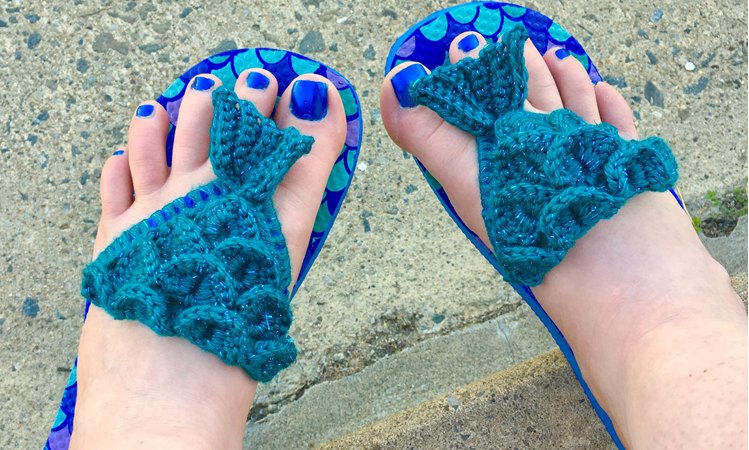
Mermaid Flip Flops Crochet Pattern (Teens / Adults)
They said I could be anything, so I became a MERMAID! Or at least my feet did once I was wearing these magical flip flops that are so easy to make! If you’re looking for a quick, easy and fun summer project to liven up your flip flops, then you have come to the right place. The crocheted mermaid scale adornment takes minutes to work up, and the flip flop can be your favorite pair of store-bought flip flops – or even a pair of Dollar Tree flip flops (that’s where I got mine)!
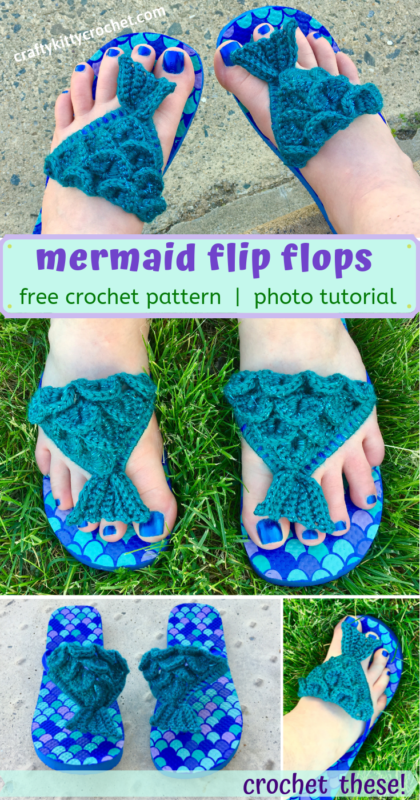
(Pin it for later!)
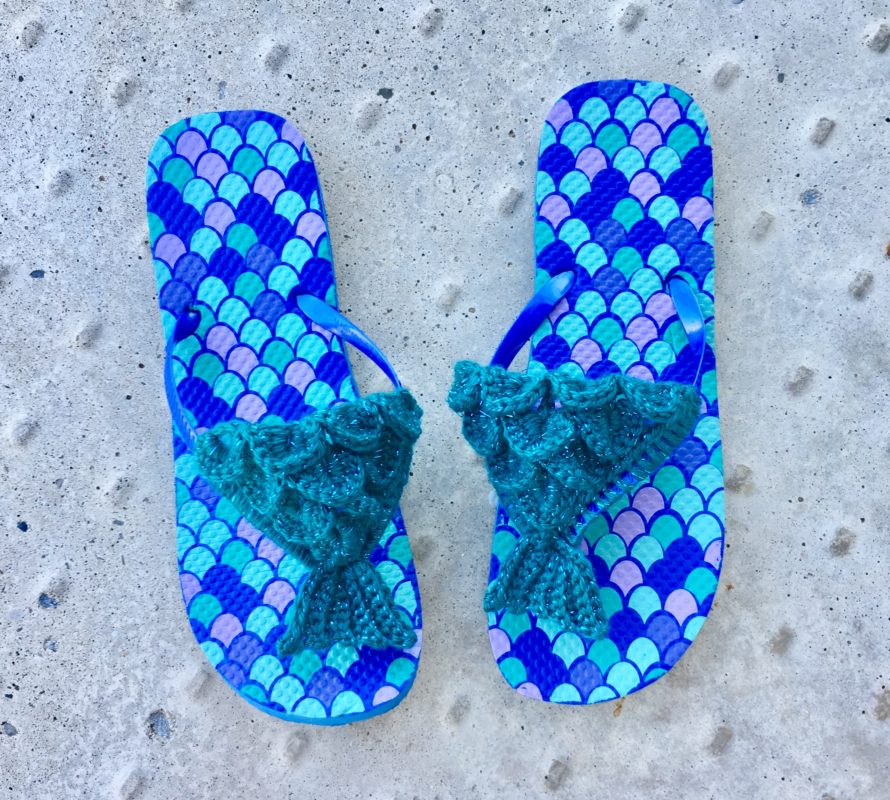
I really lucked out and found flip flops that were actually mermaid themed, which I think makes these even cuter! I was able to track down some cute similar ones on Amazon – take a look HERE!
The body of the Mermaid Scales in this pattern is the same as the first few rows of my Mermaid Scarf (pattern HERE!) – so it might look familiar! After just a few rows of the Crocodile Stitch, the scales are complete. The fin is super easy and fast to make, and crocheting around the straps of the flip flop (making a base to sew on the Mermaid Scales later) makes the plastic straps SO much comfier to wear! I don’t know about you, but I have a problem with flip flop straps “biting” my foot if the plastic is too rough or tight. Not a problem here though – the only thing on your feet will be cozy yarn!
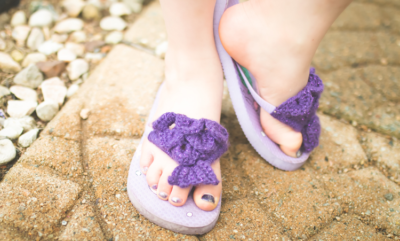
This pattern is also adjustable – I included some notes on how to size it differently for different sized flip flops (Small, Medium, Large). But you could use that logic to custom make it in other sizes as well! Speaking of other sizes – keep an eye out for a KIDS VERSION of this pattern, coming soon!!!!!!!
Speaking of yarn, I went with my signature Mermaid yarn for this pattern – Caron Simply Soft Party! It’s a lovely yarn that’s just the right weight, available in gorgeous jewel tones, and most of all – it SPARKLES! It doesn’t get much more magical than that! I used Teal for these flip flops, which you can find on Amazon HERE! I’m also a big fan of Purple and Royal (find them on Amazon HERE
and HERE
, respectively)!
Ready to make some mermaid magic? Then let’s get started!
Supplies
* Caron Simply Soft Party in desired color (“Teal” used in cover photo)
* Size E-4 / 3.5 mm crochet hook for Women’s Medium (7/8) and Large (9/10) flip flops; Size D-3 / 3.25 mm crochet hook for Women’s Small (5/6) [Hook size can be moved up or down to accommodate different Flip Flop sizes.]
* Women’s Flip Flops in desired size
* Yarn Needle
* Scissors
Abbreviations
*= indicates the beginning/end of a section that is to be repeated
BLO = BLO
Ch = chain
Croc St = crocodile stitch
Dc = double crochet
Sc = single crochet
St = stitch
Rem = rem
Rep = repeat
Size
Varies; Mermaid Scales measure about 5 inches wide (at widest point) and 2.75 in length (before fin) for Women’s Medium/Large pair of flip flops
Gauge
Exact Gauge is not essential to this project.
Notes
* Scales are worked from bottom tip upwards, in alternating rows of 2dc cluster/dc rows, and croc st/sc rows. One increase occurs each row (either a 2dc cluster/dc increase, or croc st/sc increase).
* At the end of each crocodile stitch row, work will already be turned from creating last croc st. At the end of each 2dc cluster row, work will not be turned until after the first half of the croc in the following row is made. Therefore, instructions do not include a “turn” at the end of each row.
Here is a diagram of the order in which the double crochet stitches of the crocodile stitch are worked:

Instructions
Mermaid Scales
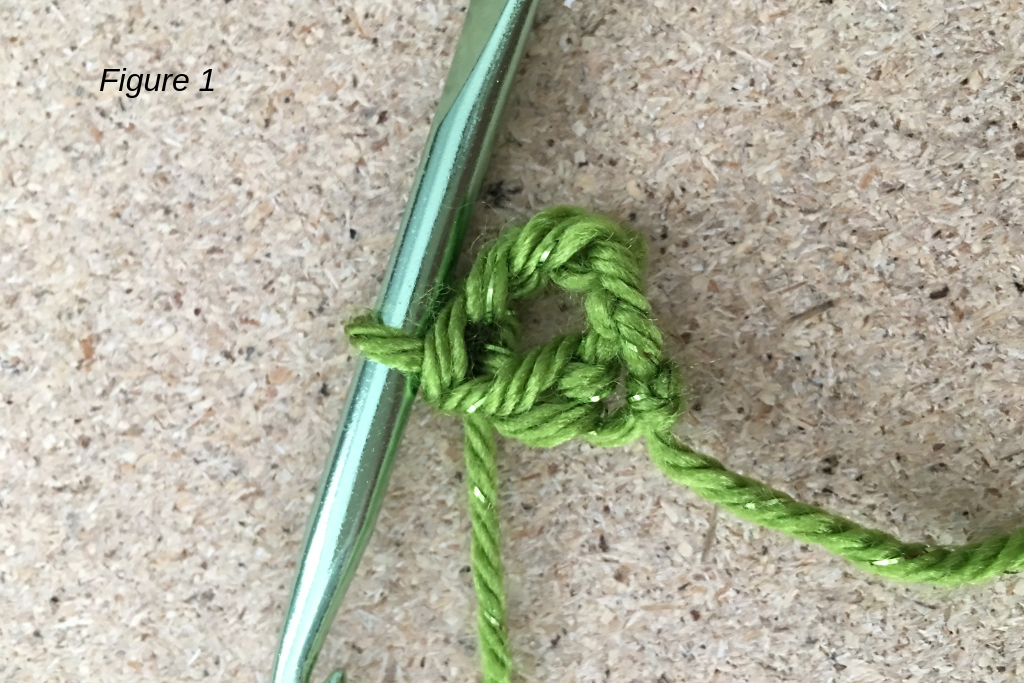
Row 1 – Ch 4, Dc in 4th ch from hook – counts as 2dc cluster (Fig.1). Ch 1 (1 dc)
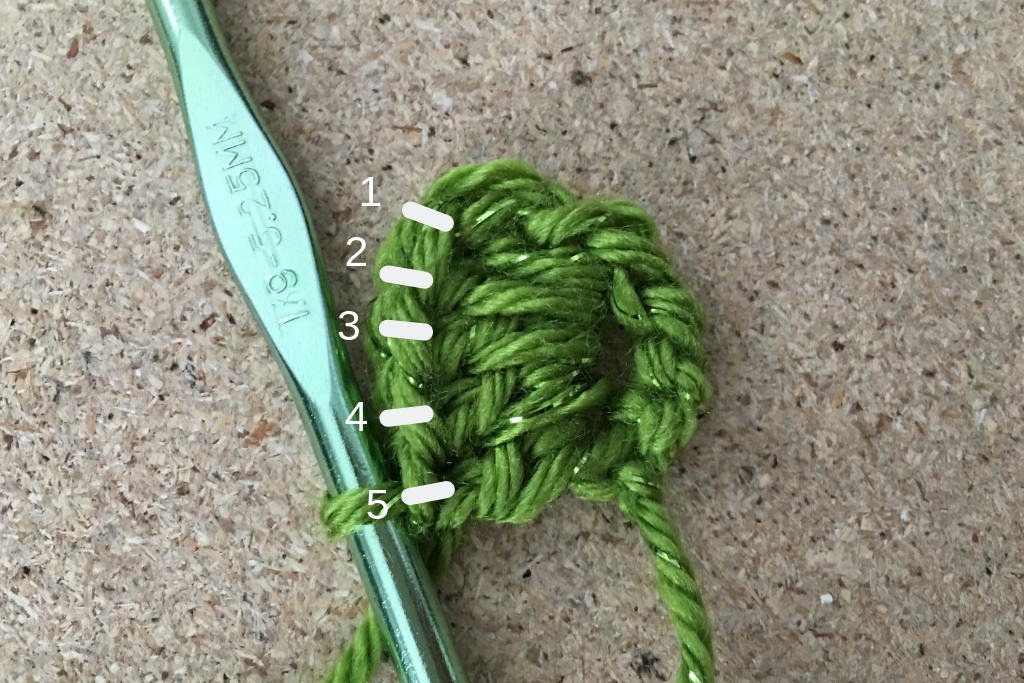
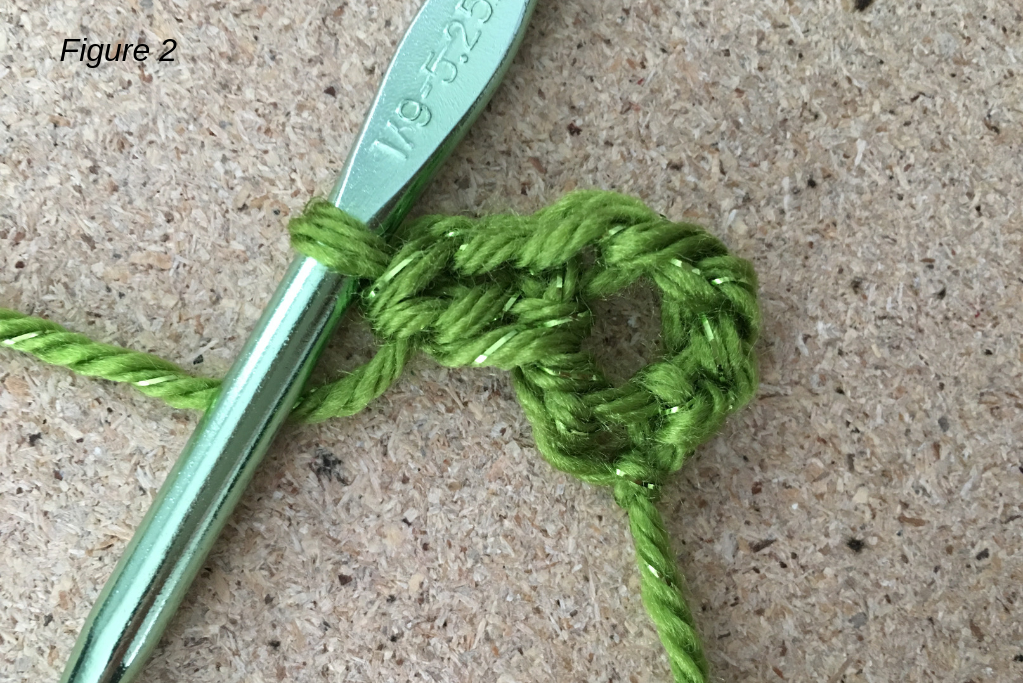
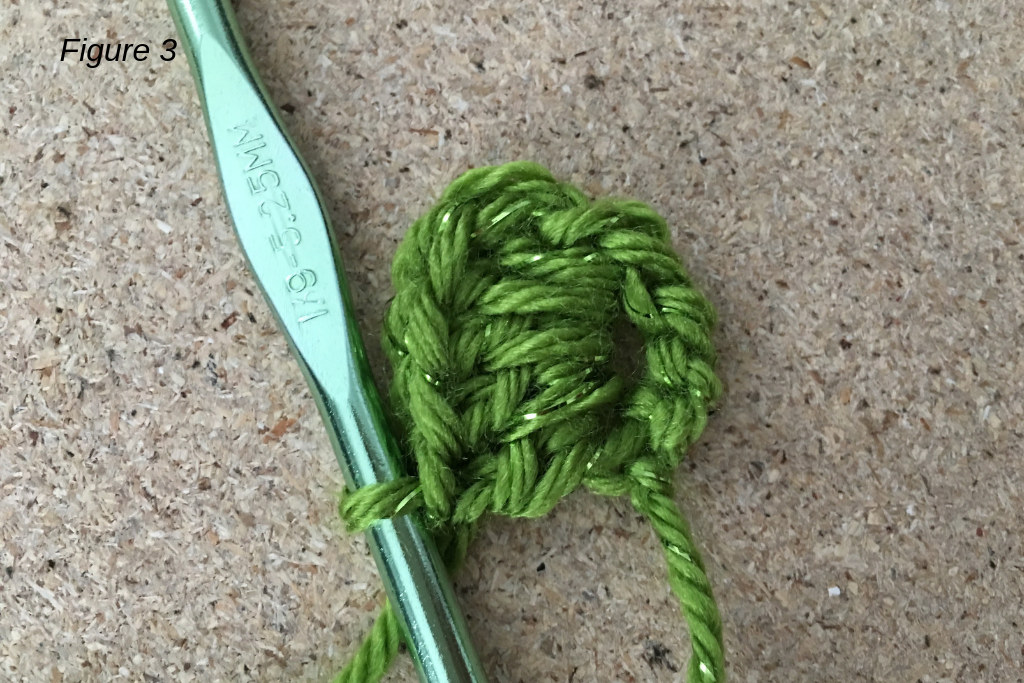
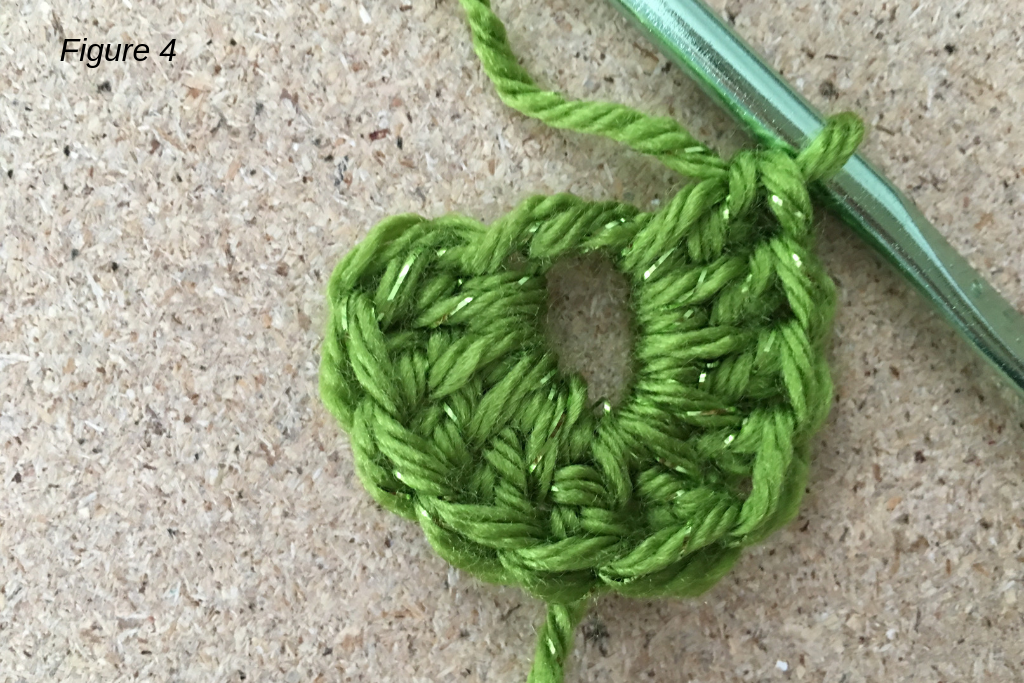
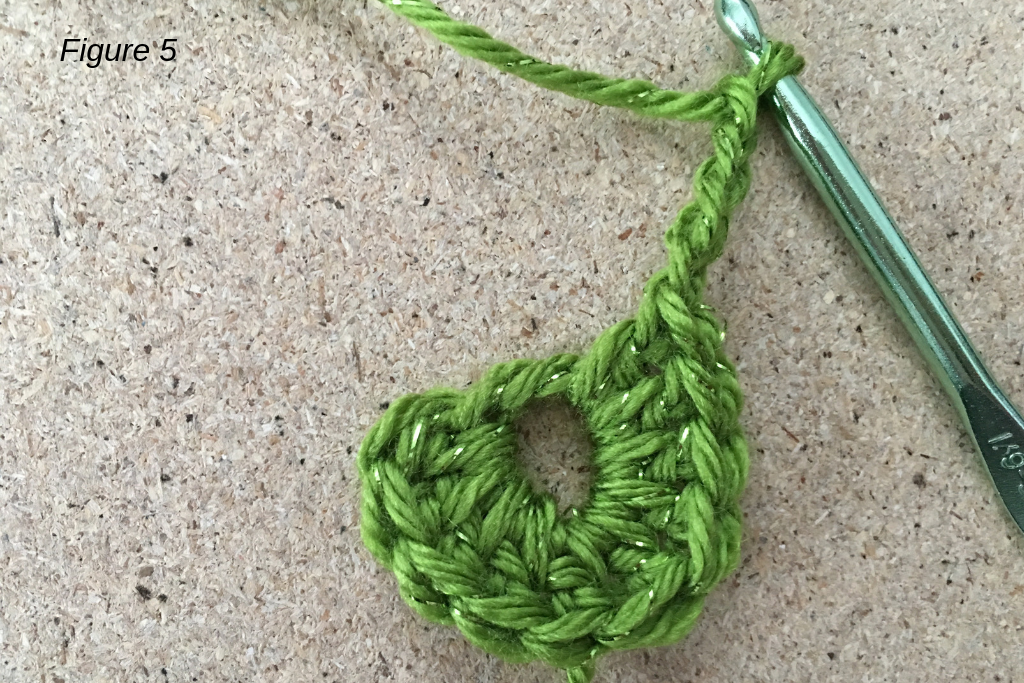
Row 2 – Croc st around two posts (dc from last row, and ch from Ch 4 of last row), working up towards the top of second post while creating second half of croc st (Figs. 2-4). Ch 4 (Fig. 5). (1 croc st)
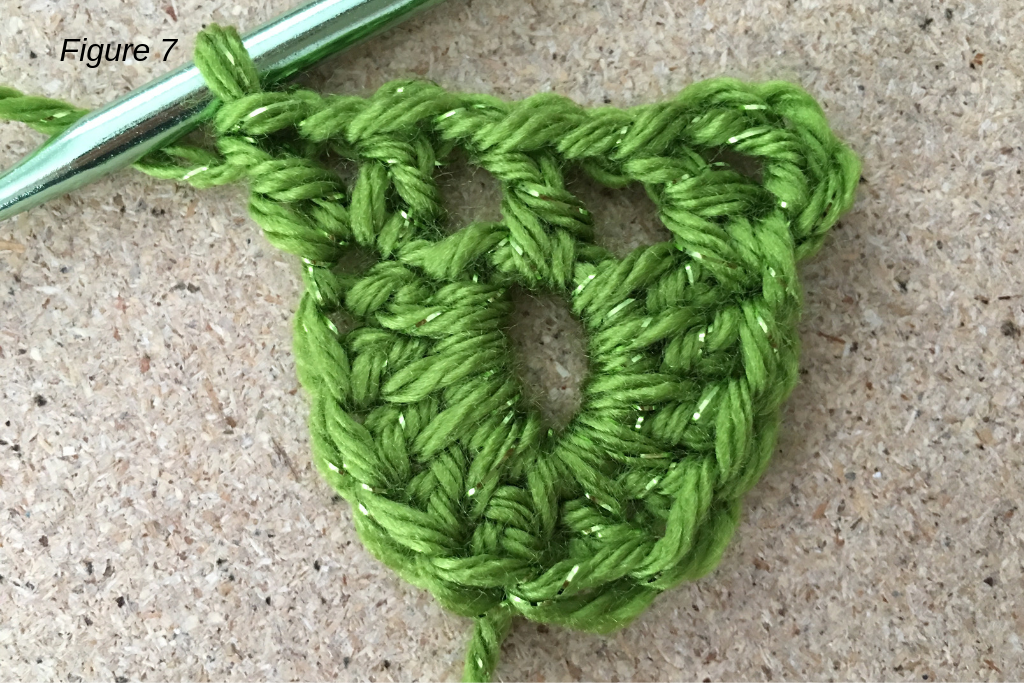
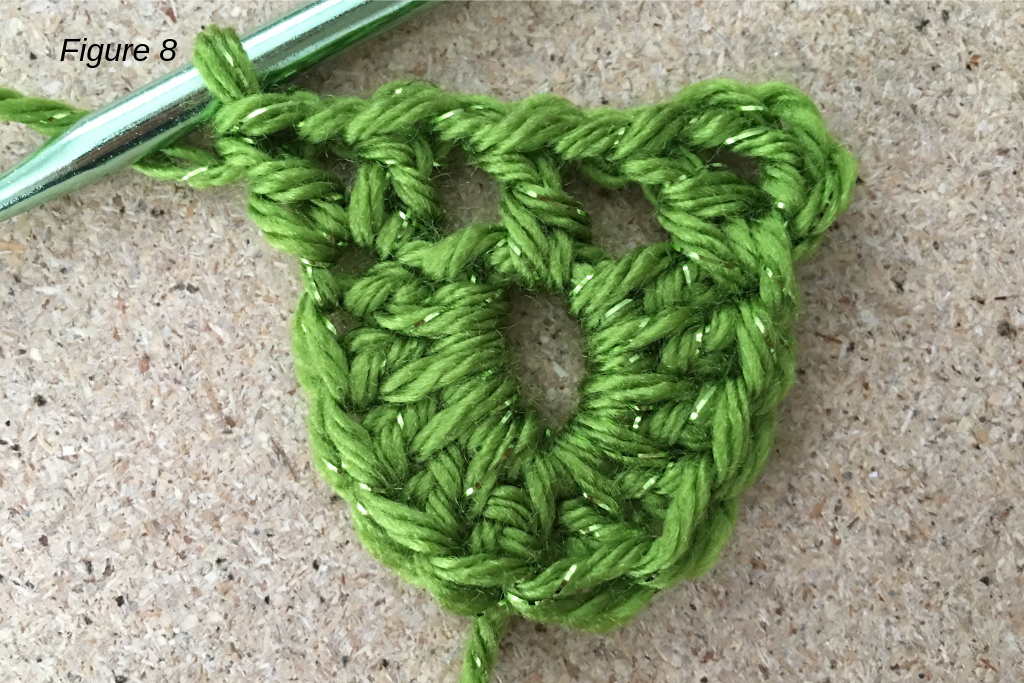
Row 3 – Dc in same st – counts as 2dc cluster (Fig. 6). Ch 1. Dc in center of croc st below (Fig. 7), ch 1. In outer edge of last croc st, [dc, ch 1, dc] (Fig. 8) (2dc cluster made). Ch 1 (2 2dc clusters made, 1 dc)
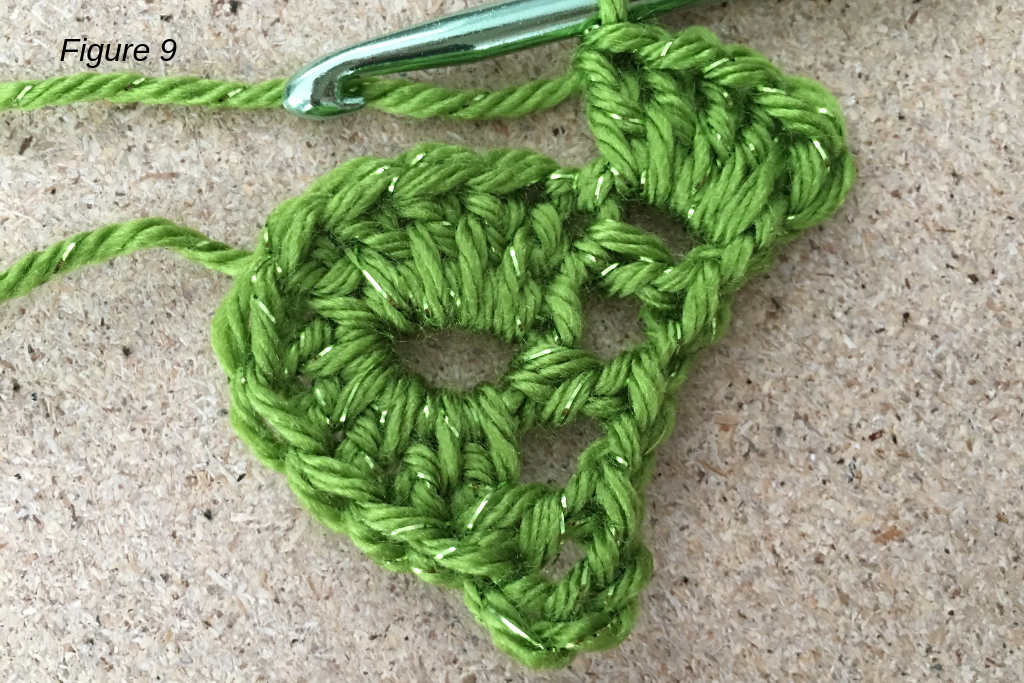
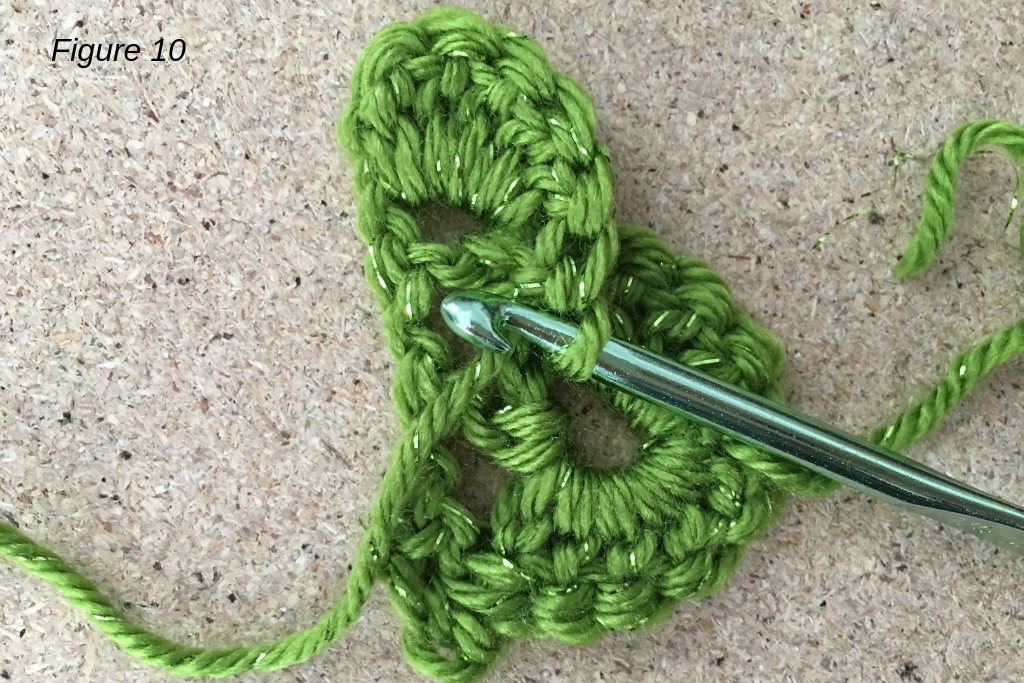
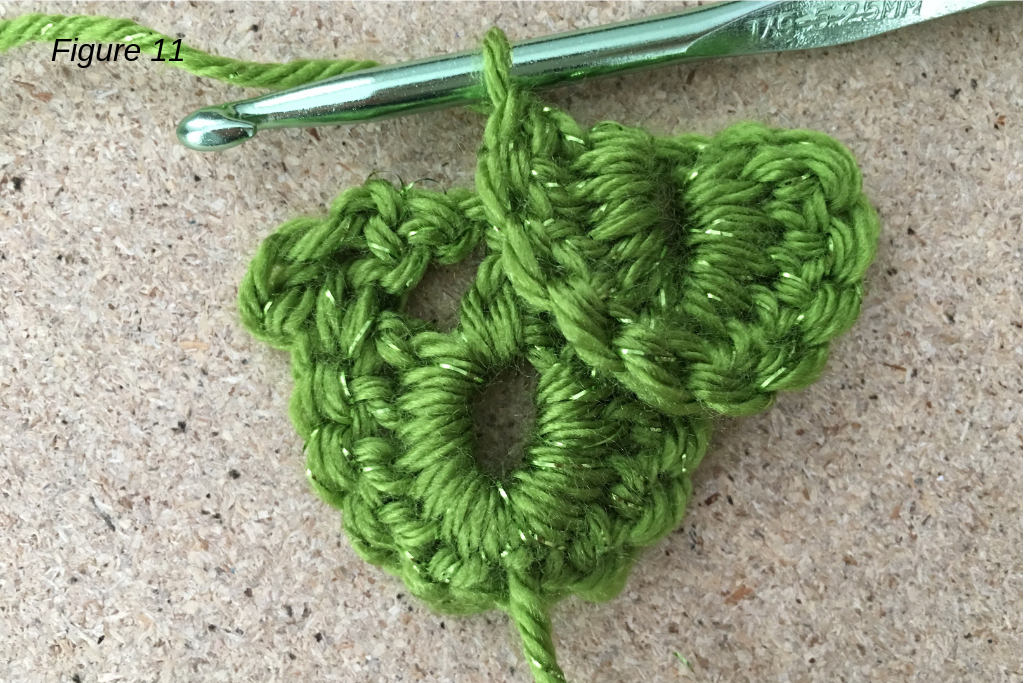
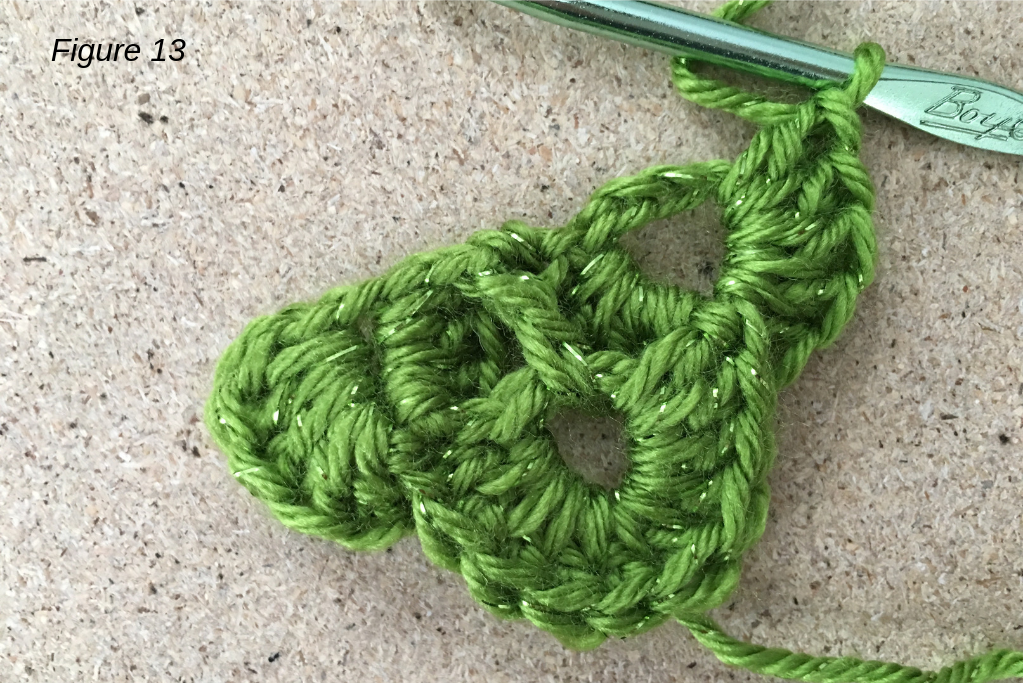
Row 4 – Croc st around first 2dc cluster, turning work while creating second half of croc st (Figs. 9-11). Sc in next dc, croc st around last 2dc cluster (Figs 12 & 13). Ch 4 (2 croc sts, 1 sc)


Row 5 – Dc in same st, ch 1. Dc in center of next croc, ch 1. In next sc, [dc, ch 1, dc]. Ch 1, dc in center of next croc, ch 1. In outer edge of last croc, [Dc, ch 1, dc]. Ch 1 (3 2dc clusters, 2 dc)
Row 6 – *Croc st around first 2dc cluster, turning work while creating second half of croc st. Sc in next dc.* Rep from * to * once more. Croc st around last 2dc cluster. Ch 4 (3 croc sts, 2 sc)
Row 7 – Dc in same st. *Ch 1, dc in center of next croc, ch 1. In next sc, [dc, ch 1, dc].* Rep from * to * once more. Ch 1, dc in center of next croc st, ch 1. In outer edge of last croc st, [dc, ch 1, dc]. Ch 1 (4 2dc clusters, 3 dc)
Row 8 – *Croc st around first 2dc cluster, turning work while creating second half of croc st. Sc in next dc.* Rep from * to * 2 more times. Croc st around last 2dc cluster. Ch 4 (4 croc sts, 3 sc)
Edging
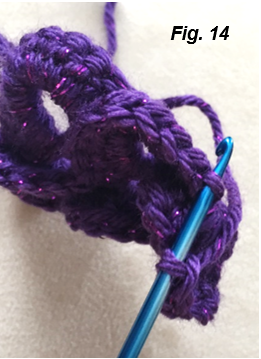
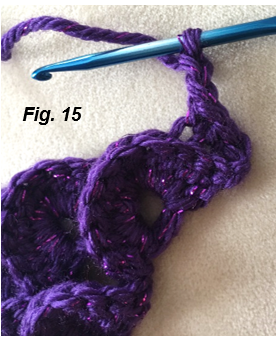
Working around sides of piece in BLO (Fig 14), *sc in first 3 sts of next croc, ch 2 (Fig 15)*; rep from * to * 6 times, making final 3 sc in first sts of first croc st from Row 8. Do not ch 2 at the end of last rep.
Fasten off, leaving long tail for sewing.
Fin
Piece is worked in BLO (Fig 16)
Ch 8.
Row 1 – Sc in 2nd ch from hook and in each st across. Ch 1, turn (7 sc)
Row 2 – Sc in next 6 sts, leave rem st unworked. Ch 1, turn (6 sc)
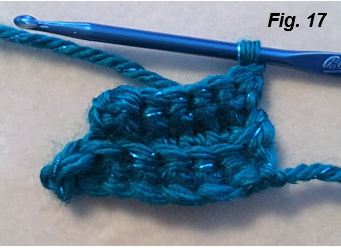
Row 3 – Sc in each st across. Ch 1, turn (Fig 17) (6 sc)
Row 4 – Sc in next 5 sts, leave rem st unworked. Ch 1, turn (5 sc)
Row 5 – Sc in each st across. Ch 1, turn (5 sc)
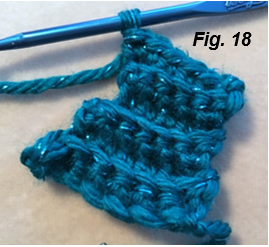
Row 6 – Sc in next 4 sts, 2 sc in last st. Ch 1, turn (Fig 18) (6 sc)
Row 7 – Sc in each st across. Ch 1, turn (6 sc)
Row 8 – Sc in next 5 sts, 2 sc in last st. Ch 1, turn (7 sc)
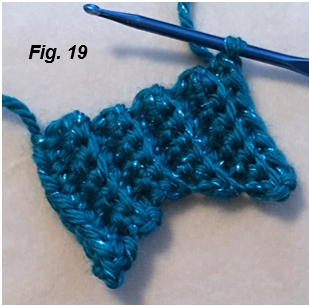
Row 9 – Sc in each st across (Fig 19) (7 sc).
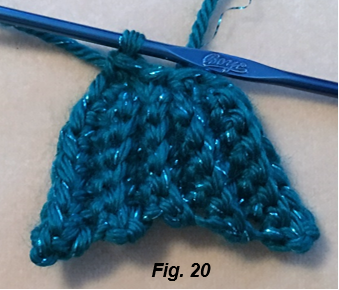
Sc 3 sts evenly across top of Fin, making last sc in first sc of first Row (Fig 20).
Fasten off, leaving long tail for sewing.

Straps
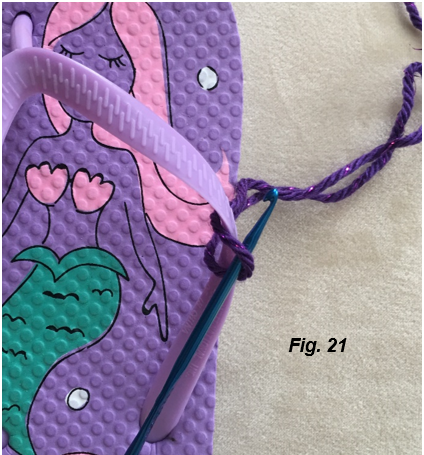
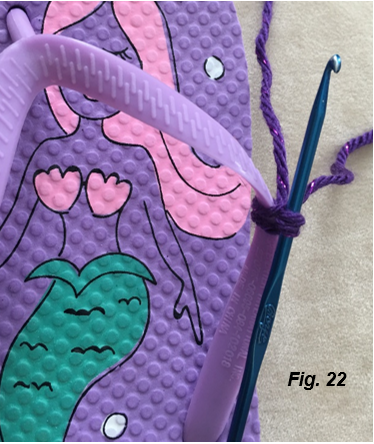
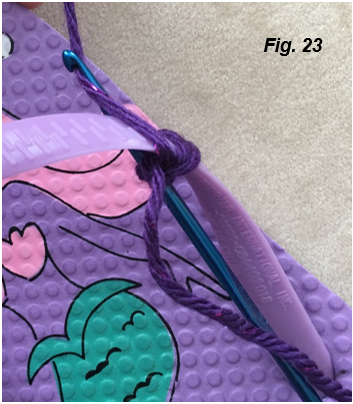
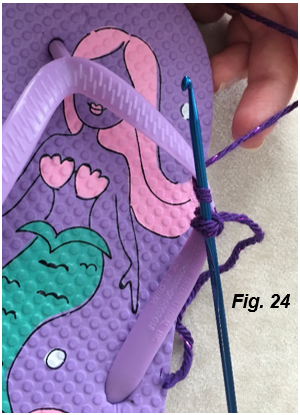
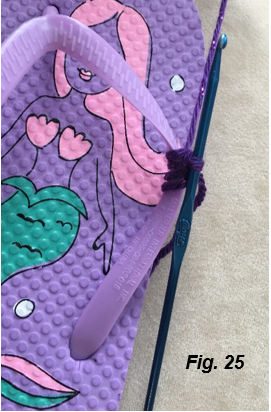
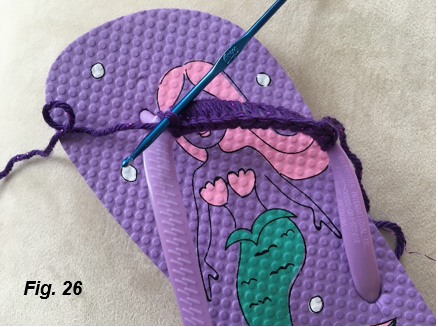
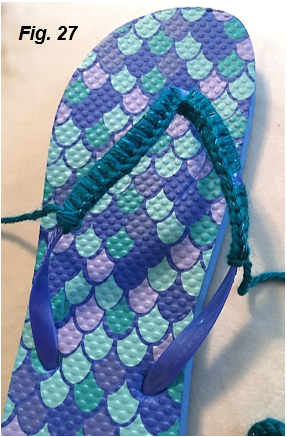
Attach yarn around right strap and ch 1 (Figs 21 & 22). Sc 16 around each strap (Figs 23 – 27). Fasten off.
Finishing
Weave in all ends except long tail left from finishing off Mermaid Scales. Sew sts of Straps along the edges of Mermaid Scales (Fig 28). Sew fin to bottom peak of Scales (on top of plastic piece that goes between toes). Weave in ends.

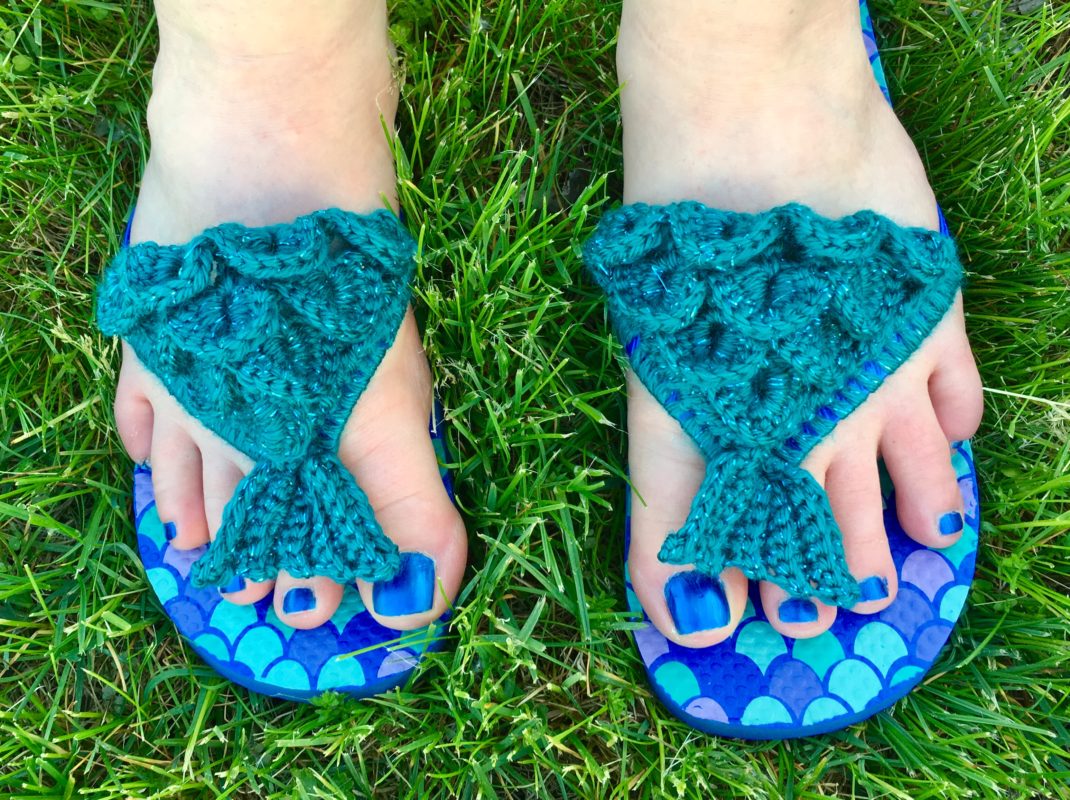
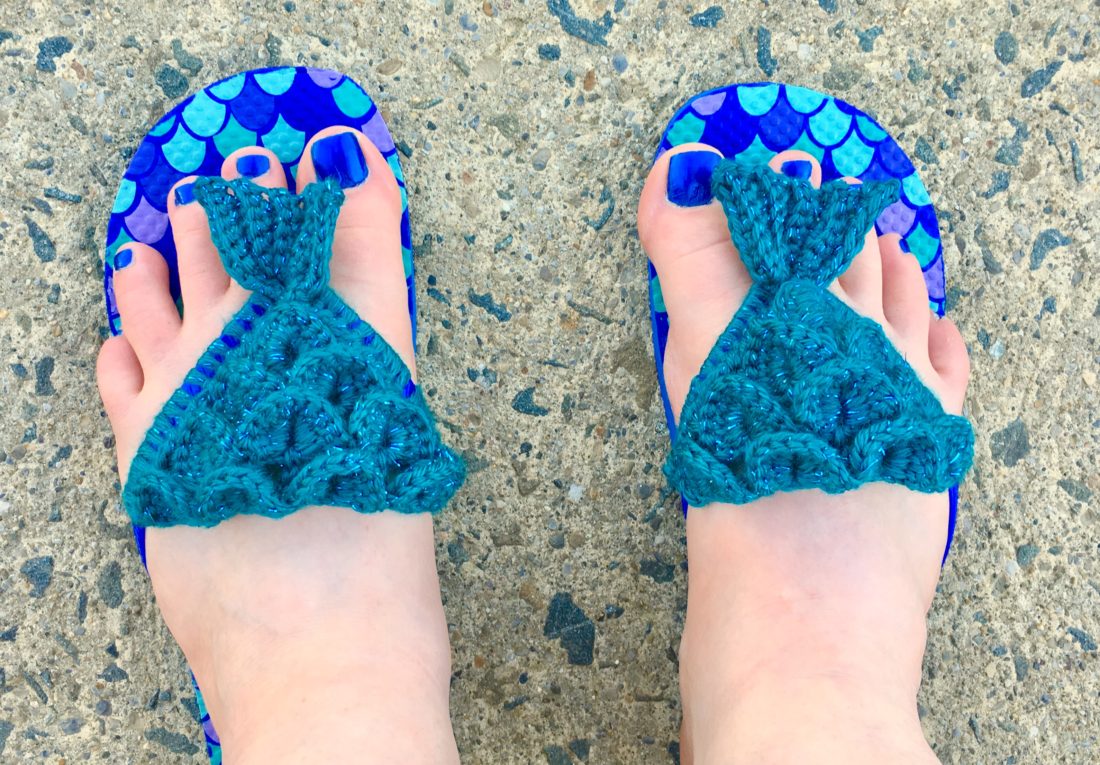
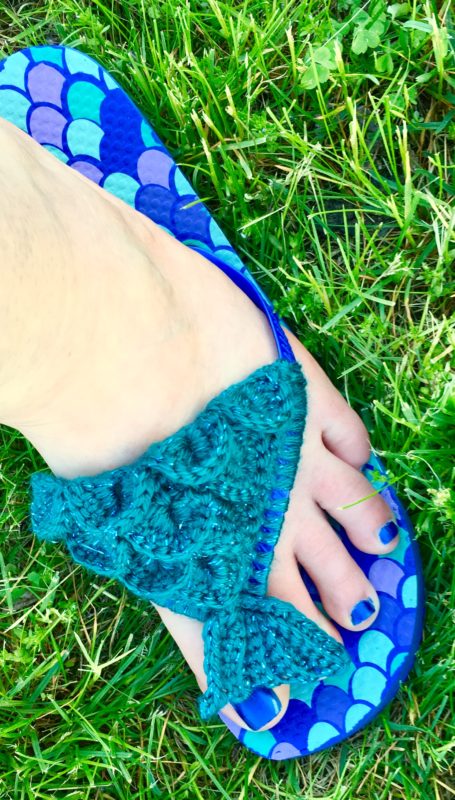
Here are the finished Mermaid Flip Flops!

I hope you enjoyed crocheting these Mermaid Flip Flops along with me! Keep an eye out for a KIDS VERSION coming soon, as well as many other fun patterns I have planned for my blog! Be sure to subscribe to my email list and follow me on social media to keep up to date, and Happy Crocheting!
COPYRIGHT:
This pattern is owned by Crafty Kitty Crochet (Melissa Moore). Any reselling or distribution of this pattern is prohibited. Sale of items made using this pattern is welcomed, but I do ask that credit/a link be provided back to my site, craftykittycrochet.com.
Comments (5)
Barb
July 28, 2019 at 2:02 pm
These look great! However, I am about to throw my hands up and call it done. I cannot for the life of me figure it out after the first row even though I am an experienced crocheter. Any chance you may consider a video? ARGH!!
Melissa
July 28, 2019 at 5:54 pm
Hi Barb, thank you for your compliments, but sorry to hear you’re having trouble with the pattern! There’s a diagram before the pattern starts that can be helpful, it shows the order in which you make the “croc” stitch around the posts of Row 1. Basically, you are making 5 dc around the dc you make in Row 1, and 5 more around your initial chain stitch in Row 1. I’m actually planning on eventually making a video of my Mermaid Triangle Scarf which follows the same pattern in the first few rows as this pattern! That will be in the near future, hopefully – unfortunately, my full time schedule prevents me from making more video tutorials at the moment, but I’m hoping to change that very soon. Hope that helps! Keep at it and please let me know if you have any more questions, I’m happy to help! ~ Melissa
Barbara
August 3, 2019 at 1:39 am
Thanks for your reply! Started over and carefully read the instructions and success!! They turned out as nice as yours 😀. Planning on starting the scarf for a Christmas gift.
Thanks for sharing your talent, you are very creative.
Barb
Melissa
August 5, 2019 at 9:22 pm
That’s great news, I’m so happy to hear it!!! I hope you have lots of fun with the scarf – thank you so much for your sweet compliments and for using my patterns! ^_^
Mermaid Flip Flops Free Crochet Pattern – Knitting – DIY – Craft Blog
May 31, 2020 at 9:41 pm
[…] Flip Flops […]