
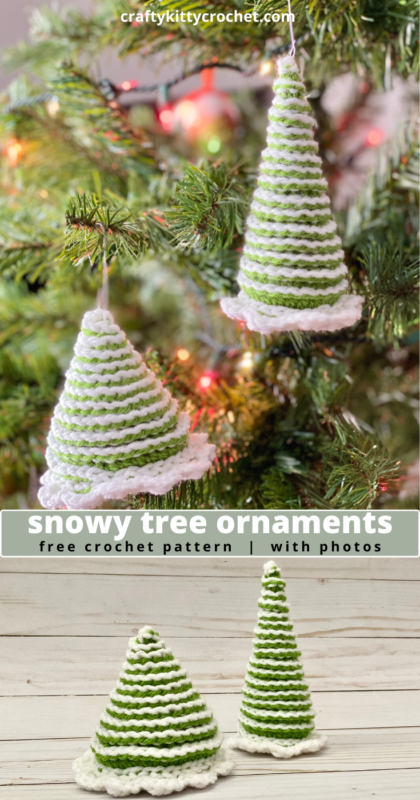
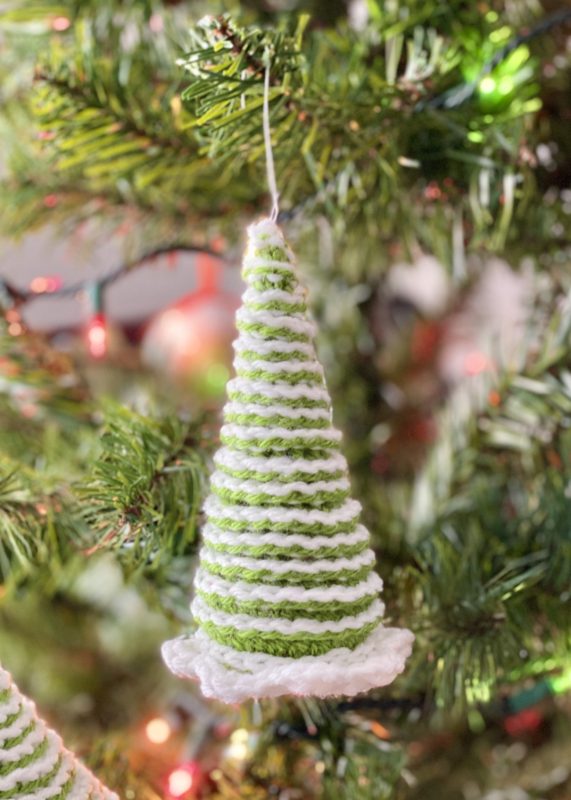
12 Weeks of Christmas: Snow-Tipped Tree Ornaments – Crochet Pattern
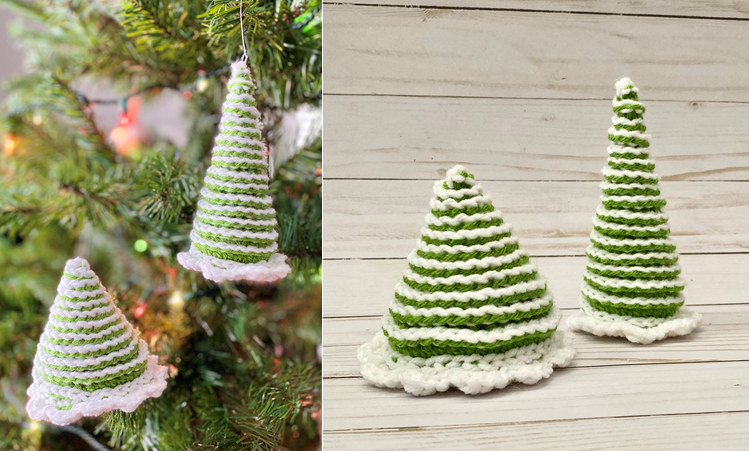
Oh Christmas Tree, Oh Christmas Tree, your pattern is so easy! There are few symbols of Christmas that are more recognizable than a classic Christmas tree. But what if your tree could have little trees of its own? That’s where these fun, fast, cute ornaments come in! They have an adorable and festive look with very little effort. Plus, they come in two sizes – so you can enjoy a little variety in your tree ornaments!
Pin it for later!
If you’ve been keeping up with my other 12 Weeks of Christmas patterns, you know that I’m a big fan of fun, unique ornaments (mermaids, kawaii food, you name it!). But this time I went a bit more traditional with some tranquil evergreens with snow-tipped branches. That being said, you could really mix it up with these trees, too, and create a more non-traditional look – like pastel or rainbow toned trees! Whatever your tastes are, you can express them through these fun little trees!
As you may know from my other patterns, I’m a big fan of Lion Brand Vanna’s Choice. With a wide range of colors and sturdy medium weight texture, it’s great for small projects like amigurumi (as well as other projects). I decided not to go too dark with the green tone in the spirit of keeping the look bright and cheery. I chose “Fern” (on Amazon HERE!), which is a nice medium grass-green! The snow is classic “White” (on Amazon HERE
!).
And if your tree is already full this year, no worries! You can also use these trees as cute little decorations on a tabletop. They’d look great in any room – as part of a dining room centerpiece, on a coffee or end table in the living room, next to the coffee maker in the kitchen, etc.!
So who’s ready to trim…err…crochet….these little trees? Let’s get started!!!
Supplies
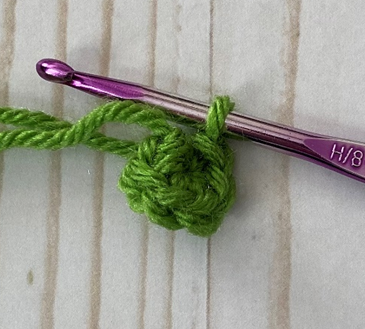
Size H/8 5.00 mm crochet hook
1 skein each of Lion Brand Vanna’s Choice in Fern, White
Fiberfill stuffing
Yarn Needle
Scissors
Ornament hook or small piece of yarn for hanging
Abbreviations
*= indicates the beginning/end of a section to be repeated
BLO = back loop only
Hdc = half double crochet
Rep = repeat
Rnd(s) = round(s)
Sc = single crochet
Sl st = slip stitch
St(s) = stitch(es)
Gauge
Exact gauge is not essential to this project.
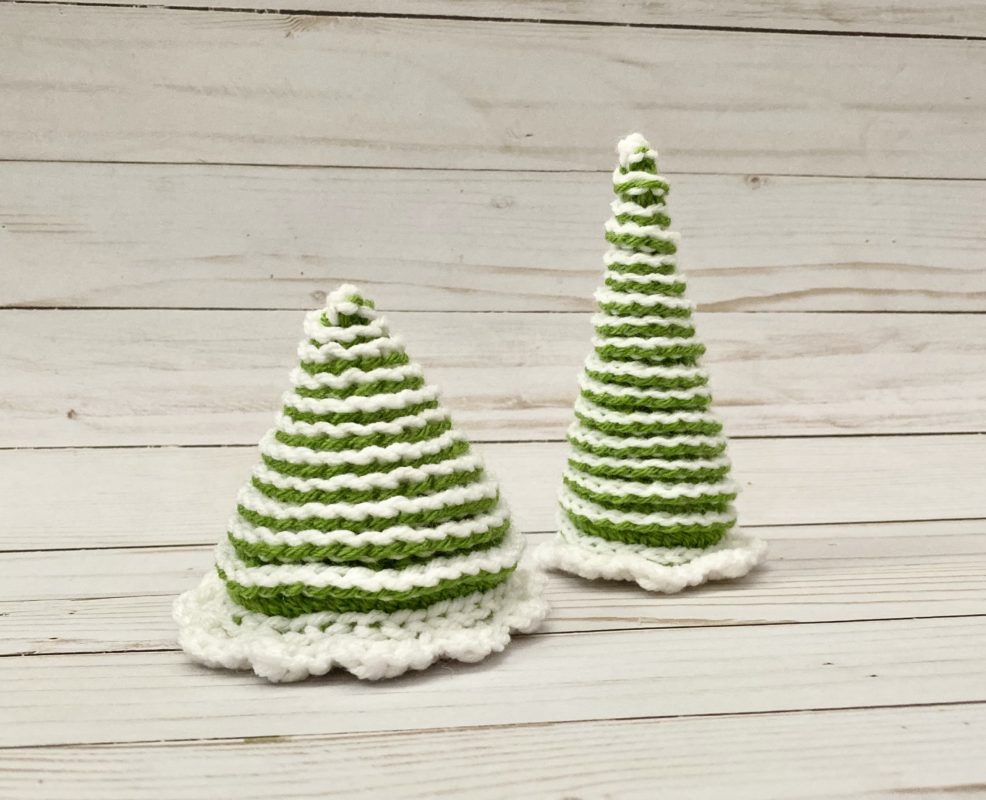
Size
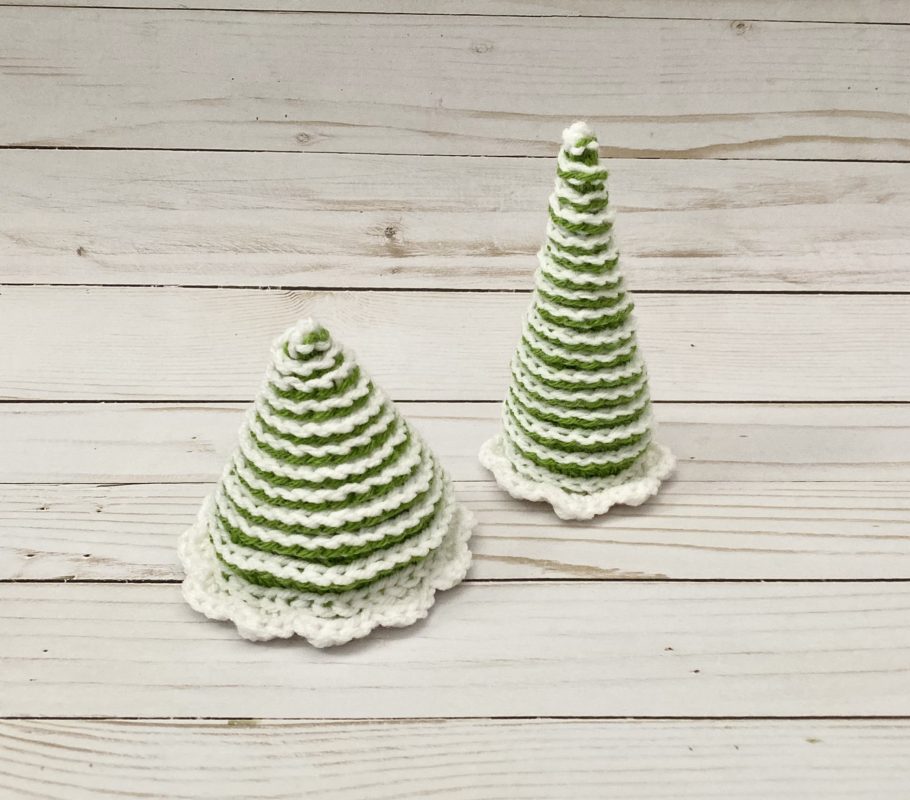
Short Tree: about 4 inches tall; Tall Tree: about 5.5 inches tall
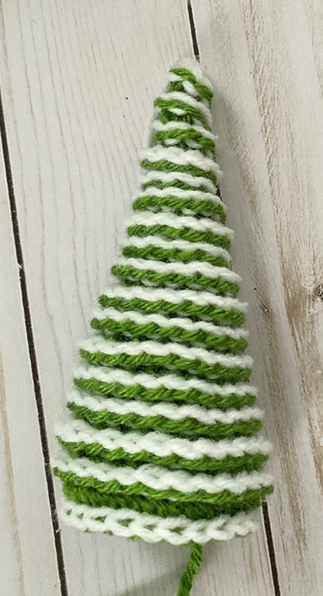
Short Tree
This piece is worked in continuous rnds; do not join. You may wish to use a stitch marker and move it up at the beginning of each new round. Note: all rounds starting with Rnd 2 are worked in BLO.
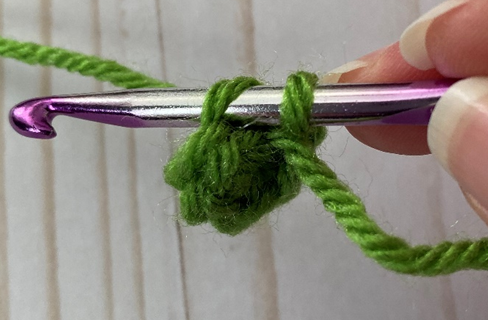
Rnd 1 – With Fern, make a magic ring. 6 sc in ring (6 sc)
Rnd 2 – sc in each st around. (6 sc)
Rnd 3 – 2 sc in next st; rep around (12 sc)
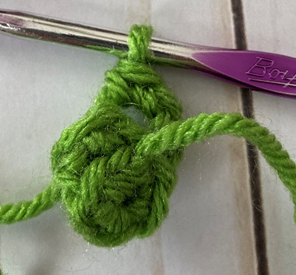
Rnd 4 – sc in each st around. (12 sc)
Rnd 5 – 2 sc in next st, sc in next st; rep around. (18 sc)
Rnd 6 – sc in each st around. (18 sc)
Rnd 7 – 2 sc in next st, sc in next 2 sts; rep around. (24 sc)
Rnd 8 – sc in each st around. (24 sc)
Rnd 9 – 2 sc in next st, sc in next 3 sts; rep around. (30 sc)
Rnd 10 – sc in each st around. (30 sc)
Rnd 11 – 2 sc in next st, sc in next 4 sts; rep around. (36 sc)
Rnd 12 – sc in each st around. (36 sc)
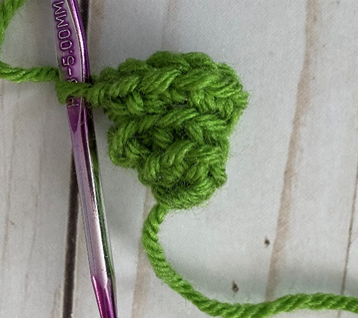
Fasten off Fern.
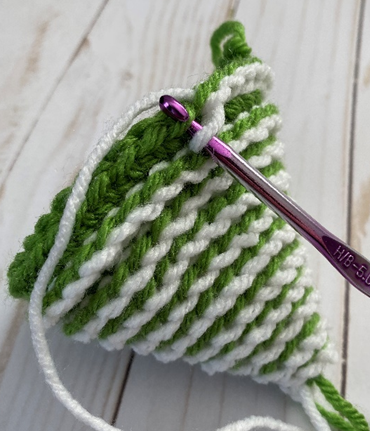
Attach White in rem loop (of sts worked in BLO) of first st from Rnd 2.
Sl st in each rem loop around, down to bottom of Tree. Sl st in BLO of sts of Rnd 12, as well.
Fasten off.

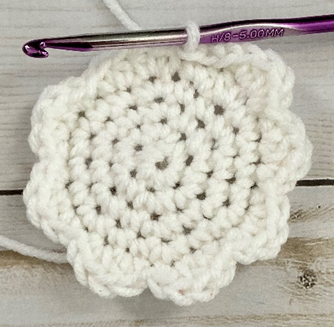
Base for Short Tree
This piece is worked in continuous rnds; do not join. You may wish to use a stitch marker and move it up at the beginning of each new round.
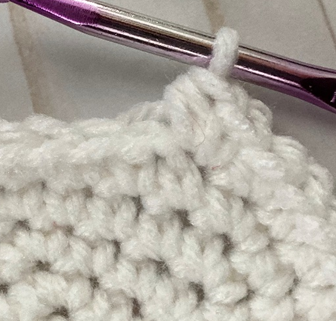
Rnd 1 – With White, make a magic ring. 6 sc in ring (6 sc)
Rnd 2 – 2 sc in each st around. (12 sc)
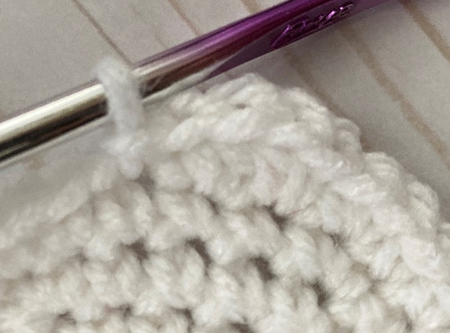
Rnd 3 – 2 sc in next st, sc in next st; rep around. (18 sc)
Rnd 4 – 2 sc in next st, sc in next 2 sts; rep around (24 sc)
Rnd 5 – 2 sc in next st, sc in next 3 sts; rep around (30 sc)
Rnd 6 – 2 sc in next st, sc in next 4 sts; rep around. (36 sc)

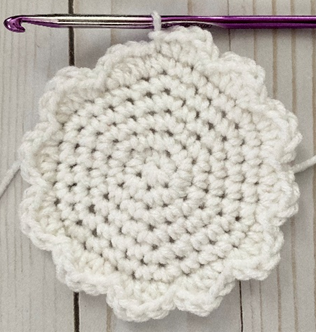
Rnd 7 – (Making the scalloped edging) *sc, hdc in next st. Hdc, sc in next st. Sl st in next st.* Rep 11 more times. (12 scallops)
Tall Tree
This piece is worked in continuous rnds; do not join. You may wish to use a stitch marker and move it up at the beginning of each new round. Note: all rounds starting with Rnd 2 are worked in BLO.
Rnd 1 – With Fern, make a magic ring. 4 sc in ring (4 sc)
Rnds 2 – 3 – sc in each st around. (4 sc)
Rnd 4 – 2 sc in next st; rep around (8 sc)
Rnds 5 – 6 – sc in each st around. (8 sc)
Rnd 7 – 2 sc in next st, sc in next st; rep around. (12 sc)
Rnds 8 – 9 – sc in each st around. (12 sc)
Rnd 10 – 2 sc in next st, sc in next 2 sts; rep around. (16 sc)
Rnds 11 – 12 – sc in each st around. (16 sc)
Rnd 13 – 2 sc in next st, sc in next 3 sts; rep around. (20 sc)
Rnds 14 – 15 – sc in each st around. (20 sc)
Rnd 16 – 2 sc in next st, sc in next 4 sts; rep around. (24 sc)
Rnds 17 – 18 – sc in each st around. (24 sc)
Fasten off Fern.
Attach White in rem loop (of sts worked in BLO) of first st from Rnd 2. Sl st in each rem loop around, down to bottom of Tree. Sl st in BLO of sts of Rnd 18, as well.
Fasten off, leaving long tail for sewing.
Base for Tall Tree
This piece is worked in continuous rnds; do not join. You may wish to use a stitch marker and move it up at the beginning of each new round.
Rnd 1 – With White, make a magic ring. 6 sc in ring (6 sc)
Rnd 2 – 2 sc in each st around. (12 sc)
Rnd 3 – 2 sc in next st, sc in next st; rep around. (18 sc)
Rnd 4 – 2 sc in next st, sc in next 2 sts; rep around. 2 sc once more in next st (26 sc)
Rnd 7 – (Making the scalloped edging) *sc, hdc in next st. Hdc, sc in next st. Sl st in next st.* Rep 7 more times. Sl st in next 2 sts. (8 scallops)
Fasten off, leaving long tail or sewing.
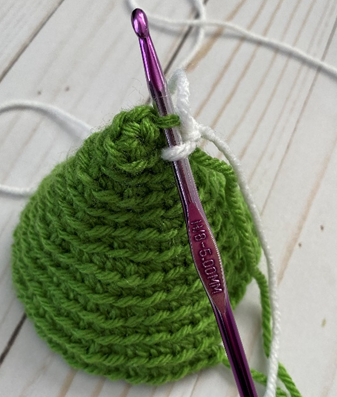
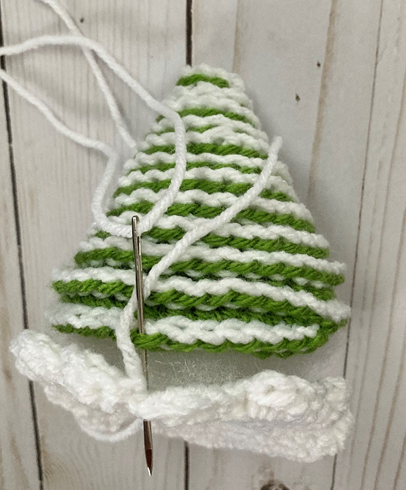
Finishing
Stuff Trees. With long tail left over from each Base, sew each Base to each Tree. Weave in all ends.
Here are the finished Trees!
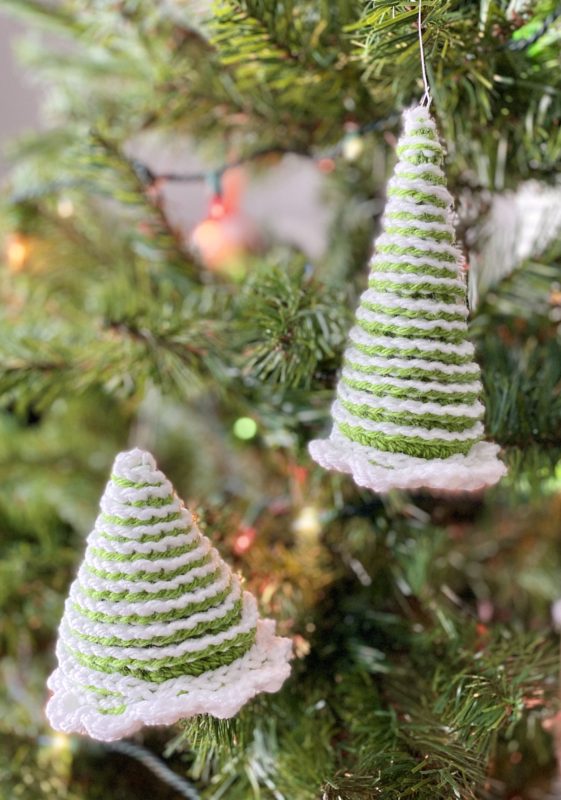
I hope you enjoyed crocheting these Snowy Trees along with me! If you love fun, free patterns, please be sure to subscribe to my email list and follow me on social media. I have many more fun patterns like this one coming soon!
Happy Crocheting!
COPYRIGHT: This pattern is owned by Crafty Kitty Crochet (Melissa Moore). Any reselling or distribution of this pattern is prohibited. Sale of items made using this pattern is welcomed, but I do ask that credit/a link be provided back to my site, craftykittycrochet.com.
Comments (1)
9 Festive Crochet Christmas Tree Patterns You’ll Love to Make – Complete Gardening
December 23, 2024 at 5:01 pm
[…] © ~ Crafty Kitty Crochet […]