
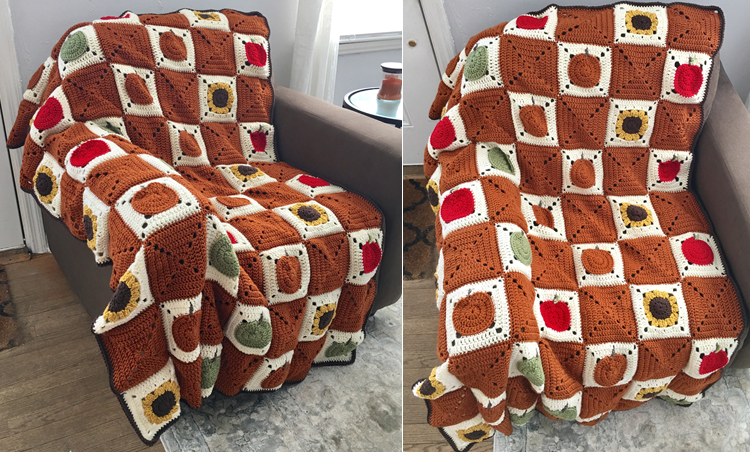
Farm Fresh Fall Blanket – Crochet Pattern
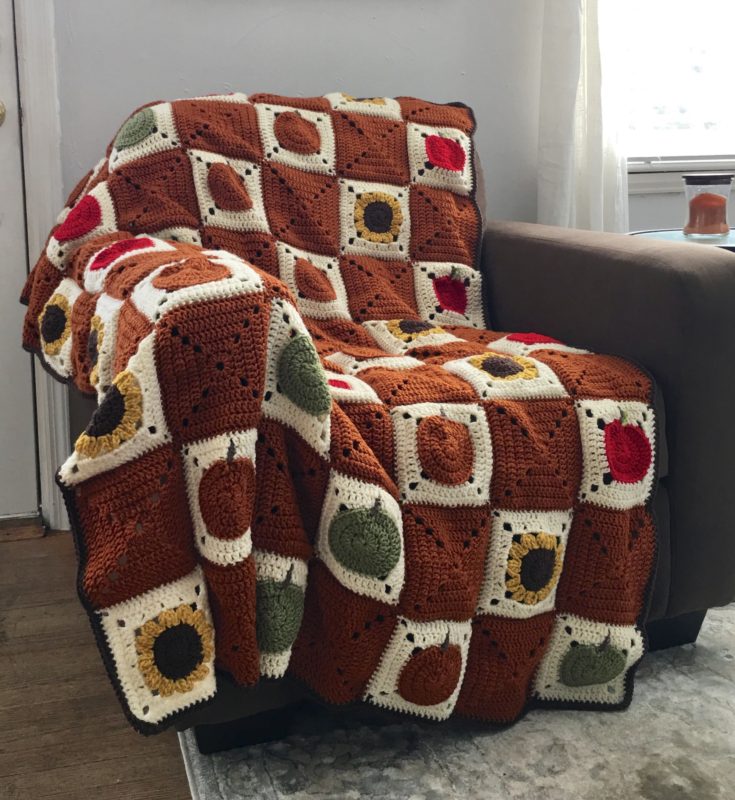
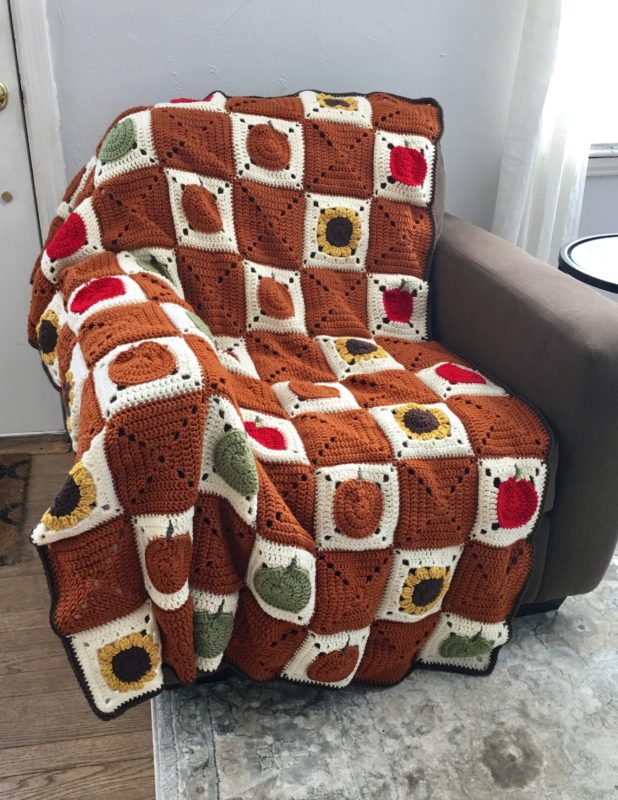
It’s time to celebrate some of the best things about fall – apples, pumpkins, and sunflowers! What better way to do that than by cozying up with this fall afghan, which features all of the above fall staples? You can customize your blanket to have as many red and green apples, pumpkins, sunflowers, and rust-colored accent squares as you like!
(Pin it for later!)
As you may know from browsing the rest of my blog and my other patterns, my usual style is best described as kawaii (referring to the “cute” culture of characters, clothing, etc. derived from Japan). But when it comes to fall, I find myself getting a bit fonder of the rustic farmhouse style of decor. The whole time of year centers so much on farming – after all, “harvest” refers to harvesting crops you would find on a farm, right? In my neck of the woods, there are many farm areas that feature orchards, pumpkin patches, corn mazes, hayrides, etc. that you can walk through with your family – it doesn’t get much more “autumn” than that!
So when I had the concept of a fall afghan in mind, I knew I wanted to go with a “country quilt” kind of look. Fortunately, granny squares are fun and easy to make, and really fit the bill when it comes to squares similar to quilting squares! I knew that the colors should be vivid but not neon, and I wanted the yarn to be durable but soft. I turned to an old favorite, Vanna’s Choice by Lion Brand Yarn. The primary colors of this blanket – Fisherman (on Amazon HERE) and Rust (on Amazon HERE
) are perfect for autumn! I also love how Dusty Green and Scarlet add a pop of color when used for the green and red apples. Last but not least, the sunflowers are made using an earthy gold tone, Mustard and accented by the warm dark brown color, Chocolate. I also used Chocolate for the border, which I think is the perfect compliment and makes the squares really pop out!
In addition to being so soft and cozy, another great thing about this blanket is that you can customize the size. The pattern calls for 10 rows and 7 columns of squares, but feel free to get creative and make the blanket as small or large as you like! You may even decide to use only one of the granny square designs instead of the medley I went with. I think any one of the squares would make a beautiful singular-themed throw all on their own!
So who’s ready to cozy up with a favorite fall beverage and get started on this Farm Fresh Fall Blanket? I know I am – let’s go!!
(Psst!!! Looking for the ad-free PDF copy of this pattern? You can purchase it in my shop HERE!)
Supplies
H/8 5.0 mm crochet hook
1 skein each of Lion Brand Vanna’s Choice in:
- Barley
- Dusty Green
- Scarlet
-Mustard
-Chocolate
8 skeins of Lion Brand Vanna’s Choice in Rust
4 skeins of Lion Brand Vanna’s Choice in Fisherman
Scissors
Yarn Needle
Abbreviations
*= indicates the beginning/end of a section to be repeated
[] = indicate a separate set of instructions
Beg = beginning
BLO = back loop only
Ch = chain
Dc = double crochet
Hdc = half double crochet
Rnd = round
Sc = single crochet
Sk = skip
Sl st = slip stitch
Sp = space
St(s) = stitches
Rep = repeat
Tr = triple crochet
Gauge
Exact gauge is not essential to this project.
Size
Each square measures about 6” square.
Notes
In stitch counts for certain squares, the word “corner” is used; “corner” refers to the combination of double crochet stitches and chains used to make a corner. The double crochet stitches used to make the corner should not be included in the stitch count (i.e. only count the stitches between corners for the total count of double crochet stitches).
Instructions
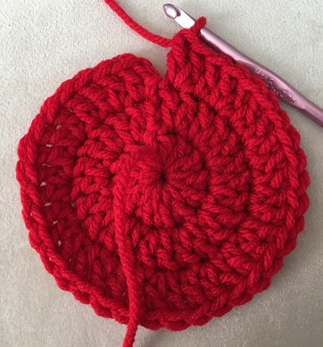
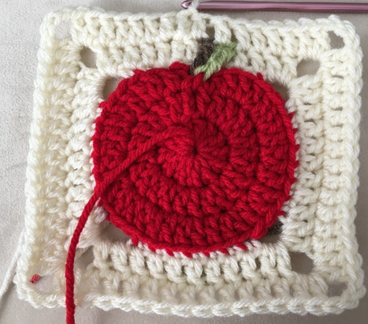
Red Apple
Rnd 1 – With Scarlet, make a Magic Ring. 12 Dc in ring. Join with sl st to first dc of rnd. Ch 2 (12 dc)
Rnd 2 – 2 dc in each st around. Join with sl st to first dc of rnd. Ch 2. (24 dc)
Rnd 3 – 2 dc in next st, dc in next; rep around. Do not join. Sl st into next st on previous rnd. Sl st up beg ch from this rnd. (36 dc)
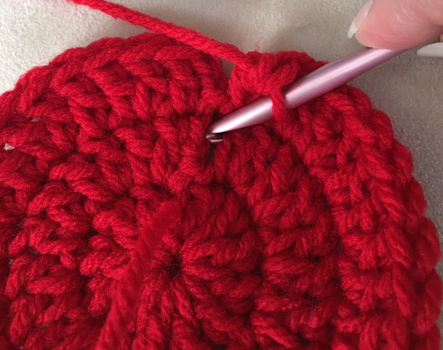
Rnd 4 – Attach Fisherman and fasten off Scarlet, ch 1. Working in BLO, Sc in next 3 sts. Ch 3, sk 2 sts (corner ch sp made). *Sc in next 7 sts. Ch 3, sk 2 sts.* Rep from * to * two more times. Sc in next 4 sts. Join with sl st to first sc of rnd. (28 sc and 4 corners)

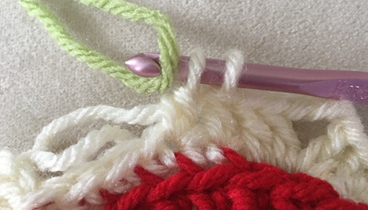
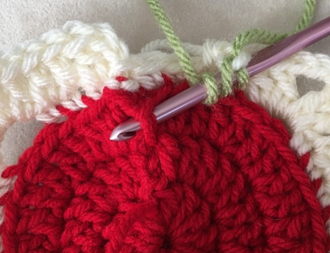
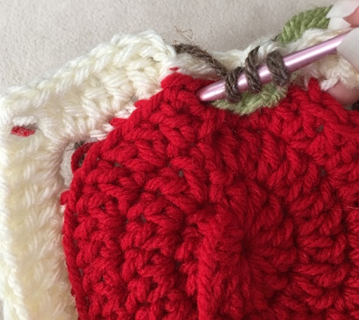
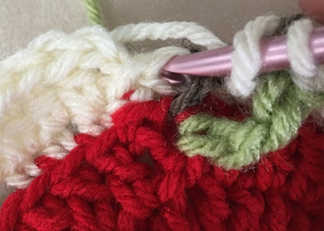
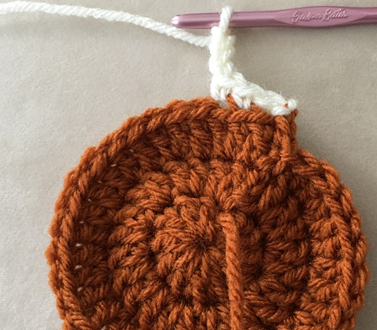
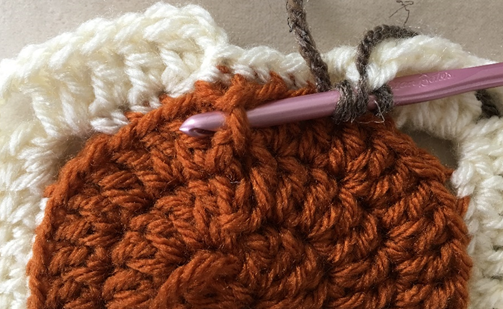
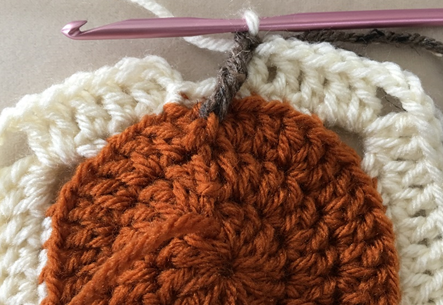
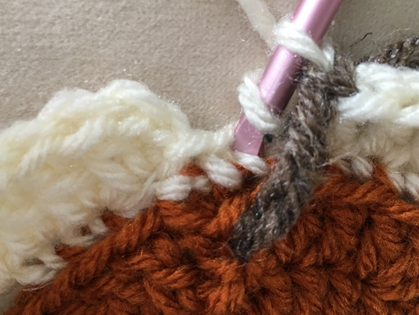
Rnd 5 – Ch 2, dc in next 3 sts, [2 Dc, ch 3, 2 dc – corner made] in corner ch sp. *Dc in next 7 sts, [2 dc, ch 3, 2 dc].* Rep two more times. Dc in next 2 sts. Attach Dusty Green (do not fasten off Fisherman), tr around post of last st from Rnd 3, rejoin Fisherman before finishing st. Dc in next st of current rnd, attach Barley. Tr in sl st from end of Rnd 3, rejoining Fisherman before finishing st. Dc in next st in current rnd (behind tr st just made). Join with sl st to first st of rnd. (28 dc and 4 corners)

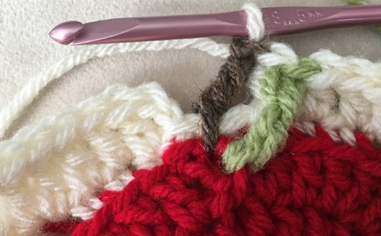
Rnd 6 – Ch 2, dc in next 5 sts, [2 Dc, ch 3, 2 dc – corner made] in corner sp. *Dc in next 11 sts, [2 Dc, ch 3, 2 dc] in corner sp.* Rep from * to * twice. Skipping Leaf and Stem from last rnd, dc in next 6 sts. Join with sl st to first st of rnd.
Fasten off.
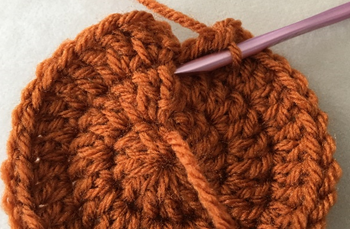
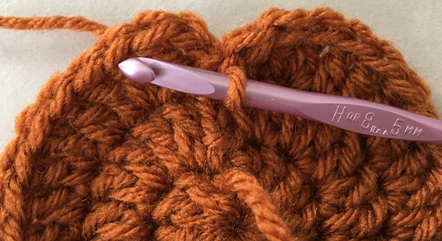
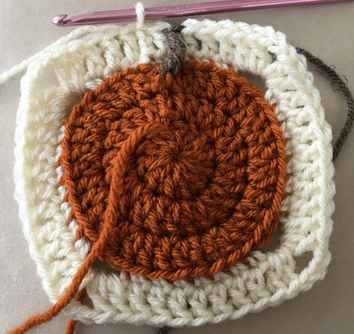
Green Apple / Pumpkin
Rnd 1 – With Dusty Green (Apple) or Rust (Pumpkin), make a Magic Ring. 12 Dc in ring. Join with sl st to first dc of rnd. Ch 2 (12 dc)
Rnd 2 – 2 dc in each st around. Ch 2. Join with sl st to first dc of rnd. (24 dc)
Rnd 3 – 2 dc in next st, dc in next; rep around. Do not join. Sl st into next st on previous rnd. Sl st up beg ch from this rnd. (36 dc)
Rnd 4 – Attach Fisherman, ch 1. Working in BLO, Sc in next 3 sts. Ch 3, sk 2 sts (corner ch sp made). *Sc in next 7 sts. Ch 3, sk 2 sts.* Rep from * to * two more times. Sc in next 4 sts. Join with sl st to first sc of rnd. (28 sc and 4 corners)
Rnd 5 – Ch 2, dc in next 3 sts, [2 Dc, ch 3, 2 dc – corner made] in corner ch sp. *Dc in next 7 sts, [2 dc, ch 3, 2 dc].* Rep two more times. Dc in next 3 sts. Attach Barley. Tr around post of last st from Rnd 3, rejoining Fisherman before finishing st. Dc in next st in current rnd (behind tr st just made). Join with sl st to first st of rnd. (28 dc and 4 corners)

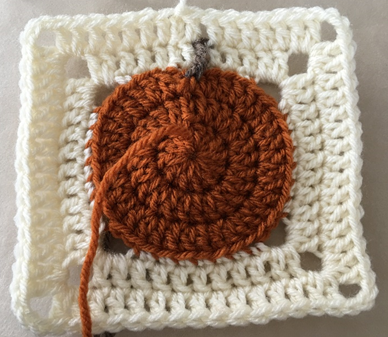
Rnd 6 – Ch 2, dc in next 5 sts, [2 Dc, ch 3, 2 dc – corner made] in corner sp. *Dc in next 11 sts, [2 Dc, ch 3, 2 dc] in corner sp.* Rep from * to * twice. Skipping Stem from last rnd, dc in next 6 sts. Join with sl st to first st of rnd.
Fasten off.
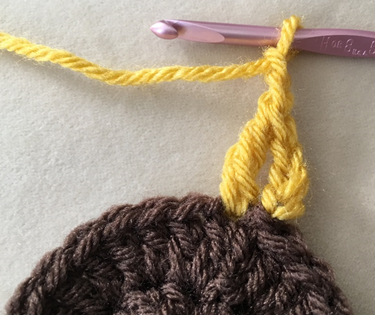
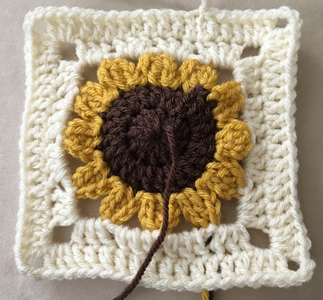
Sunflower
Rnd 1 – With Chocolate, make a magic ring. 12 dc in ring. Join with sl st to first st of rnd. (12 dc)
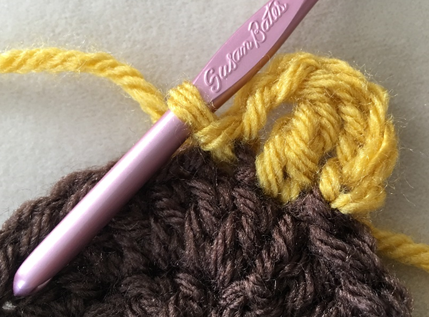
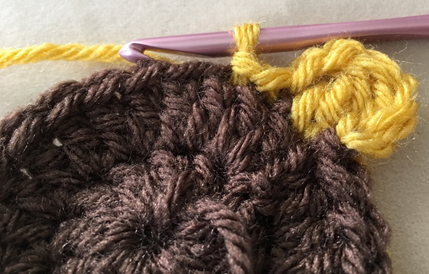
Rnd 2 – 2 dc in each st around. Join Mustard in last st of rnd. Join with sl st to first st of rnd. (24 dc)
Rnd 3 – *Ch 3, tr in same st. Ch 2, sl st in next st. Sl st in next st.* Rep from * to * 11 more times. Fasten off Mustard. (12 petals)

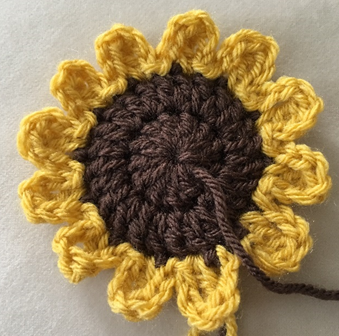
Rnd 4 – Attach Fisherman in tr st of any petal from Rnd 3. *Ch 3, sl st into tr of next petal from Rnd 3.* Rep 10 more times. (12 ch-sps)
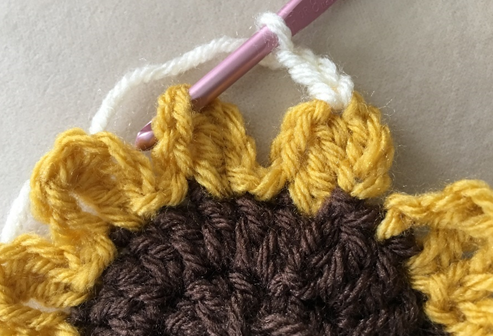
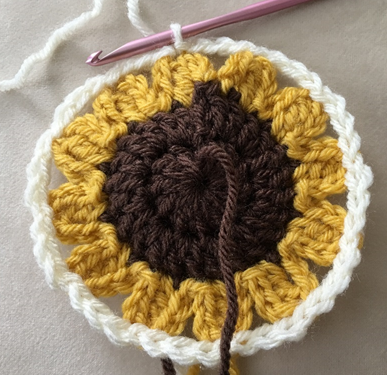
Rnd 5 – Ch 2. *Make 3 dc in next ch-sp from Rnd 4. Make 3 dc in next ch-sp. [3 Dc, ch3, 3 dc – corner made] in next ch-sp.* Rep 3 more times. Join with sl st to first st of rnd. (24 dc, 4 corners)
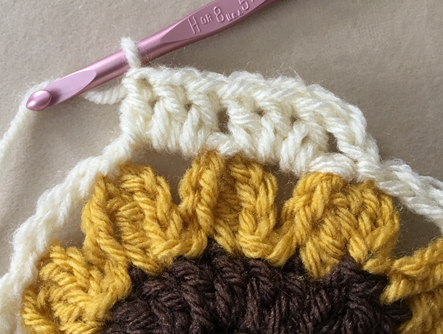
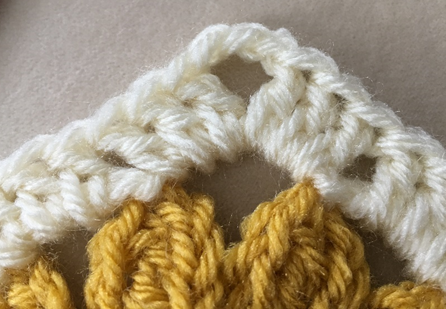
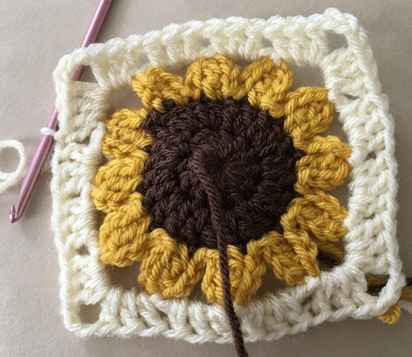
Rnd 6 – Ch 2. Dc in next 9 sts, [3 Dc, ch3, 3 dc – corner made] in next corner sp from Rnd 5. *Dc in next 12 sts, [3 Dc, ch3, 3 dc] in next corner sp from Rnd 5.* Rep from * to * two more times. Dc in next 3 sts, join with sl st to first st of rnd. Fasten off, weave in all ends.
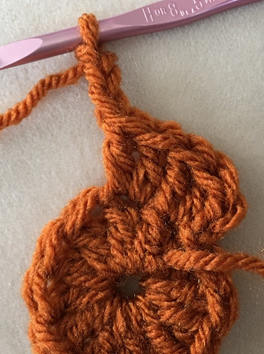
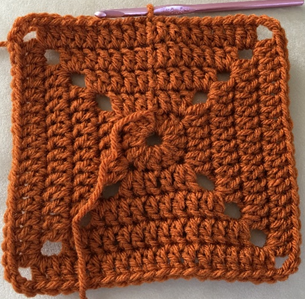
Solid Granny Square
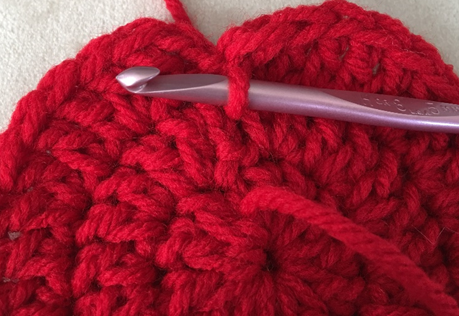
Rnd 1 – With Rust, make a magic ring. 12 Dc in ring. Join with sl st to first st of rnd. (12 dc)
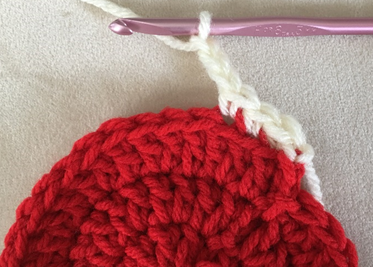
Rnd 2 – Ch 2 (counts as a dc). Dc in next st, [2dc, ch 3, 2 dc – corner made] in next st. *Dc in next 2 sts, [2dc, ch 3, 2 dc] in next st.* Rep from * to * two more times. Dc in next st. Join with sl st to first st of rnd. (8 dc, 4 corners)
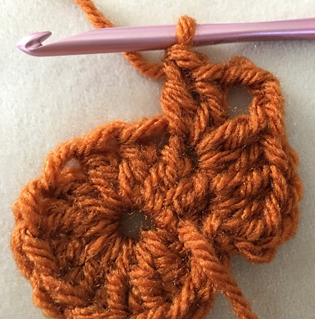
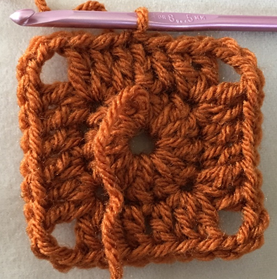
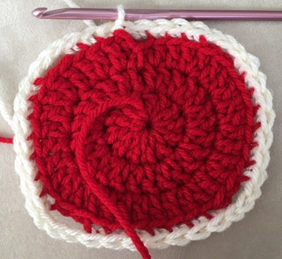
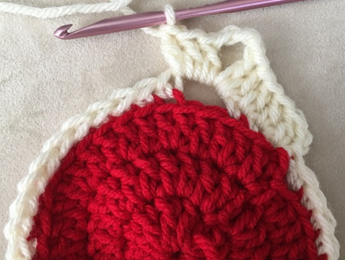
Rnd 3 – Ch 2. Dc in next 3 sts, [2dc, ch 3, 2 dc – corner made] in next corner sp. *Dc in next 6 sts, [2dc, ch 3, 2 dc] in next corner sp.* Rep from * to * two more times. Dc in next 3 sts. Join with sl st to first st of rnd. (24 dc, 4 corners)

Rnd 4 – Ch 2. Dc in next 5 sts, [2dc, ch 3, 2 dc – corner made] in next corner sp. *Dc in next 10 sts, [2dc, ch 3, 2 dc] in next corner sp.* Rep from * to * two more times. Dc in next 5 sts. Join with sl st to first st of rnd. (40 dc, 4 corners)
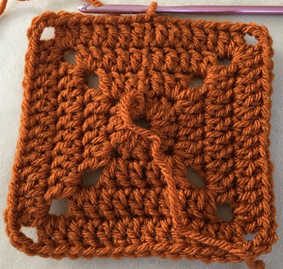
Rnd 5 – Ch 2. Dc in next 7 sts, [2dc, ch 3, 2 dc – corner made] in next corner sp. *Dc in 14 sts, [2dc, ch 3, 2 dc] in next corner sp.* Rep from * to * two more times. Dc in next 7 sts. Join with sl st to first st of rnd. Fasten off, weave in all ends. (56 dc, 4 corners)
Assembly
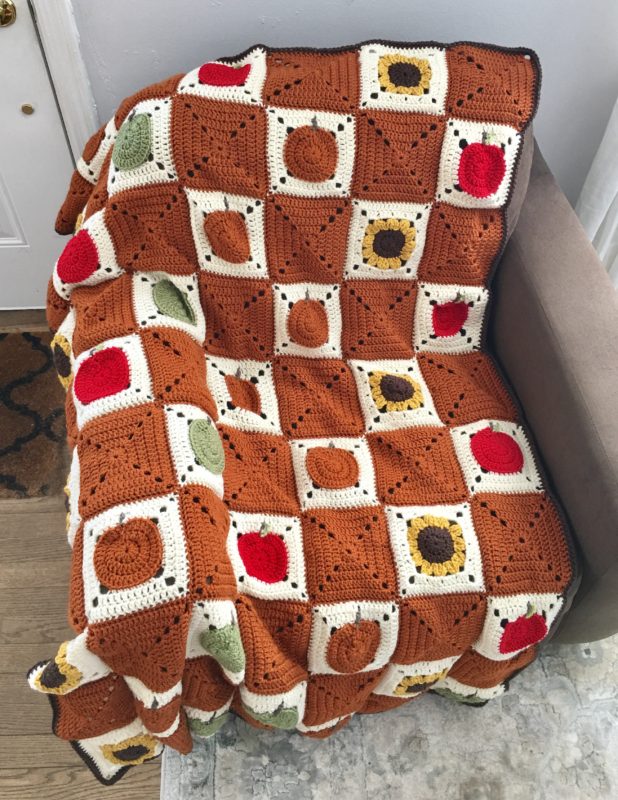
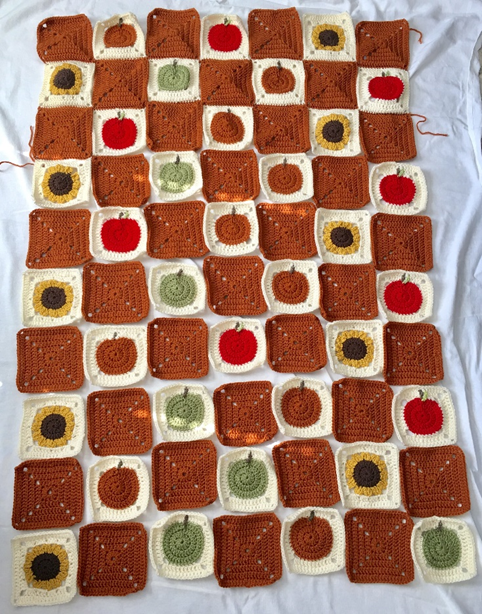
Arrange squares as shown in photo (or as desired).
With right sides facing, place two squares together and sc through front loop of square closest to you, and back loop of other square.

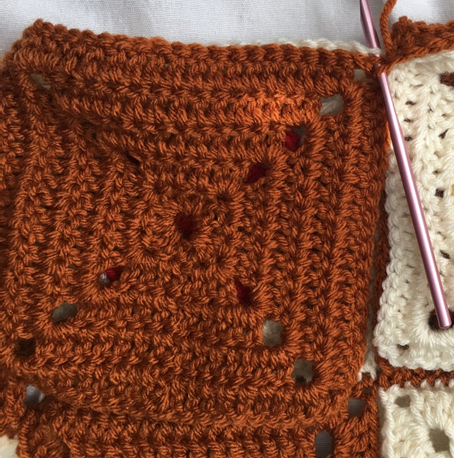
Continue this process to stitch together each row and column of squares. (Note: solid squares are slightly varied in size from other squares; you may need to join two sts of the solid square to one st of other squares occasionally, in order to keep them even.)
Border
Attach Chocolate in any corner of blanket. Ch 1, 2 hdc in same corner. Hdc in each st around of blanket edges, making 4 hdc in each corner of the blanket. Make 2 hdc in same corner you started in to finish, and join with sl st to first hdc of Border. Fasten off, weave in all ends.
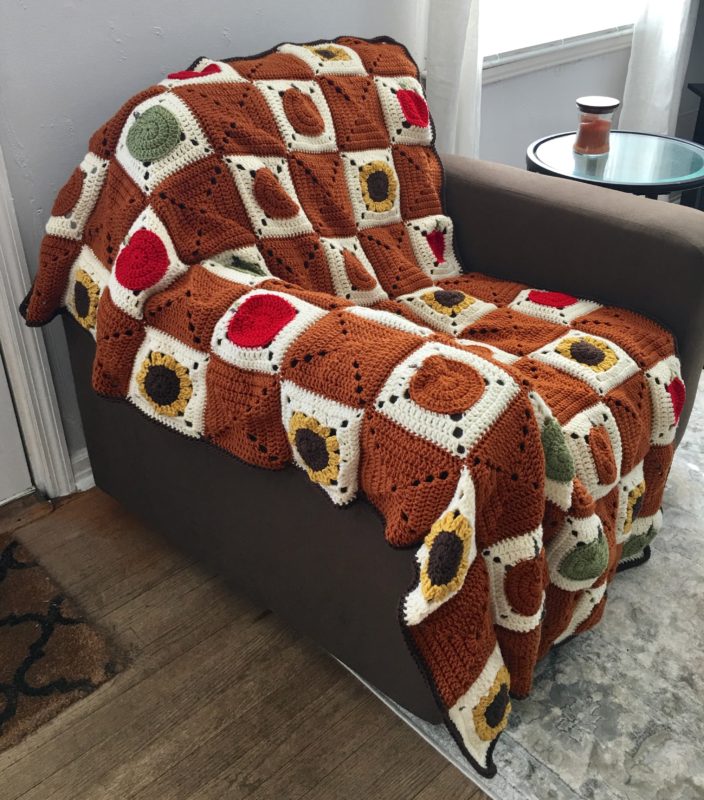
Here is the finished blanket!
I hope you enjoyed crocheting this fall blanket along with me! If you love fun, free patterns, then please be sure to subscribe to my email list and follow me on social media. I have so many more fun patterns like this one coming soon!
Happy Crocheting!
COPYRIGHT: This pattern is owned by Crafty Kitty Crochet (Melissa Moore). Any reselling or distribution of this pattern is prohibited. Sale of items made using this pattern is welcomed, but I do ask that credit/a link be provided back to my site, craftykittycrochet.com.
Comments (16)
Capitol Couture Newsboy Hat – Crochet Pattern – Crafty Kitty Crochet
December 28, 2019 at 11:57 pm
[…] prize, I ordered many yarns that you’ve already seen used in patterns on my site – the Farm Fresh Fall Blanket, the Frog Hooded Blanket, etc. And there are still more to come using my prize yarn stash!!! Also, […]
Rose Granny Square – Crochet Pattern – Crafty Kitty Crochet
March 23, 2020 at 12:58 pm
[…] using this Rose Granny Square pattern, as well as a variation of the solid granny squares from my Farm Fresh Fall Blanket pattern. This afghan took about 700 yards each of medium weight Pink, Cream, and White […]
Solid Granny Square – Crochet Pattern – Crafty Kitty Crochet
April 10, 2020 at 4:13 pm
[…] that have quite a bit going on, such as my Rose Granny Squares, Sunflower Granny Square, and Fall Granny Squares, I like to be able to accent these squares with a very basic square to make them […]
Sweater Weather Throw Blanket – Crochet Pattern ~ Crafty Kitty Crochet
August 7, 2020 at 8:51 pm
[…] with an easy and snuggly blanket? You may remember other fun autumnal designs for the home like my Farm Fresh Fall Blanket from last year (pattern HERE). When designing this blanket, I knew I wanted it to be easy and […]
Fall Maple Leaf – Crochet Pattern ~ Crafty Kitty Crochet
August 21, 2020 at 4:19 pm
[…] fall-tastic color called Rust. Does this color look familiar? That’s because I used it in my Farm Fresh Fall Blanket (pattern HERE) last year! The other orange-toned leaf is made using the same brand, but in the colorway Tangerine […]
Scarecrow Hat for Kids & Adults – Crochet Pattern ~ Crafty Kitty Crochet
August 21, 2020 at 5:00 pm
[…] Rnds 1- 3 for the Sunflower Square in my Farm Fresh Fall Blanket (pattern HERE) – then come back to this pattern for Finishing […]
Sunflower Slouchy Hat – Crochet Pattern ~ Crafty Kitty Crochet
October 2, 2020 at 8:02 pm
[…] are proof of that). I even designed a smaller sunflower granny square, which is a co-star in my Farm Fresh Fall Granny Square Blanket! But why should they be limited to just the house? That’s right, you could be wearing a field […]
Sunflower Fingerless Gloves – Crochet Pattern ~ Crafty Kitty Crochet
October 2, 2020 at 8:42 pm
[…] the square used in this pattern consists of the first few rounds of the sunflower square in my Farm Fresh Fall Blanket pattern! When trying to find new ways to crochet sunflowers, fashion seemed to be the natural next […]
Sunflower Granny Square Coaster – Crochet Pattern ~ Crafty Kitty Crochet
January 2, 2021 at 6:29 pm
[…] decorate your home or wardrobe. That’s why I designed this small sunflower granny square for my Farm Fresh Fall Blanket a few years ago. Since then, I’ve used this same square in a few designs – and now […]
Shalah Scott
September 5, 2022 at 2:01 pm
What is the size of the finished blanket please? Love it btw!
Melissa
September 5, 2022 at 2:06 pm
Thanks so much for asking, Shalah! The squares are about 6 inches each, so if you assembled the blanket as it’s shown here – 7 squares across and 10 squares down – it would measure about 42 inches by 60 inches! Hope that helps 🙂 ~ Melissa
Shalah Scott
September 6, 2022 at 12:51 am
Yes! Thanks so much! 🥰
Melissa
September 6, 2022 at 11:16 am
You are so welcome!!! Hope you love the pattern! ^_^
Best 2022 Fall Crochet Patterns – Décor, Blankets, and More! –
October 18, 2022 at 8:54 pm
[…] Farm Fresh Fall Blanket […]
Crochet Fall Decor for Home – Crochet For You
October 18, 2024 at 2:30 pm
[…] Farm Fresh Fall Blanket – Crafty Kitty Crochet […]
Cozy Crochet Barn Blanket: Warm & Rustic Comfort
October 25, 2024 at 12:27 pm
[…] Farm Fresh Fall Blanket – Crochet Pattern ~ Crafty Kitty Crochet – https://www.craftykittycrochet.com/2019/09/16/farm-fresh-fall-blanket-crochet-pattern/ […]