

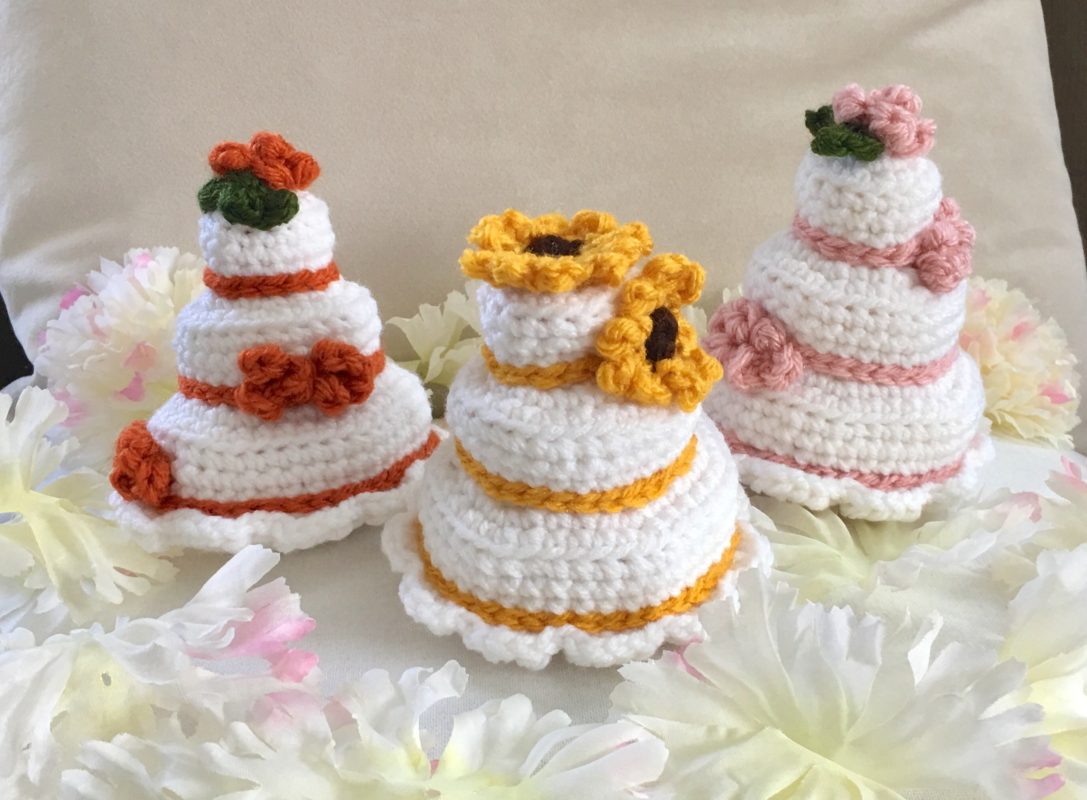
Tiny Wedding Cake Crochet Pattern
What better way to celebrate the big day than with a tiny crocheted wedding cake? These little cakes are easy and fun to make, and this free pattern has lots of photos to guide you! These would make a great gift for the bride and groom to be in your life. They would also make great wedding favors – what a fun and personalized gift for your wedding guests! The possibilities are endless!
(Pin it for later!)
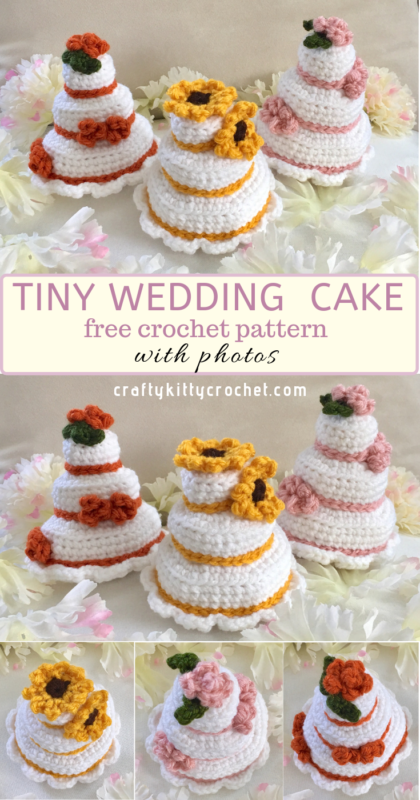
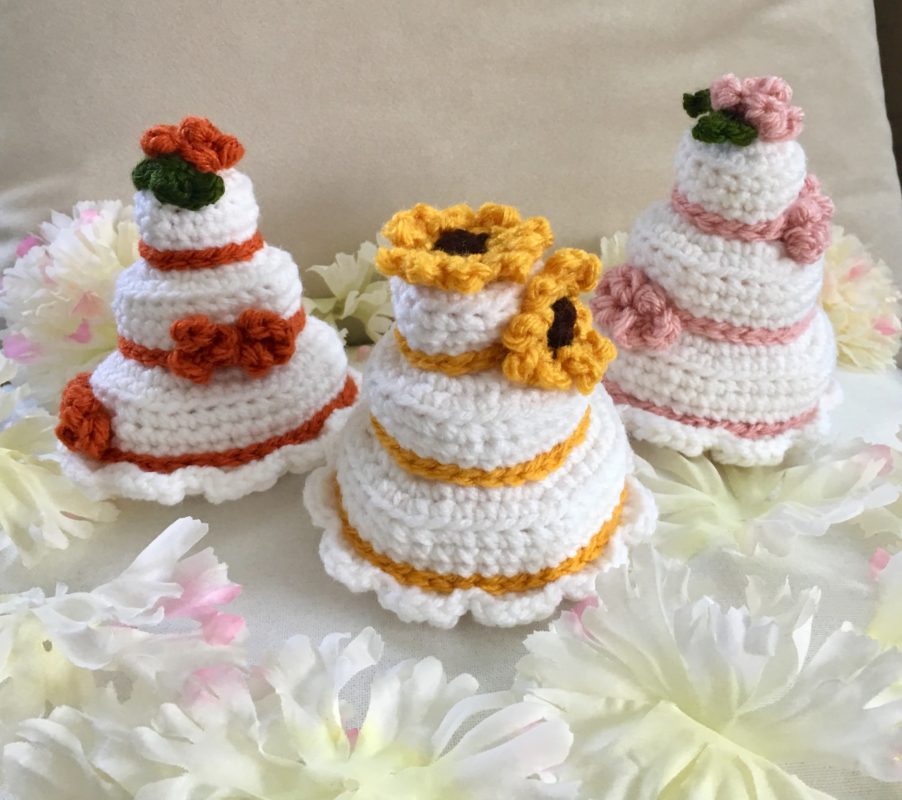
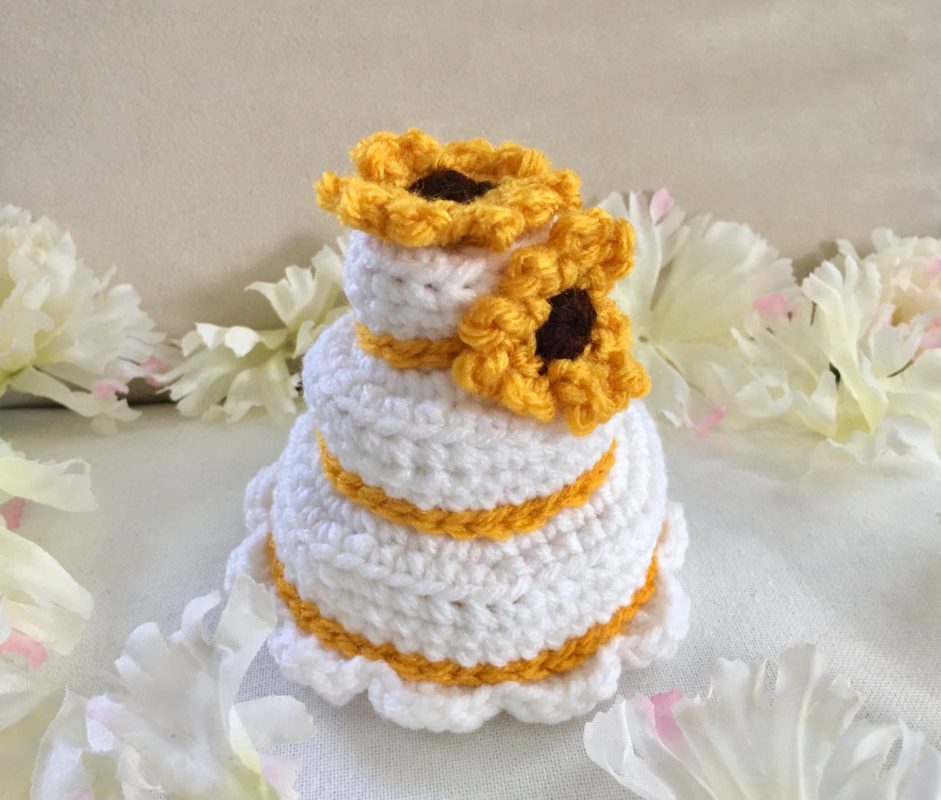
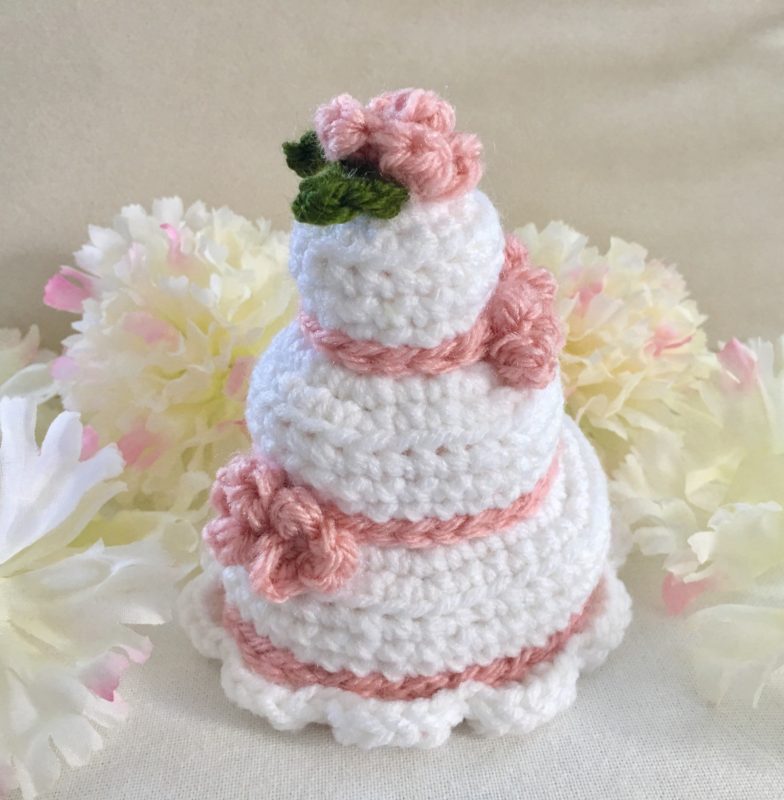
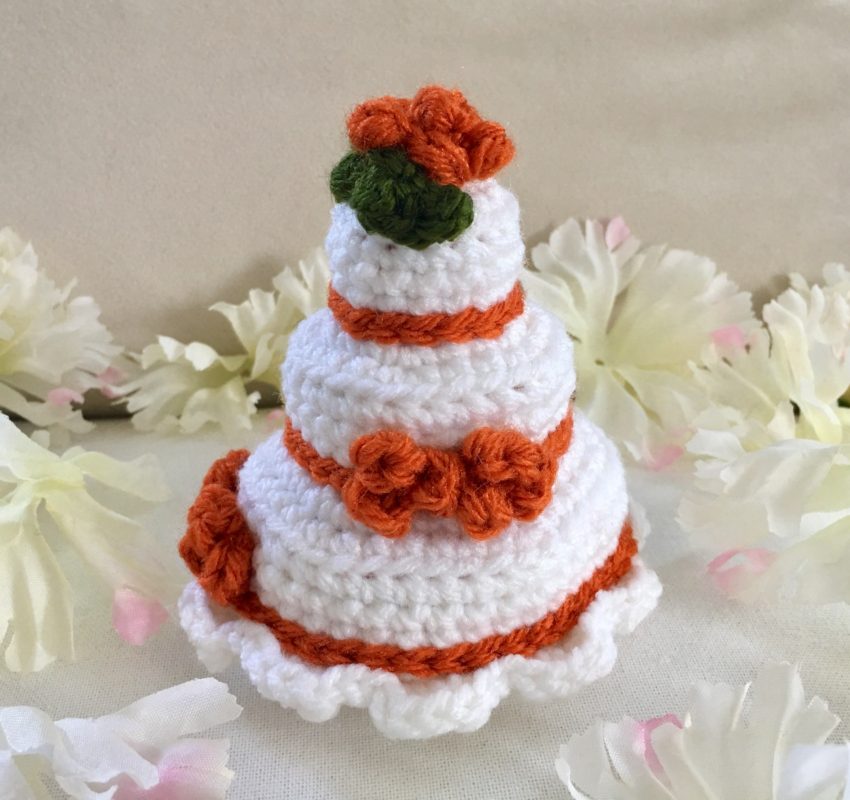
The design of these cakes is based on a tiered wedding cake, and each layer is decorated with crocheted “ribbons” in a contrast color. You can even customize your cake with your choice of flowers – rose bunches or sunflowers!
I chose Lion Brand Vanna’s Choice for the majority of the yarn used throughout this pattern. It’s a great multipurpose yarn, and is a great combination of both soft and sturdy, which makes it great for stuffed food projects like this one! You can find some Vanna’s Choice in White on Amazon HERE. I’m also a huge fan of the colorway Pink, which is what I used for one of the three cakes shown here. Find some on Amazon HERE
!
I love that this yarn is available in so many colors! So feel free to get creative an coordinate according to the bride and groom’s chosen colors for the wedding!
And for those of you who know anyone with a fall wedding coming up, the little sunflowers in this pattern are the perfect accent!
So are you ready to say “I do” to this delicious pattern? Then let’s go!
Supplies
Size D/3 3.25 mm crochet hook
1 Skein of Lion Brand Vanna’s Choice in White for cake tiers
1 Skein of Contrast Color for ribbon (photos show Lion Brand Vanna’s Choice in Pink, Terra Cotta, and Gold)
Small amounts of Vanna’s Choice in Olive for Leaf
Small amounts of Red Heart Super Saver in Coffee and Gold (optional – for Sunflower)
Fiberfill stuffing
Scissors
Yarn needle
Abbreviations
*= indicates the beginning/end of a section to be repeated
BLO = back loop only
Ch = chain
FLO = front loop only
Hdc = half double crochet
Sc = single crochet
Sl st = slip stitch
St(s) = stitch(es)
Rep = repeat
Rnd(s) = round(s)
Gauge
Exact gauge is not essential to this project.
Size
Each cake measures about 4.5 inches tall and about 3.5 inches wide.
Instructions
Top Tier
This piece is worked in continuous rnds; do not join. You may wish to use a stitch marker and move it up at the beg of each new rnd.
Rnd 1 – make a magic ring, 6 sc in ring. (6 sc)
Rnd 2 – 2 sc in each st around. (12 sc)
Rnd 3 – 2 sc in next st, sc in next st; rep around. (18 sc)
Rnd 4 – working in BLO, sc in each st around. (18 sc)
Rnds 5 – 6 – working through both loops of st, sc in each st around. (18 sc per rnd)
Fasten off, leaving long tail for sewing.
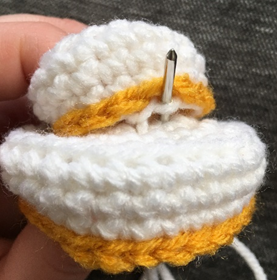
Middle Tier
This piece is worked in continuous rnds; do not join. You may wish to use a stitch marker and move it up at the beg of each new rnd.
Rnd 1 – make a magic ring, 6 sc in ring. (6 sc)
Rnd 2 – 2 sc in each st around. (12 sc)
Rnd 3 – 2 sc in next st, sc in next st; rep around. (18 sc)
Rnd 4 – 2 sc in next st, sc in next 2 sts; rep around. (24 sc)
Rnd 5 – 2 sc in next st, sc in next 3 sts; rep around. (30 sc)
Rnd 6 – working in BLO, sc in each st around. (30 sc)
Rnds 7 – 8 – working through both loops of st, sc in each st around. (30 sc per rnd)
Fasten off, leaving long tail for sewing.
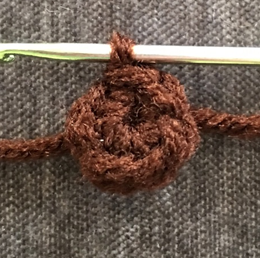
Bottom Tier
This piece is worked in continuous rnds; do not join. You may wish to use a stitch marker and move it up at the beg of each new rnd.
Rnd 1 – make a magic ring, 6 sc in ring. (6 sc)
Rnd 2 – 2 sc in each st around. (12 sc)
Rnd 3 – 2 sc in next st, sc in next st; rep around. (18 sc)
Rnd 4 – 2 sc in next st, sc in next 2 sts; rep around. (24 sc)
Rnd 5 – 2 sc in next st, sc in next 3 sts; rep around. (30 sc)
Rnd 6 – 2 sc in next st, sc in next 4 sts; rep around. (36 sc)
Rnd 7 – 2 sc in next st, sc in next 5 sts; rep around. (42 sc)
Rnd 8 – working in BLO, sc in each st around. (42 sc)
Rnds 9 – 10 – working through both loops of st, sc in each st around. (42 sc per rnd)
Fasten off, leaving long tail for sewing.
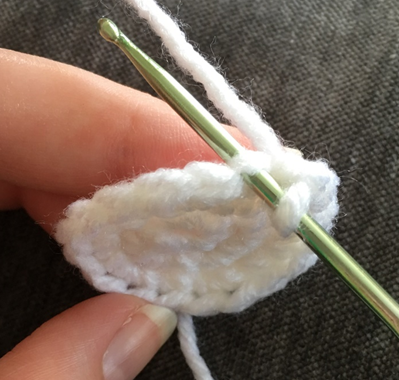
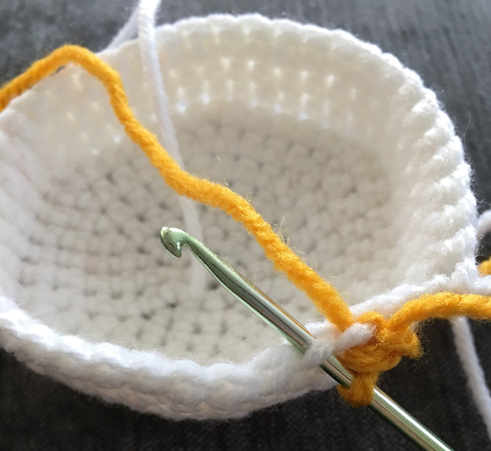
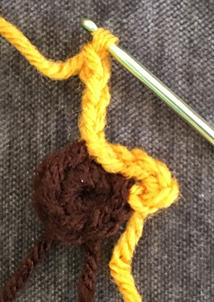
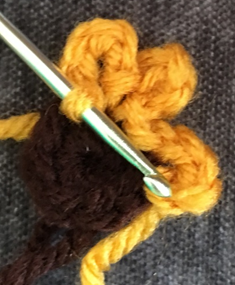
Ribbon (make one on each Tier of cake)
Working in FLO of last rnd of the Tier you are working on, attach contrast color, ch 1. Sc in FLO of next st, and in each st around. Fasten off.
Rep for each additional Tier.
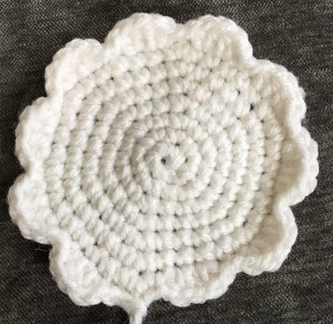
Base
This piece is worked in continuous rnds; do not join. You may wish to use a stitch marker and move it up at the beg of each new rnd.
Rnd 1 – make a magic ring, 6 sc in ring. (6 sc)
Rnd 2 – 2 sc in each st around. (12 sc)
Rnd 3 – 2 sc in next st, sc in next st; rep around. (18 sc)
Rnd 4 – 2 sc in next st, sc in next 2 sts; rep around. (24 sc)
Rnd 5 – 2 sc in next st, sc in next 3 sts; rep around. (30 sc)
Rnd 6 – 2 sc in next st, sc in next 4 sts; rep around. (36 sc)
Rnd 7 – 2 sc in next st, sc in next 5 sts; rep around. (42 sc)
Rnd 8 – working in BLO, sc in each st around. (42 sc)
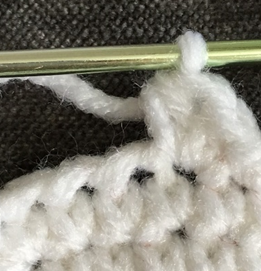
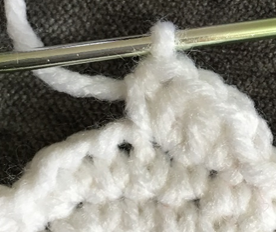
Rnd 9 – sl st in next 2 sts, *2 hdc in next 2 sts, sl st in next 2 sts*. Rep from * to * 9 more times. (10 scallops in edging)

Large Top Flower (make one per cake to match photo, or as many as desired)
With Contrast Color, ch 7.
Row 1 – *2 hdc in next st, sl st in same st. Sl st in next st.* Rep from * to * 5 more times. (6 scallops in flower)
Fasten off, leaving long tail for sewing.
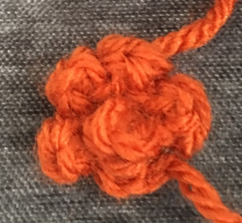
Roll up Flower and sew together. Leave rem tail for sewing to Cake.
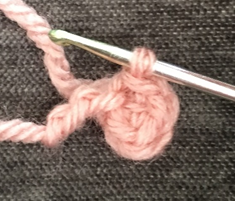
Small Side Flower (make 4 to match photo, or as many as desired)
With Contrast Color, ch 4.
Row 1 – *2 hdc in next st, sl st in same st. Sl st in next st.* Rep from * to * 2 more times. (3 scallops in flower)
Fasten off, leaving long tail for sewing.
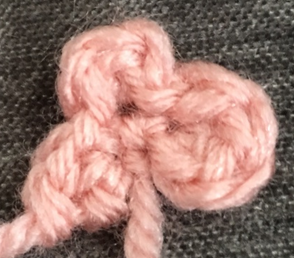
Roll up Flower and sew together. Leave rem tail for sewing to Cake.
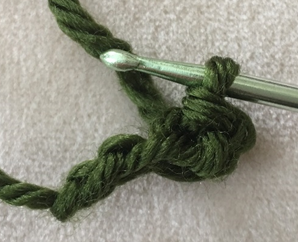
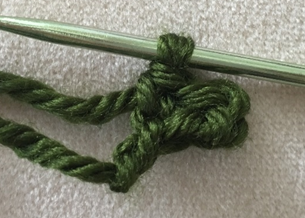
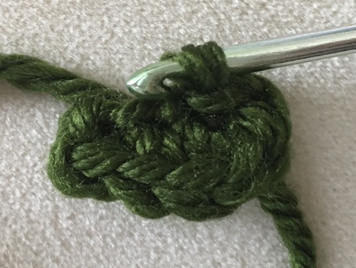
Leaf (make 2 per large flower or as many as desired)
With Olive, ch 4.
Row 1 – sl st in first st, sc in next st, [2 hdc, sc, sl st] into last st. Fasten off, leaving long tail for sewing.
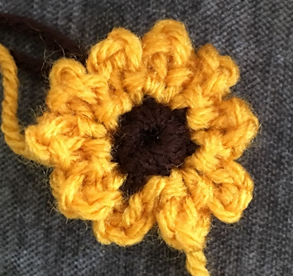
Sunflower (make two to match photo, or as many as desired)
This piece is worked in continuous rnds; do not join. You may wish to use a stitch marker and move it up at the beg of each new rnd.
Rnd 1 – With Coffee, make a magic ring. 6 sc in ring. Switch to Gold in last st (6 sc)
Rnd 2 – *Ch 4, sl st in same st. Sl st in next st. Ch 4, sl st back into same st; ch 4, sl st back into same st.* Rep from * to * twice. Sl st in last st, ch 4, sl st back into same st. (10 petals)
Fasten off, leaving long tail for sewing.

Finishing
Lightly stuff each Tier and sew Bottom Tier to Base, Middle Tier to Bottom Tier, and Top Tier to Middle Tier. Sew Large Flower (or a Sunflower) onto Top Tier and arrange Small Flowers (or Sunflower[s]) and Leaves as desired throughout the other Tiers and sew on.
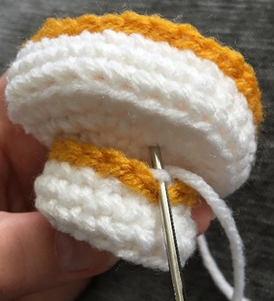
Weave in all ends.
Here are the finished Wedding Cakes!
I hope you enjoyed crocheting these tiny wedding cakes along with me! If you love fun, free patterns like this one, please be sure to subscribe to my email list and follow me on social media. I have lots more patterns coming soon!
Happy Crocheting!
COPYRIGHT: This pattern is owned by Crafty Kitty Crochet (Melissa Moore). Any reselling or distribution of this pattern is prohibited. Sale of items made using this pattern is welcomed, but I do ask that credit/a link be provided back to my site, craftykittycrochet.com.
Comments (2)
Face Mask for Kids & Adults – Crochet Pattern ~ Crafty Kitty Crochet
June 26, 2020 at 7:56 pm
[…] you might recognize the flowers on some of the masks shown here. The sunflower is taken from my Tiny Wedding Cake Pattern, and the rose on my Rose Gold mask is a teeny, tiny version of the rose in my Rose Granny Square […]
Cupcake Slippers for Kids & Adults ~ Crafty Kitty Crochet
October 23, 2020 at 6:44 pm
[…] you love crocheting cake just like me?! You might enjoy my Crochet Wedding Cake Pattern and my Amigurumi Cake Pops […]