
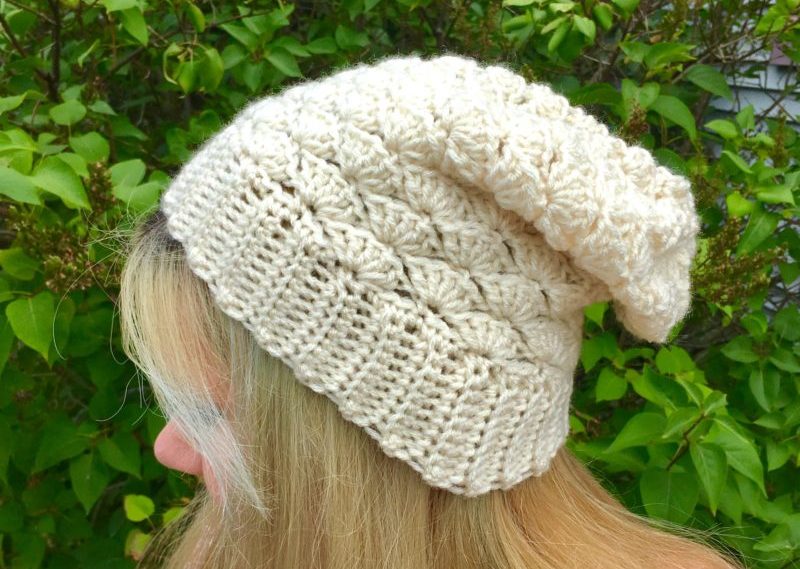
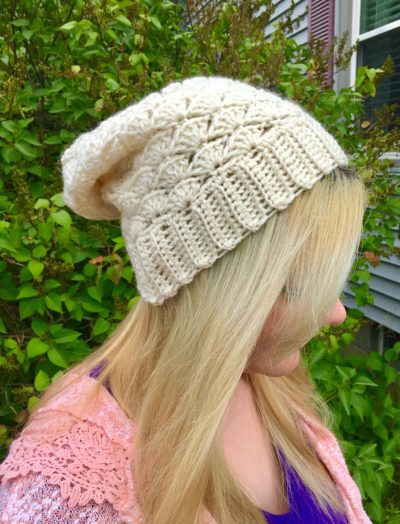
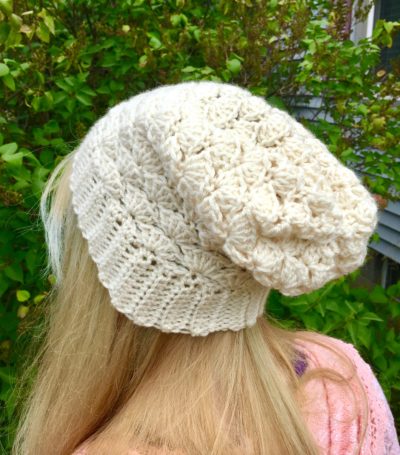
Seashell Slouchy Hat Crochet Pattern
Seashell, seashell, by the seashore! I thought of using that as the title for this hat pattern, but it didn’t exactly flow well and seemed like it would be waaayyy too wordy for a pattern title! Who doesn’t love a good stroll on the beach in the summertime, picking up seashells as they go? I’ve never been an outdoorsy person myself, and I tend to hibernate when it’s too hot outside – so a good chunk of the summer is binge-watching time for me. But even I will get in on some fun in the sun once in a while, if it means being somewhere breezy and by the water! This seashell slouchy hat is a great beach accessory for those chillier times by the water, or maybe to wear at night around a big old summer bonfire.
I made this hat in an Aran color, because I loved the natural ivory look with the shell pattern. But I had some creative pattern testers who really wowed me with their color choices – glittery blue, red-and-purple, and so on! So, feel free to customize the color options to fit your wardrobe and style.
Summer’s not over yet! Let’s make this beachy hat!!
(To purchase the ad-free PDF copy of this pattern, please click here to purchase it from my online store!)
Supplies:
Size H/8 (5 MM) Crochet Hook
Yarn Needle
Scissors
Red Heart Super Saver in Aran
Abbreviations:
* = indicates the start of a section that will be repeated
Beg = beginning
BLO = back loop only
Ch = chain
Dc = double crochet
Dec = decrease
FLO = front loop only
Rep = repeat
Rem = remaining
Rnd = round
Sc = single crochet
Sk = skip
Sl st = slip stitch
St(s) = stitch(es)
Size:
About 20-21” circumference around cuff; 11” total length
Gauge:
9 sc = 2 in (5 cm) and 6 rows of sc rib (when VERY stretched) = 1.75 in (4.5 cm)
1 shell = .75 in (2 cm) tall by 1.25 in. (3.5 cm) wide
You may need to adjust your hook size to obtain correct gauge; it could be helpful to switch to an I hook for the body of the hat if your shells appear to be coming out too small.
Instructions
Cuff
Joining cuffCh 10
Row 1 – Sc in 2nd ch from hook, sc across. Ch 1 (9 sc)
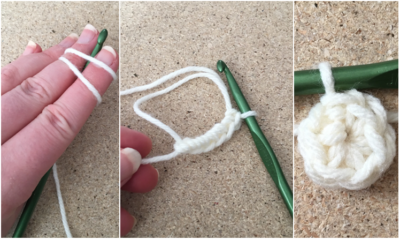
Row 2 – In BLO, sc across to create “sc rib” (see photo to the right). Ch 1 (9 sc)
Rep Row 2 until cuff measures 21″ across when very stretched (or about 15-16” un-stretched; about 53 rows). Do not ch 1 at the end of last row.
With right sides facing together, fold cuff and sl st two sides together, working in FLO. Do not fasten off.
Body of hat
Rnd 1 – Ch 1, 72 sc evenly across top of cuff (it helps to sc 1 in each row of sc rib below, but add an extra sc about every 7-10 sts). Join with sl st to first sc (72 sc)
Rnd 2 – Ch 3 (counts as first dc), 4 dc in same st – first shell made. *Ch 1, Sk 3 sc, sc in next st. Ch 1, Sk 3 sc, shell (5 dc) in next. Rep from * around to last rem 3 sc, ch 1, join to top of beg ch 3. (9 shells and 9 sc)
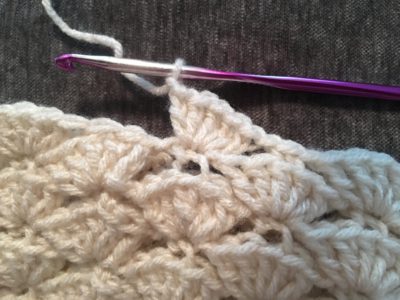
Rnd 3 – Sl st across next 2 dc of first shell, ch 1, sc in BLO of same st. *Ch 1, shell in next sc from previous row (see first photo to the right); ch 1, sc in BLO of of third dc of shell from previous row (see second photo to the right). Rep from * around. Ch 1 and join with sl to first sc (9 shells and 9 sc)
Rnd 4 – Ch 3, 4 dc in same st. *Ch 1, sc in BLO of third dc of shell from previous rnd (see Photo E); ch 1, shell in sc of previous
rnd. Rep from * around. Ch 1, join with sl st to top of beg ch 3 (9 shells and 9 sc)
Rep Rnds 3 & 4 six more times, or until hat measures 9” in total length (10 rnds) 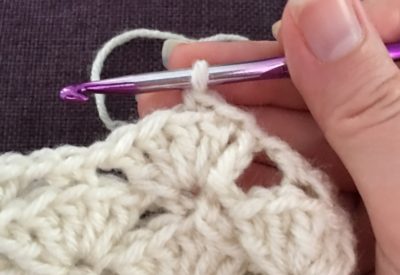
First decrease rnd
You will decrease here by making smaller shells:
Sl st to third dc of shell of previous rnd; ch 1, sc in BLO. *Ch 1 and make a 4 dc shell (instead of a 5 dc shell) in sc from previous rnd; ch 1, sc in BLO of third dc of shell from previous rnd. Rep from * around; ch 1 and join to first sc (9 decreased shells and 9 sc)
Second decrease rnd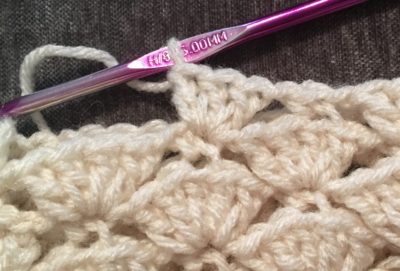
Ch 3 (counts as first dc), 2 dc in same st. *Ch 1, sc in BLO of second dc of shell from previous rnd; ch 1, 3 dc shell (instead of 4 dc shell) in sc of previous rnd (see photo to the right). Rep from * around; ch 1 and join with sl st to top of beg ch 3 (9 decreased shells and 9 sc)
(You will keep decreasing each shell by 1 dc this way for the rest of the hat.)
Third decrease rnd
Sl st to second dc of shell of previous rnd, ch 1, sc in BLO. *Ch 1, 2 dc shell in sc from previous rnd; ch 1, sc in BLO of second dc of shell from previous rnd. Rep from * around; ch1 and join to first sc (9 decreased shells and 9 sc)
Fourth decrease rnd
Ch 3 (counts as dc); *Ch 1, sc in BLO of first dc of shell from previous rnd; ch 1, 1 dc in sc of previous rnd. Rep from * around; ch 1 and join to top of ch 3 (9 decreased shells and 9 sc)
Fasten off and leave a very long tail for sewing.
Closing the hat
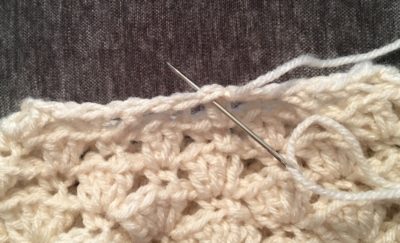
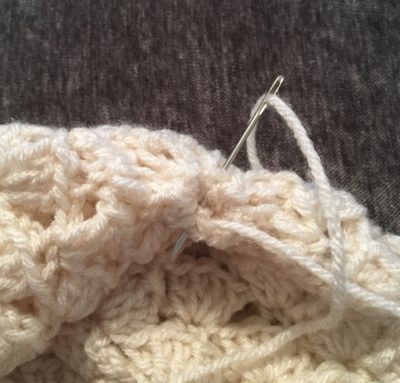
Attach long tail to yarn needle. Insert needle into first few sts of last rnd and pull through (see first photo below). The hat will start to “pucker” and gather together (see second photo below). Continue this way until you have woven the yarn tail throughout all of the sts of the last rnd, pulling together tightly as you weave. When hat is closed, sew a few times over the tiny remaining gap (see last photo below). Bring needle to inside of hat, and weave in all ends.

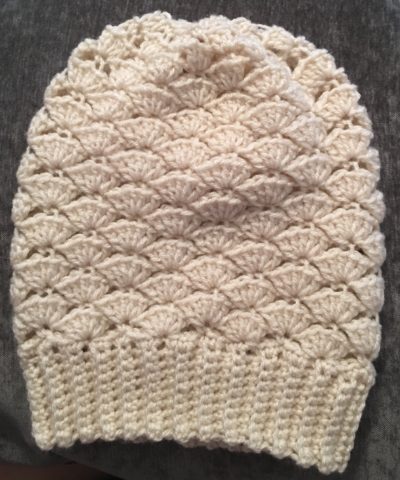
Here is the finished hat!
COPYRIGHT:
This pattern is owned by Crafty Kitty Crochet (Melissa Moore). Any reselling or distribution of this pattern is prohibited. Sale of items made using this pattern is welcomed, but I do ask that credit/a link be provided back to my site, craftykittycrochet.com.
Comments (2)
Joyce
January 6, 2020 at 5:03 pm
My Favorite crochet stitch! Cute hat. Thanks. Have a Blessed day!
Melissa
January 6, 2020 at 6:18 pm
Yay! So glad to hear it! And thank you for your kind compliments!! Hope you have a blessed day, as well 🙂