Cinnamon Bunny – Amigurumi Crochet Pattern
Pin it for later!
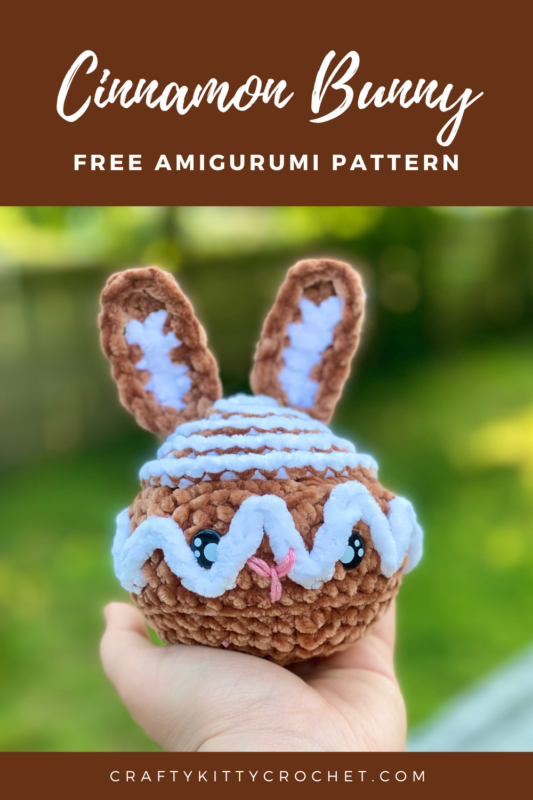
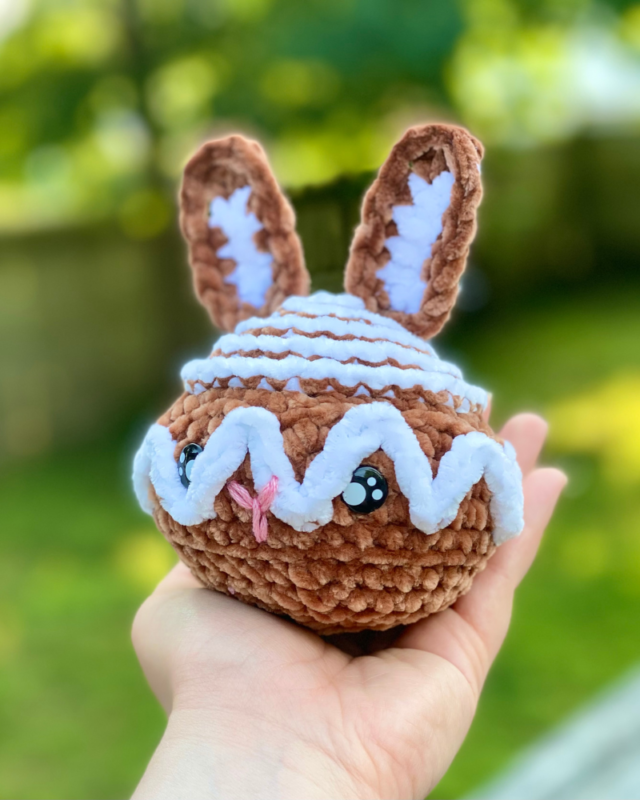
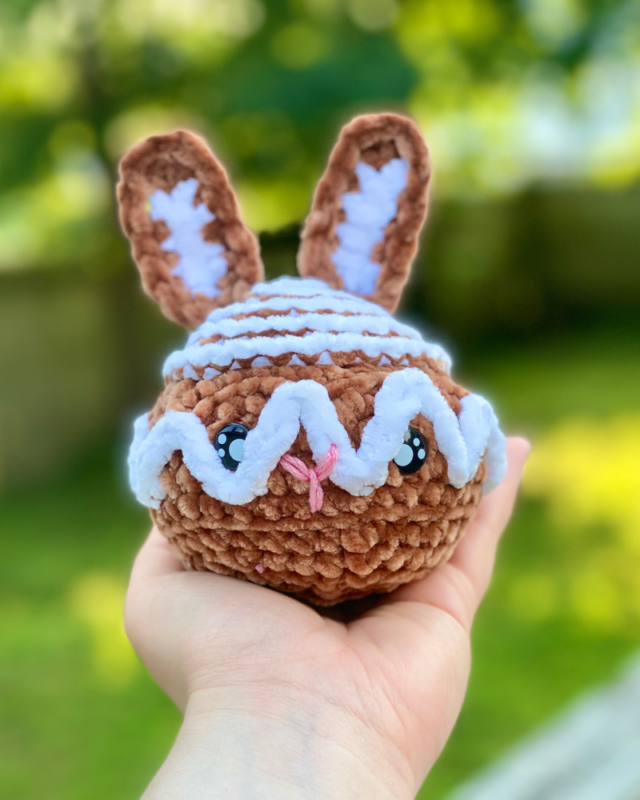
What could be better than a cinnamon bun? Well, a Cinnamon Bunny, of course! This adorable little amigurumi food / animal combo is a variation of my Amigurumi Cinnamon Roll, and it’s sure to please as a gift, a craft fair staple, and more! The pattern is easy and works up quickly, which makes it ideal for summer, fall and holiday markets, as well as gifting and using as a stocking stuffer. If you know someone who loves kawaii plushies, bunnies, or delicious desserts, then this is sure to be the perfect gift idea!
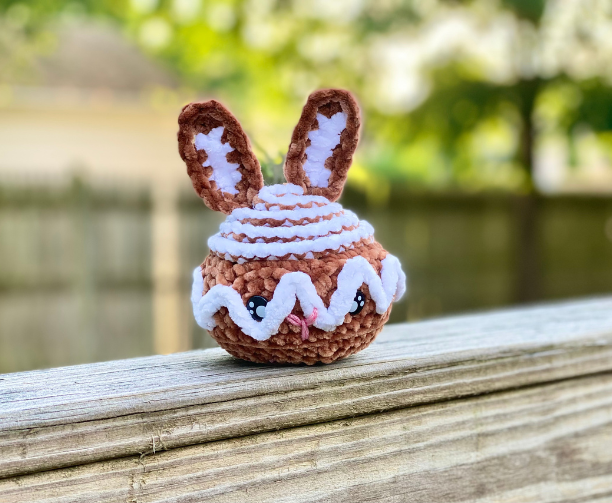
Cinnamon Bunny
I originally came up with this idea as a project for the very fun Softie Crochet Along hosted by Underground Crafter! On June 24, you can find this as the featured project in the Facebook group! Click here to go to the group page and check out the CAL for this bunny, as well as lots of other fun amigurumi projects!
I’m really happy with how this little dessert critter came out! I love making food/animal combos, as you can see from my Gingerbread Jellyfish and Octopus Ice Cream. So this seemed like a natural addition to the mix!
Can’t find Premier Just Chenille? A great alternative is Premier Parfait, which you can find on Amazon HERE!
Looking for the ad-free PDF pattern? You can find it in my shop HERE!
Supplies
Size 7 / 4.5 mm crochet hook
Premier Just Chenille in Cocoa – about 40 yds (super bulky)
Premier Just Chenille in White – about 20 yds (super bulky)
Medium weight yarn in pink – less than 1 yd
1 pair 12 mm safety eyes
Fiberfill stuffing
Yarn Needle
Scissors
Abbreviations
[ ] = indicates a section to be completed separately
*= indicates beginning/end of a section to be repeated
BLO = back loop only
Ch = chain
Hdc = half double crochet
Rem = remaining
Rep = repeat
Rnd(s) = round(s)
Sc = single crochet
Sc2tog = single crochet 2 together
Sk = skip
Sl St = slip stitch
St(s) = stitch(es)
Tr = triple crochet
Gauge
Exact gauge is not essential to this project.
Size
About 4.5 inches wide, 4 inches tall
Notes Premier Just Chenille is classified as Super Bulky but is slightly thinner than other super bulky yarns (such as Premier Parfait, Bernat Blanket, etc.)

How to Make This
Instructions
Roll
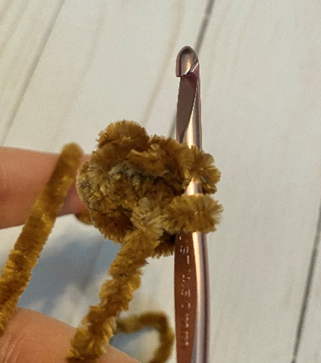
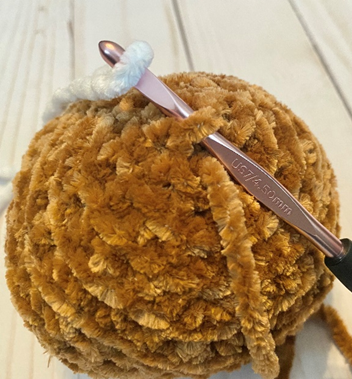
This piece is worked in continuous rnds; do not join. You may wish to use a stitch marker and move it up at the beginning of each new rnd. Please note that Rnds 1 – 7 are worked in BLO (first photo below) – the rem loops from these rnds are used to make icing later. (Rnd 10 is also working in BLO.)
Rnd 1 – With Cocoa yarn, make a magic ring. 6 sc in ring. (6 sc)
Rnd 2 – 2 sc in each st around. (12 sc)
Rnd 3 – *2 sc in next st, sc in next st.* Rep from * to * around. (18 sc)
Rnd 4 – *2 sc in next st, sc in next 2 sts.* Rep from * to * around. (24 sc)
Rnd 5 – *2 sc in next st, sc in next 3 sts.* Rep from * to * around. (30 sc)
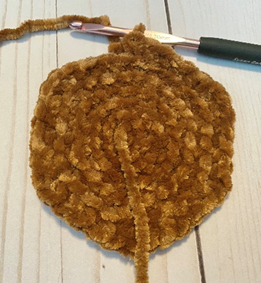
Rnd 6 – *2 sc in next st, sc in next 4 sts.* Rep from * to * around (second photo below). (36 sc)
Rnd 7 – sc in each st around. (36 sc)
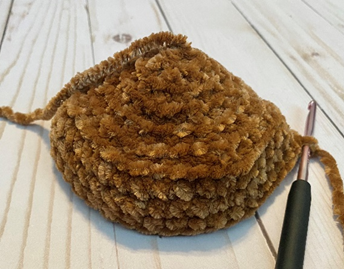
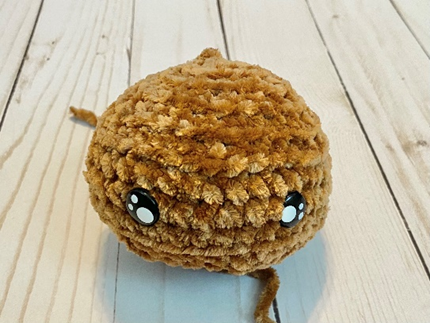
Rnds 8 – 9 – (now working through both loops) sc in each st around (third photo below). Attach safety eyes near Rnd 8, about 5 – 6 sts apart. (36 sc)
Rnd 10 – working in BLO again, *sc2tog over next 2 sts, sc in next 4 sts.* Rep from * to * around. (30 sc)
Rnd 11 – (now working through both loops) *sc2tog over next 2 sts, sc in next 3 sts.* Rep from * to * around. (24 sc)
Rnd 12 – *sc2tog over next 2 sts, sc in next 2 sts.* Rep from * to * around. Stuff piece (do not overstuff.) (18 sc)
Rnd 13 – *sc2tog over next 2 sts, sc in next st.* Rep from * to * around. (12 sc)
Rnd 14 – sc2tog in each st around. (6 sc)
Rnd 15 – sc2tog over next 2 sts; leave rem sts unworked. (5 sc)
Fasten off, leaving tail for sewing rem gap from Rnd 15. Fourth photo below shows piece at this stage.
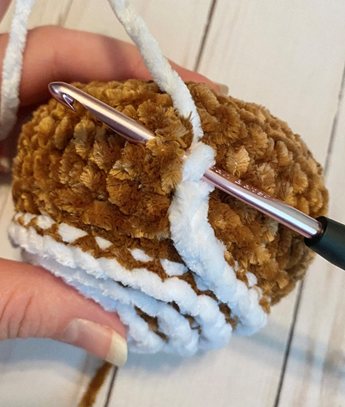
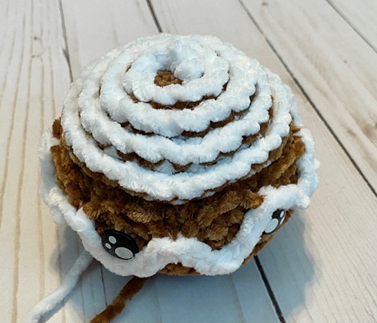
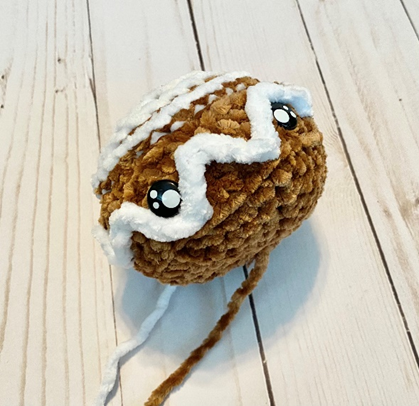
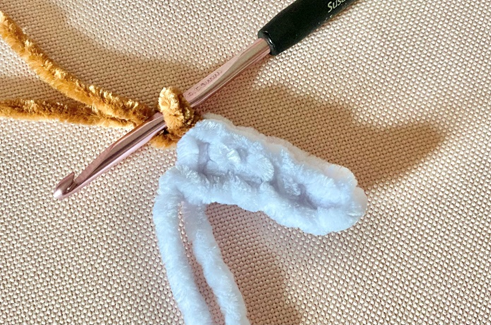
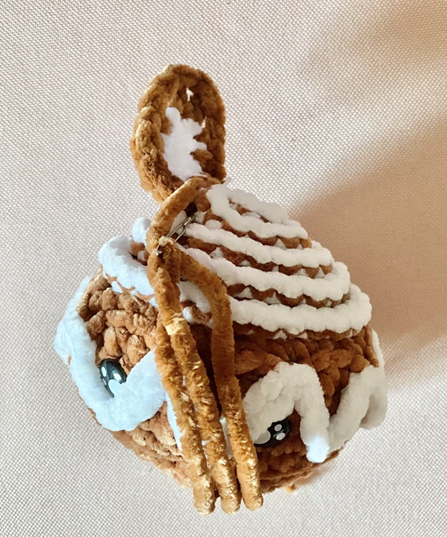
Icing
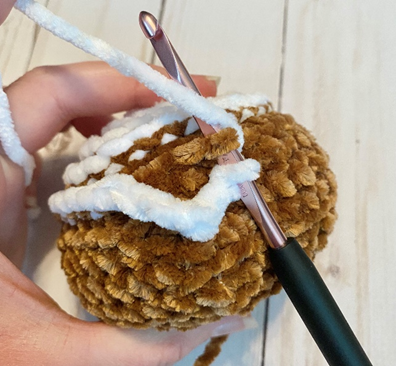
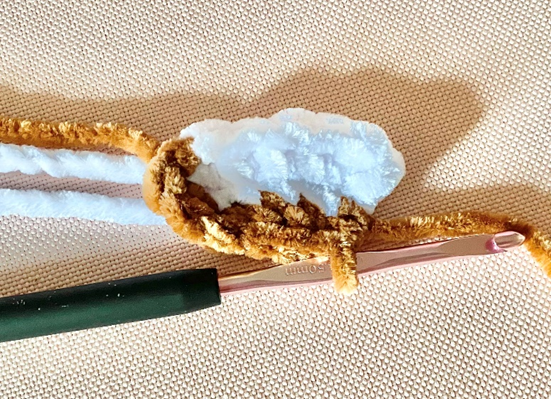
Join White yarn with sl st in first rem loop of Rnd 1 (first photo below). Ch 1, sk first st. Loosely sl st in each rem loop of Rnds 1 – 6 (second photo shows this in progress). Working into rem loops of Rnd 7, *ch 2, sl st around sc st 2 rnds below (third photo), ch 2, sk next 2 rem loops on Rnd 7, sl st in next 2 rem loops (fourth photo).* Rep from * to * 8 more times (on last rep, sl st once into last rem loop from Rnd 7).
Fasten off. Fifth and sixth photos show piece at this stage.

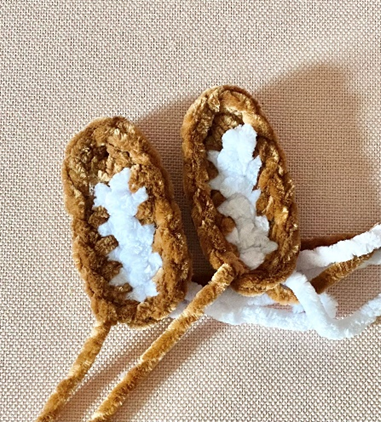
Ear (make 2)
With White yarn, ch 6.
Row 1 – sc in next ch, and in each ch across. Change to Cocoa in last st (first photo below). Do not turn (5 sc)
Row 2 – working along other side of Ear, make 2 sc in next st, hdc in each of the next 3 sts, and [ch 1, tr, ch 1, tr] in last st (second, third and fourth photos). (2 sc, 4 hdc, 2 tr)
Row 3 – working along other side of Ear, hdc in each st across. Join with sl st to first st of Row 2 (fifth photo shows finished Ears). (4 hdc)
Fasten off, leaving long tail for sewing.


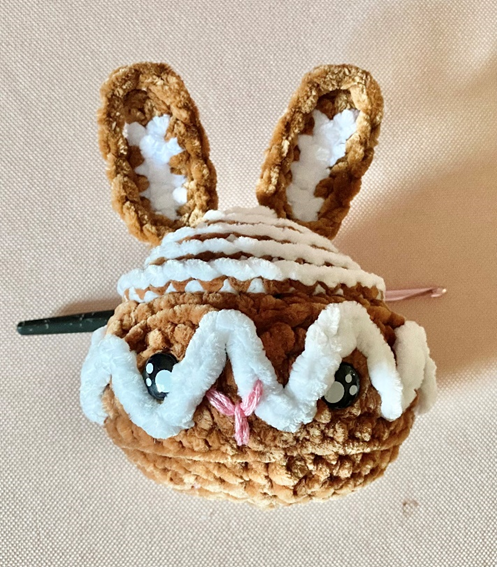
Finishing
(Refer to the two photos below)
Use pink yarn to make a small “v” between eyes for nose; make vertical line underneath to complete nose/mouth look.
Sew each Ear on center-top of Bun, near first two rounds of Icing.
Weave in all ends and/or tie off ends and hide knots inside sts.
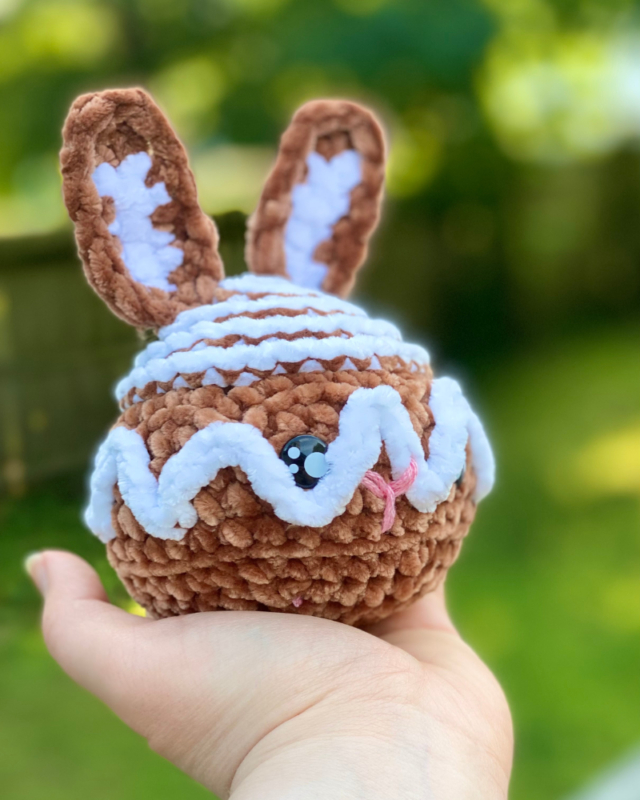
Here’s the finished Cinnamon Bunny!
I hope you enjoyed crocheting this Cinnamon Bunny along with me today. If you love fun, free patterns like this one, then please be sure to sign up for my email list to keep up to date with all my latest designs:
Also, please be sure to follow me on social media, and tag me in photos of your finished projects made from my patterns, so I can see your lovely work!
Don’t forget to pin it for later HERE!
And you can find that ad-free PDF pattern HERE!
Happy Crocheting!
COPYRIGHT:
This pattern is owned by Crafty Kitty Crochet (Melissa Moore). Any reselling or distribution of this pattern is prohibited. Sale of items made using this pattern is welcomed, but I do ask that credit/a link be provided back to my site, craftykittycrochet.com.