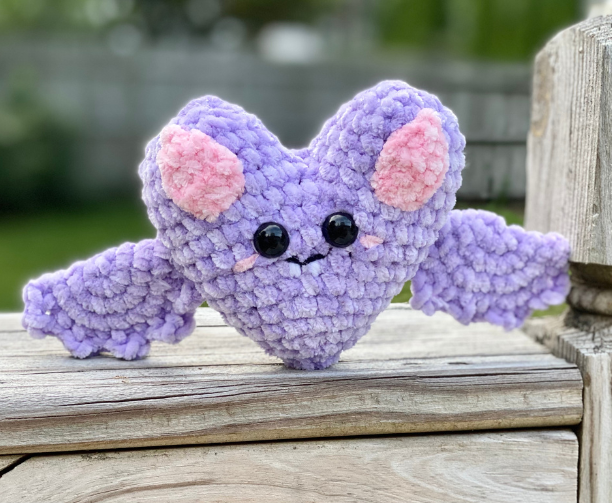
Amigurumi Hearty Bats – Crochet Pattern
Pin it for later!
It’s Halloween season, which means it’s time for bats and all things spooky! But why not keep things spooky AND cute at the same time?! These hearty bats are kawaii, spooky, and easy to make! They’re the perfect spoopy decor for fall or adorable toy plushies to collect, and they also make great gifts and craft fair sellers! The pattern works up in less than a few hours, and can be customized so many ways! This pattern checks all the boxes – fun, fast, easy, cute, one hour pattern, and more! Crochet a whole bunch of these winged wonders in a weekend!
Amigurumi Hearty Bats
We all love bats for spooky season, but this year, I wanted to do something a little out of the ordinary for my amigurumi Halloween designs. As you may already know from patterns like my Pumpkin Pie Turtle and Halloween Jelly Lanterns, I tend to be a bit extra in my designs, and often feel the need to combine two or more things together (animals and food, etc.). So since I’ve been on a bit of a heart-themed kick lately (see my Hearty Penguins and Hearty Mushrooms for proof!), I figured why not make a little heart shaped bat?! Turns out, it’s really fun and easy to do, and creates a unique toy that will be cherished for many Halloween seasons to come!
The yarn I used for this bat is a Dollar Tree exclusive, but a great alternative (also put out by the same yarn company) is Premier Parfait Chunky! It’s a staple for making soft plushies! Find some on Amazon HERE!
Looking for the ad-free PDF pattern? You can find it in my shop HERE!
Supplies
Size 7 / 4.5 mm crochet hook
For regular bat (purple bat seen in photos):
- Bulky weight yarn in main color – about 30 yds (Premier Just Chenille in Lavender)
- Bulky weight yarn in contrast color – about 10 yds (Premier Just Chenille in Pink)
For Chocolate Cherry bat:
- Bulky weight yarn in main color – about 30 yds (Premier Parfait Chunky in Espresso)
- Bulky weight yarn in contrast color – about 10 yds (Premier Just Chenille in Pink)
- Medium weight yarn in red for cherry – about 10 yds (Red Heart Super Saver in Cherry Red)
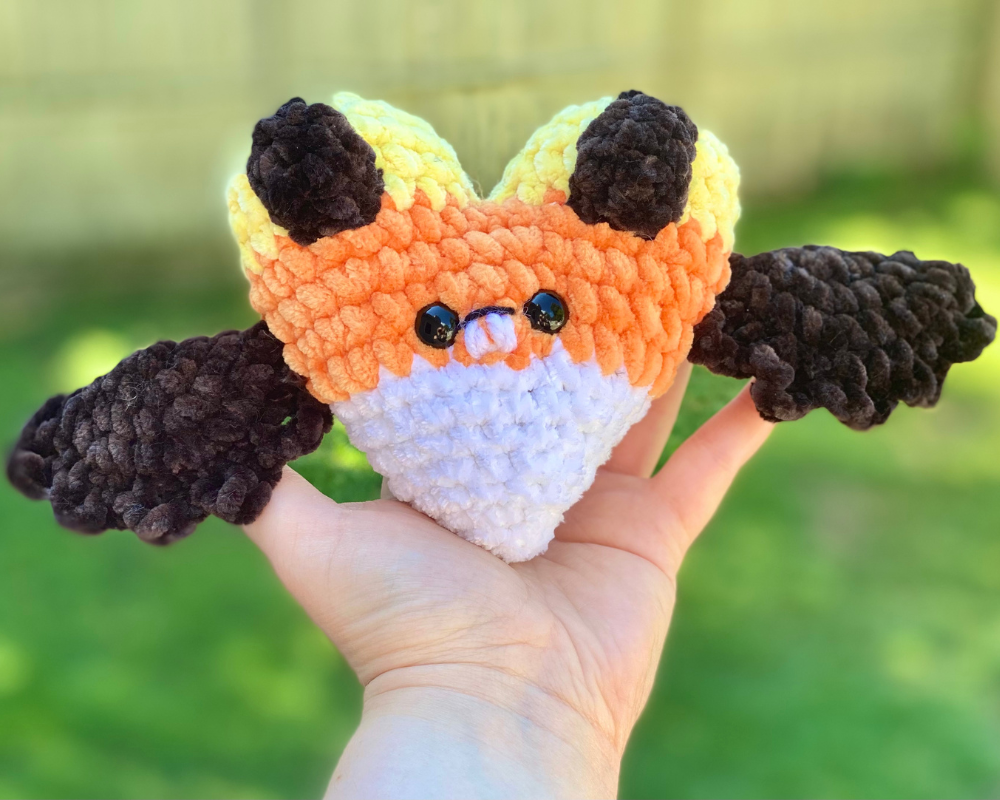
For Candy Corn bat:
- Bulky weight yarn in white, orange and yellow – about 7 yds each (Premier Just Chenille in Yellow and White, Premier Parfait Chunky in Tangerine)
- Bulky weight yarn in contrast color – about 20 yds (Premier Parfait Chunky in Espresso)
For Rainbow bat:
- Bulky weight yarn in purple, blue, green, orange, yellow and pink – about 10 yds each (Premier Just Chenille in Lavender, Light Blue, Lime, Yellow, and Pink)
- Bulky weight yarn in contrast color – about 10 yds (Premier Just Chenille in White)
- Bulky weight yarn in wing color – about 15 yds (Premier Just Chenille in Pink)
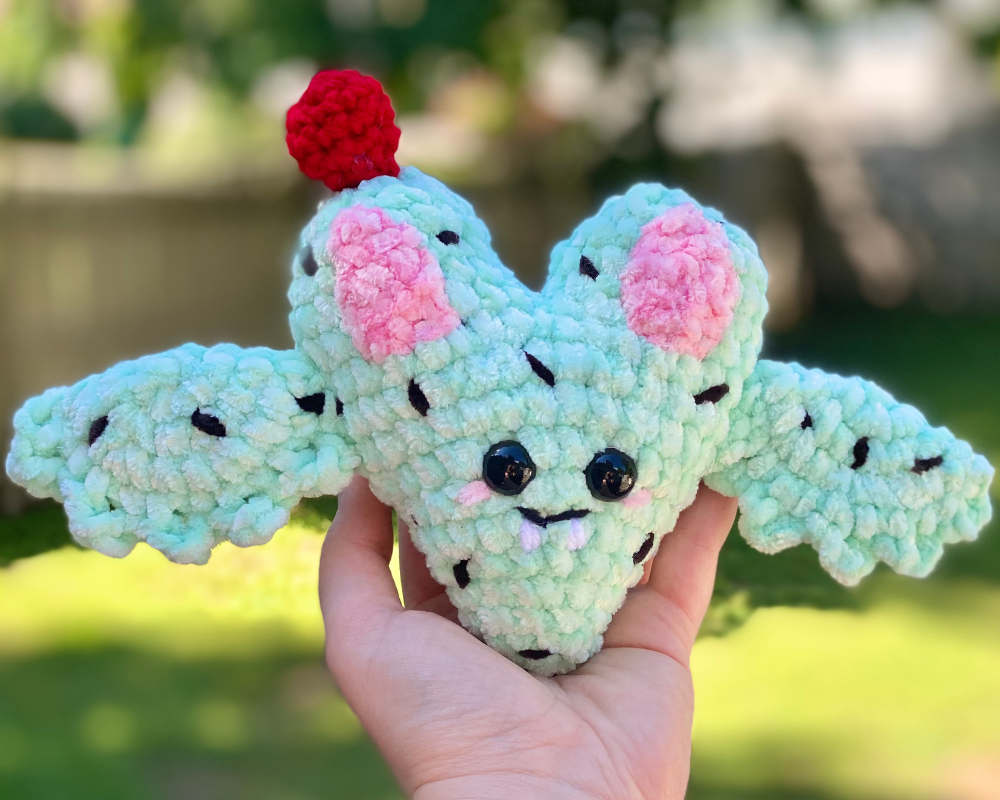
For Mint Chip bat:
- Bulky weight yarn in main color – about 30 yds (Premier Just Chenille in Mint)
- Bulky weight yarn in contrast color – about 10 yds (Premier Just Chenille in Pink)
- Medium weight yarn in red for cherry – about 10 yds (Red Heart Super Saver in Cherry Red)
- Bulky weight yarn in brown for chocolate chips – about 5 yds (Premier Parfait Chunky in Espresso)
For all styles:
Medium weight yarn in black or red for smile – <1 yd (Red Heart Super Saver in Black used in photos)
Medium weight yarn in white for fangs – <1 yd (Red Heart Super Saver in White used in photos)
Medium weight yarn in pink for blush – <1 yd (Red Heart Super Saver in Perfect Pink, or use Premier Just Chenille in Pink if using it as contrast color)
1 pair 12 mm safety eyes
Fiberfill stuffing
Yarn Needle with large eye
Scissors
Stitch marker
Abbreviations
*= indicates beginning/end of a section to be repeated
[ ] = indicates a set of instructions to be repeated
Ch = chain
Rem = remaining
Rep = repeat
Rnd(s) = round(s)
Sc = single crochet
Sc2tog = single crochet 2 together
St(s) = stitch(es)
Gauge
Exact gauge is not essential to this project.
Size
About 5 inches in length, 5 inches at widest point of heart body, and 10 inches wide including wings
Notes Premier Just Chenille, the yarn used in this pattern, is classified as Super Bulky, but has a weight more similar to bulky weight yarn
How to Make This
Instructions
Body
This piece is worked in continuous rnds; do not join. You may wish to use a stitch marker and move it up at the beginning of each new round.
Rnd 1 – with main color, make a magic ring. 6 sc in ring. (6 sc)
Rnd 2 – sc in each st around. (6 sc)
Rnd 3 – 2 sc in each st around. (12 sc)
Rnd 4 – sc in each st around. (12 sc)
Rnd 5 – *2 sc in next st, sc in next st.* Rep from * to * around. (18 sc)
Rnd 6 – sc in each st around. (18 sc)
Rnd 7 – *2 sc in next st, sc in next 2 sts.* Rep from * to * around. (24 sc)
Rnd 8 – sc in each st around. (24 sc)
Rnd 9 – *2 sc in next st, sc in next 3 sts.* Rep from * to * around. (30 sc)
Rnd 10 – sc in each st around. (30 sc)
Rnd 11 – *2 sc in next st, sc in next 4 sts.* Rep from * to * around. (36 sc)
Rnd 12 – sc in each st around. Begin stuffing. Do not fasten off. (36 sc)

First Heart Peak
This portion is also worked in continuous rnds.
Rnd 1 (partial rnd) – Count backwards 9 sts from the st you are currently in; place a marker on that stitch (first photo below). Make 9 sc. Sc across from you into st where marker was placed (second photo below); this st now indicates first st of rnd. (10 sc)
Rnds 2 – 4 – sc in each st around; stuff Peak (third photo). (18 sc)
Rnd 5 – *Sc2tog over next 2 sts, sc in next st.* Rep from * to * around. (12 sc)
Rnd 6 – sc2tog in each st around; finish stuffing Peak. (6 sc)
Rnd 7 – sc2tog over next 2 sts. Leave rem sts unworked. (5 sc)
Fasten off, leaving tail for sewing rem gap from Rnd 6. Attach safety eyes in center of piece between Rnds 10 and 11, about 2 sts apart.


Second Heart Peak
This portion is also worked in continuous rnds.
Rnd 1 – Attach main color yarn at edge of opening right next to First Heart Peak (first photo below), ch 1. Place marker here to indicate beginning of rnd. Sc in each st around opening. (18 sc)
Rnds 2 – 3 – sc in each st around (second photo below). (18 sc)
Rnd 4 – *Sc2tog over next 2 sts, sc in next st.* Rep from * to * around. (12 sc)
Rnd 5 – sc2tog in each st around; finish stuffing Peak. (6 sc)
Rnd 6 – sc2tog over next 2 sts. Leave rem sts unworked. (5 sc)
Fasten off, leaving tail for sewing rem gap from Rnd 6 and gap between two Heart Peaks. (Third photo)


Wing (make 2)
This piece is worked in continuous rnds until Shaping; do not join. You may wish to use a stitch marker and move it up at the beginning of each new round.
Rnd 1 – with main color, make a magic ring. 6 sc in ring. (6 sc)
Rnd 2 – 2 sc in each st around. (12 sc)
Rnd 3 – *2 sc in next st, sc in next st.* Rep from * to * around. (18 sc)
Rnd 4 – *2 sc in next st, sc in next 2 sts.* Rep from * to * around (first photo below). Do not fasten off. (24 sc)
Shaping
Fold piece in half at widest point (second photo), with st you are currently in on right side of folded piece (third photo). Working through both sides of folded piece, make 1 sc. *Ch 3, sc 2 through both sides of piece. (fourth and fifth photos)* Rep from * to * a total of 5 times. (Sixth photo.) (11 sc, 5 ch-3 peaks)
Fasten off, leaving long tail for sewing.


Inner Ear (make 2)
With contrast color, ch 2.
Row 1 – 2 sc in 2nd ch from hook. Ch 1, turn. (2 sc)
Row 2 – sc in each st across. Ch 1, turn. (2 sc)
Row 3 – 2 sc in each of the next 2 sts. Ch 1, turn. (4 sc)
Row 4 – [sc2tog over next 2 sts] twice. Ch 1, turn. (2 sc)
Row 5 – sc in each st across. (2 sc)
Fasten off, leaving long tail for sewing.

Finishing
(See photo below for placement.) Sew each Inner Ear to each center of each Heart Peak. With pink yarn, make small horizontal lines on outer edge of each Eye for Blush. With black yarn, make small “v” centered below Eyes for Smile. With white yarn, make small vertical lines below Smile for Fangs. Sew each Wing to each side of piece, between Rnds 8 – 12 of Body.
Weave in all ends and/or tie off ends and hide knots inside sts.

Variations
For Chocolate Cherry Bat and Mint Chip Bat: complete Body in brown or mint green. Complete Ears in pink contrast color. To make mint chips, sew several small lines throughout Body and Wings with brown yarn. Follow directions for Cherry below and sew above one Ear.
For Candy Corn Bat: complete Rnds 1 – 8 in white, 9 – 12 in orange; and Rnds 2 – 7 of first Heart Peak, and Rnds 1 – 6 of second Heart Peak in yellow. Complete Inner Ears and Wings in brown contrast color.
For Rainbow Bat: Complete Rnds 1 – 4 of Body in purple, 5 – 8 in blue, 9 – 12 in green; and Rnds 2 – 4 of both first Heart Peak and Rnds 1 – 3 of second heart peak in yellow; and 5 – 7 of first Heart Peak, and 4 – 6 of second Heart Peak in pink.

Cherry
This piece is worked in continuous rnds; do not join. You may wish to use a stitch marker and move it up at the beginning of each new rnd.
Rnd 1 – with medium weight red yarn, make a magic ring, leaving a long beginning tail. 5 sc in ring. (5 sc)
Rnd 2 – 2 sc in each st around. (10 sc)
Rnds 3 – 4 – sc in each st around. (10 sc per rnd)
Rnd 5 – sc2tog in each st around. (5 sc)
Fasten off, leaving long tail for sewing. Use beginning tail to stuff piece.
Here are the finished bats!
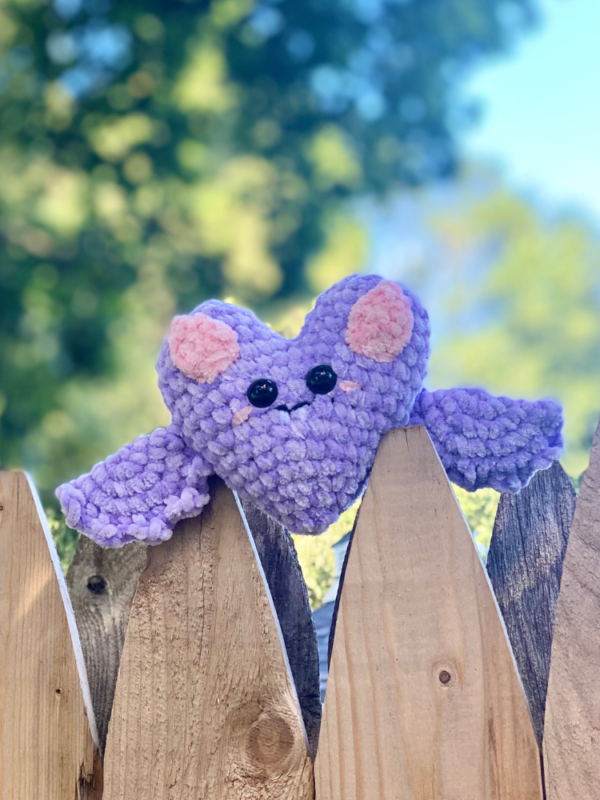
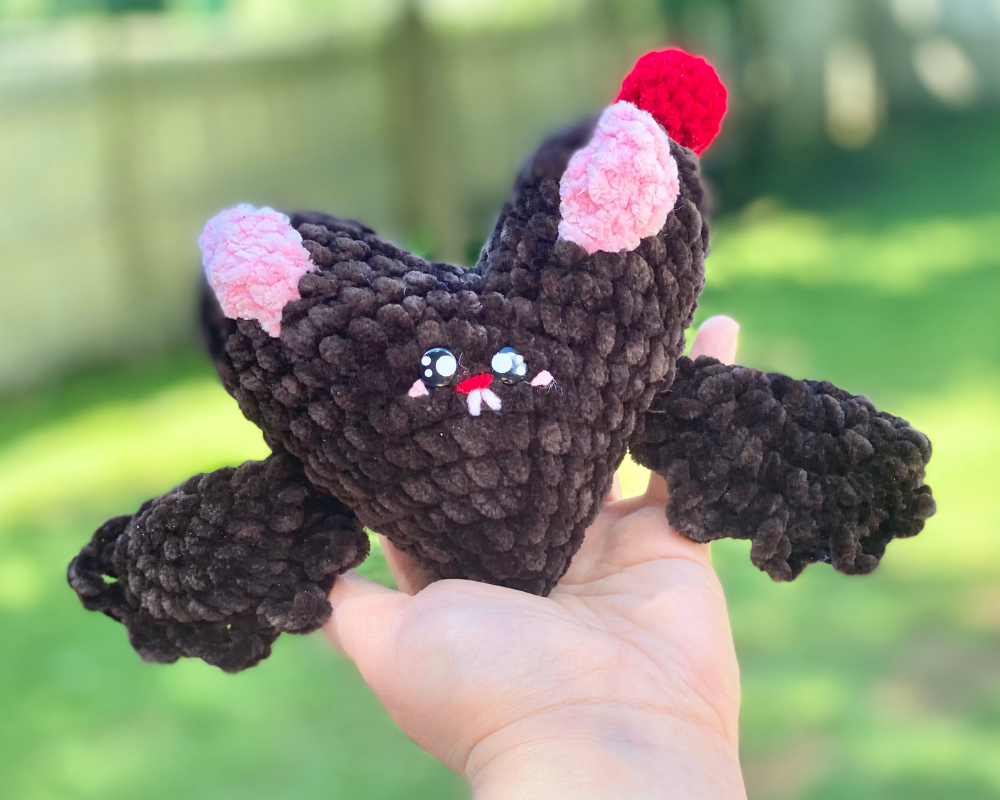
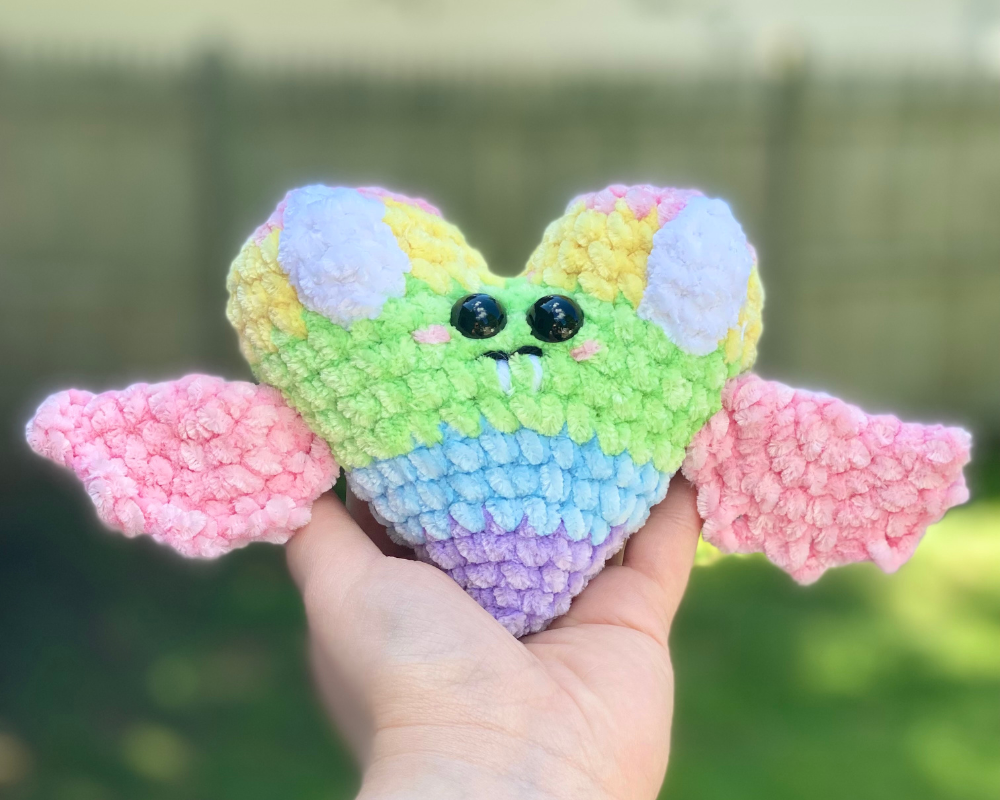
I hope you enjoyed crocheting these bats along with me today. If you love fun, free patterns like this one, then please be sure to sign up for my email list to keep up to date with all my latest designs:
Also, please be sure to follow me on social media, and tag me in photos of your finished projects made from my patterns, so I can see your lovely work!
Don’t forget to pin it for later HERE!
And you can find that ad-free PDF pattern HERE!
Happy Crocheting!
COPYRIGHT:
This pattern is owned by Crafty Kitty Crochet (Melissa Moore). Any reselling or distribution of this pattern is prohibited. Sale of items made using this pattern is welcomed, but I do ask that credit/a link be provided back to my site, craftykittycrochet.com


Comments (5)
Linda Zumwalt
September 30, 2022 at 3:39 pm
I dearly love your patterns and ideas. I will be glad and happy to make some for my grandchildren and friends. Thank you once again. Linda Zumwalt, from Southern Illinois.
Melissa
October 10, 2022 at 6:05 pm
Hi Linda, I’m so happy to hear that! You’re so welcome and thank YOU! ~ Melissa
Spooktacular Stiches: 25 Free Crochet Bat Patterns – love. life. yarn.
July 12, 2023 at 12:05 am
[…] Designer: Crafty Kitty CrochetYarn: Premier Yarns Parfait Chunky (Super Bulky Weight #6)Click here for the free crochet pattern!_______________________ […]
20 Crochet Bat Free Patterns & Amigurumi + Spooky Tutorials – Clairea Belle Makes
August 14, 2023 at 8:56 am
[…] Click Here […]
Hot Fudge Ghosts – Amigurumi Crochet Pattern ~ Crafty Kitty Crochet
December 28, 2024 at 5:36 pm
[…] you’re familiar with my other Halloween patterns, like my Wee Ghosties, Pastel Ghosties, and Hearty Bats, you know that I love designing spooky cute critters with some kind of twist (like a food theme, a […]