
Light and Airy Cardigan Crochet Pattern
(Note, this post contains affiliate links, meaning, at no additional cost to you, I will make a small commission if you click through and make a purchase.)
(Pin it for later!)
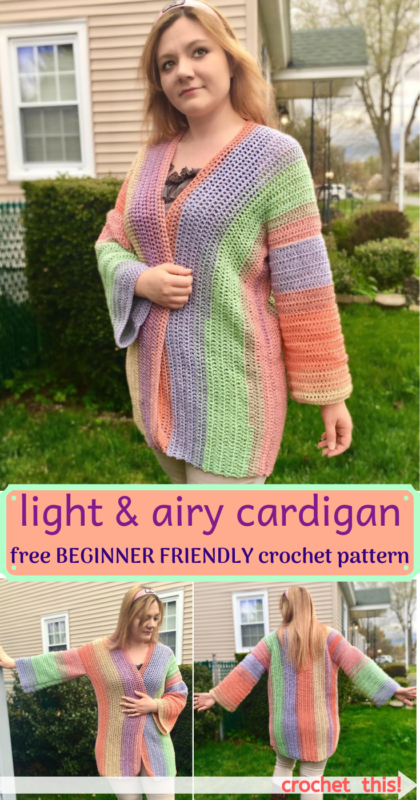
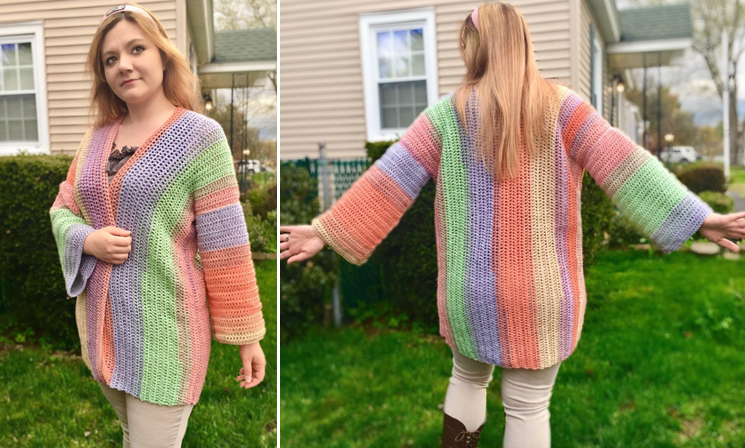
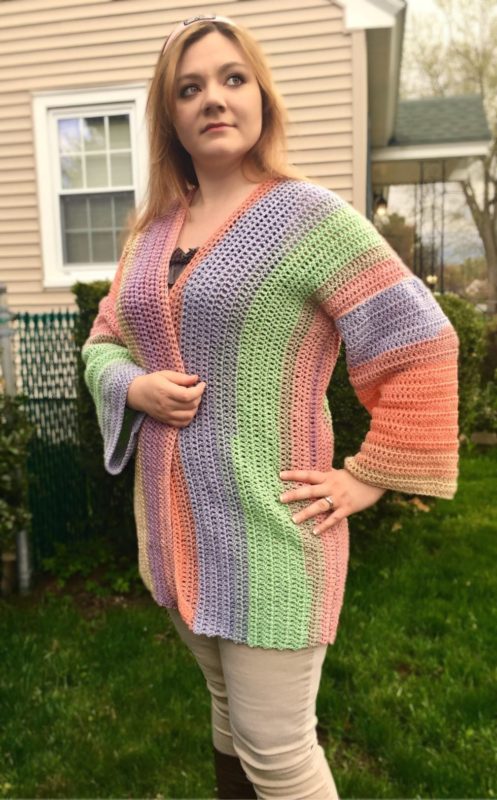
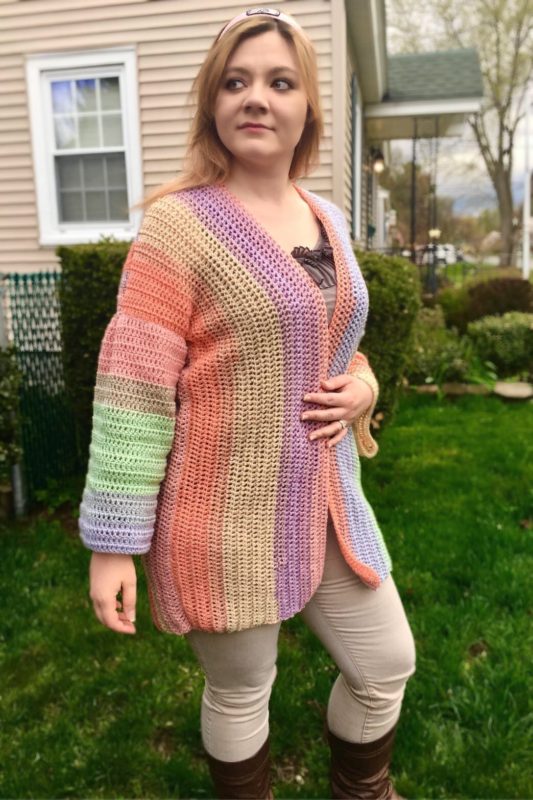
This comfy, bright and airy cardigan is the perfect spring sweater! What’s even better is that it is INCREDIBLY easy to make – it’s comprised of just a few blocks of double crochet! If you’re looking for an easy project that combines both style and comfort, then you’re in for a treat with this pattern!
If you’re looking for an autumnal twist on this cardigan, I recommend using the colorway “Sunny Days” of Lion Brand cupcake – it’s what I used to make this “Fall Festival” edition of my Cardigan, and I love how fall-tastic the colors are!

I’m so excited to announce that on February 23, 2021 my Light and Airy Cardigan was featured in the February edition of Made With a Twist’s blog burst! The theme was Spring Garments, and I’m honored to have been featured alongside of many talented designers and their beautiful springy projects!
Did you happen to miss this blog hop date? No worries! There’s a handy Pattern Bundle for this lovely collection! Get all of these lovely spring fashion designs, including my Light & Airy Cardigan, in one convenient, curated package!
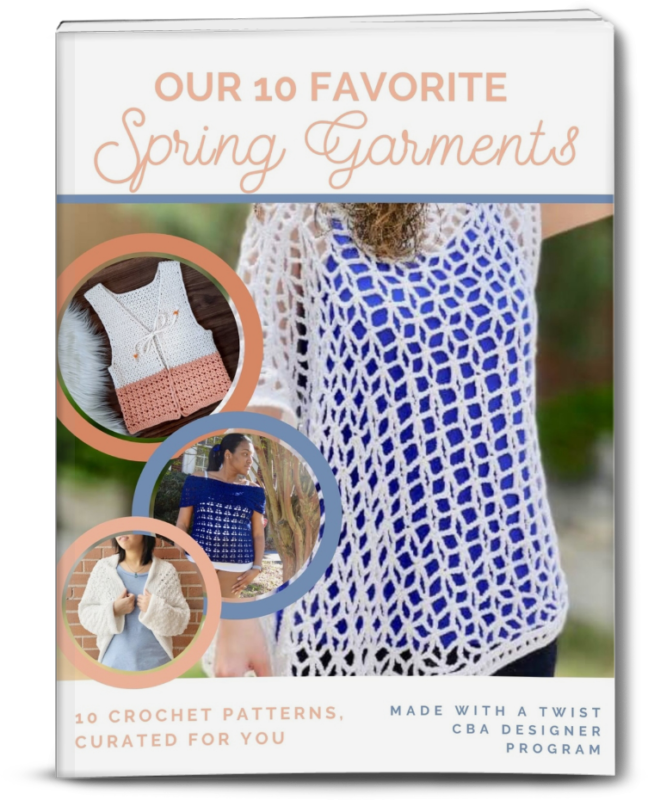
GET THE PATTERN BUNDLE HERE!!!
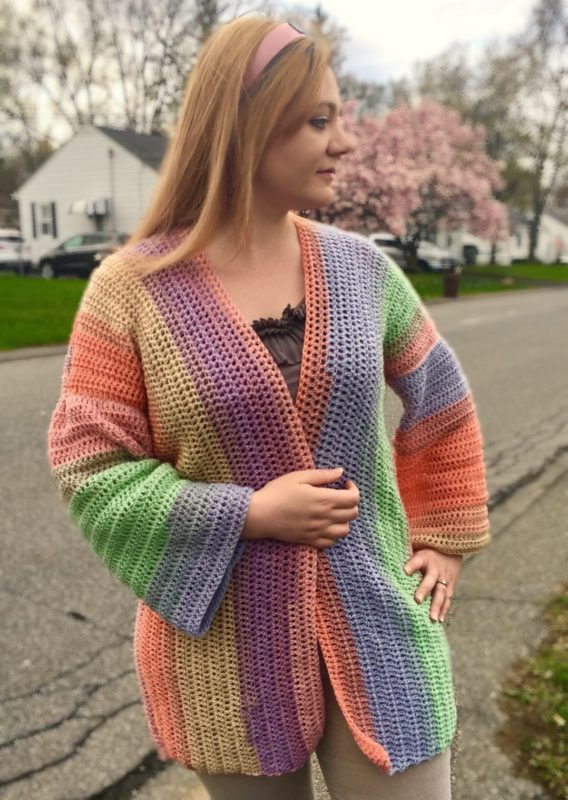
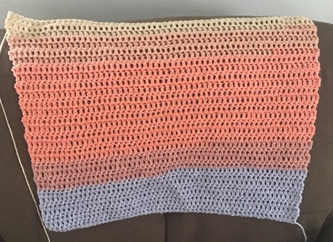
I discovered the perfect yarn for this project! I knew I wanted cheery colors for spring and summer, but wanted to keep the yarn weight light, as well. I’ve experimented with making sweaters using bulky yarns in the past, and although they’re warm, they can be a bit cumbersome to wear! I came across this lovely yarn by Lion Brand called “Cupcake”. How could I resist a yarn with a name like that?! The colorways are all bright and cheerful, and named after desserts as an added bonus! This cardigan is made using “Gelato”, a blend of soft pastels. It’s a yummy sounding name, and the colors also remind me a little bit of a sunset on the beach! Find some of this delicious yarn on Amazon HERE!
Looking to purchase the ad-free PDF pattern for this Light & Airy Cardigan? You can find it HERE!
Supplies
Lion Brand Cupcake in “Gelato” – 3 skeins
Size H/8 5.00 mm crochet hook
Yarn Needle
Scissors
Abbreviations
Ch = chain
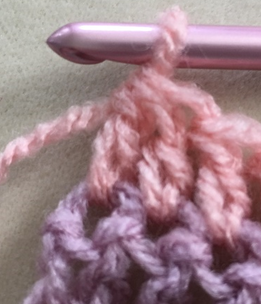
Dc = double crochet
Dc2tog = double crochet 2 together
Rep = repeat
St = stitch(es)
Gauge
3 dc and 2 rows = 1”
Size
One Size Fits Most (Ladies’ Small through Large); about 26-27” wide (without sleeves), 31” length. Size can be adjusted by adding/removing stitches from initial foundation chains and subsequent rows.
Instructions
Back
Ch 100.
Row 1 – dc in 3rd ch from hook, and in each st across. Ch 2, turn (98 dc)
Row 2 – dc in each st across. Ch 2, turn. (98 dc)
Rows 3 – 47 – Rep Row 2. Do not ch 2 at end of Row 47.
Fasten off, leaving a long tail for sewing.
Front (make 2)
Ch 100.
Row 1 – dc in 3rd ch from hook, and in each st across. Ch 2, turn (98 dc)
Row 2 – dc in each st across. Ch 2, turn (98 dc)
Rows 3 – 14 – Rep Row 2.
Row 15 – dc in next 96 sts, dc2tog over last 2 sts. Ch 2, turn (97 dc)
Row 16 – dc in each st across. Ch 2, turn (97 dc)
Row 17 – dc in next 95 sts, dc2tog over last 2 sts. Ch 2, turn (96 dc)
Row 18 – dc in each st across. Ch 2, turn (96 dc)
Row 19 – dc in next 94 sts, dc2tog over last 2 sts. Ch 2, turn (95 dc)
Row 20 – dc in each st across. Ch 2, turn (95 dc)
Row 21 – dc in next 93 sts, dc2tog over last 2 sts. Ch 2, turn (94 dc)
Row 22 – dc in each st across. Ch 2, turn (94 dc)
Row 23 – dc in next 92 sts, dc2tog over last 2 sts. Ch 2, turn (93 dc)
Row 24 – dc in each st across. (93 dc)
Fasten off, leaving a long tail for sewing.
Sleeve (make 2)
Ch 60.
Row 1 – dc in 3rd ch from hook, and in each st across. Ch 2, turn (58 dc)
Row 2 – dc in each st across. Ch 2, turn (58 dc)
Rows 3 – 30 – Rep Row 2. Do not ch 2 at end of Row 30 (58 dc)
Fasten off, leaving long tail for sewing.
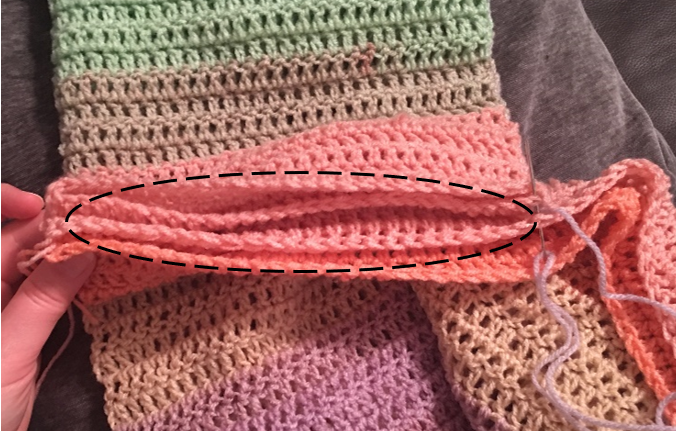
Finishing
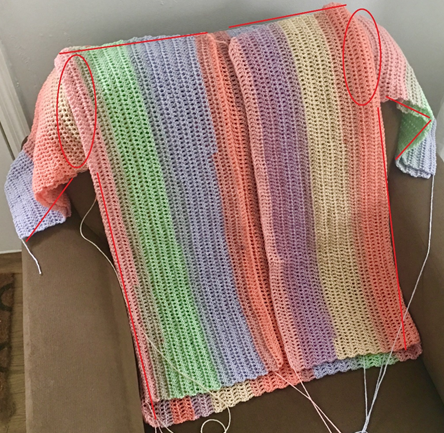
Piece should be sewn together with right sides facing each other (so that piece is sewn inside out, and seams do not show when piece is turned right side out); except for one of the Fronts, which should be placed opposite of the other Front, so that decreased edges match. Photo below shows areas that should be sewn together.
Fold Sleeve in half with right sides facing each other and sew together; repeat for other Sleeve.
Sew Fronts to Back across top edges.
Sew Sleeves on sides of piece, sewing one half of Sleeve to Front, and one half to Back, for armhole.
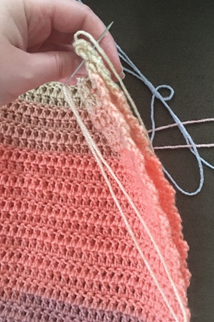
Sew Fronts to Back up to where Sleeves begin. Weave in all ends.
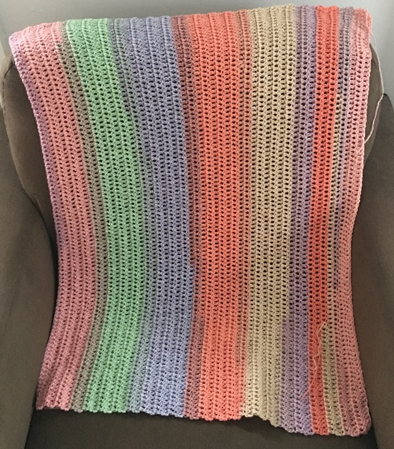
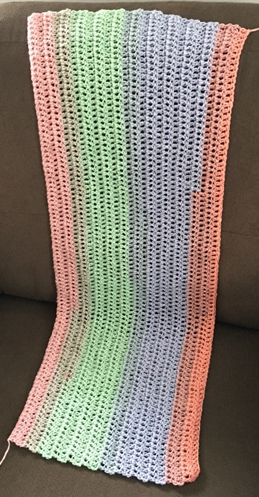
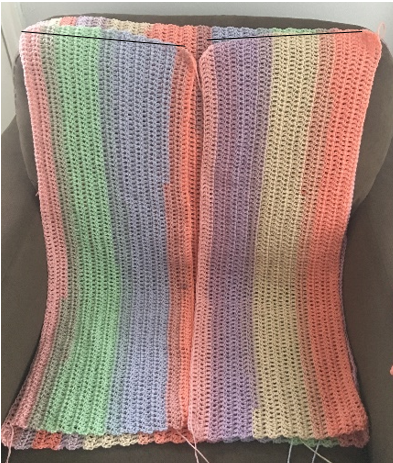
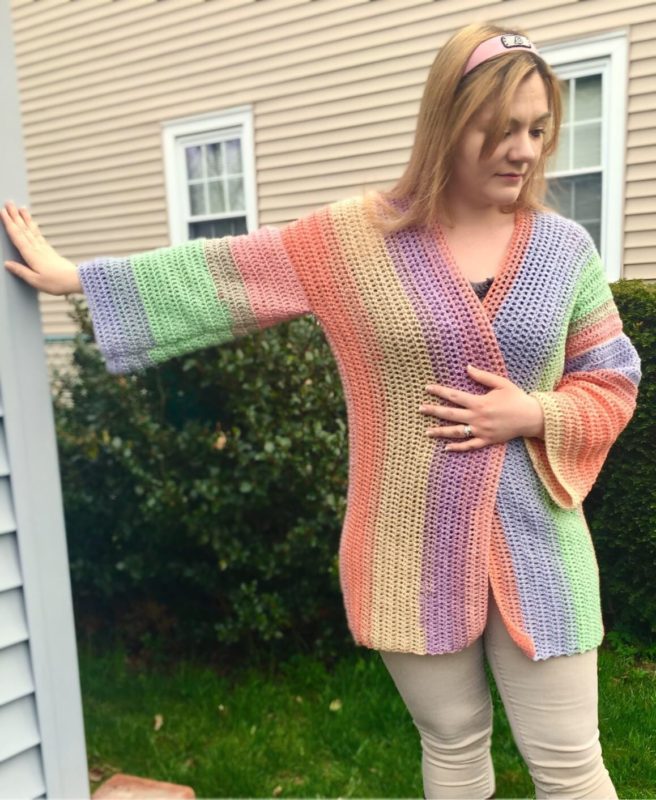
Here is the finished Cardigan!

I hope you enjoyed crocheting this comfy cardigan along with me! If you love fun and easy free patterns, please be sure to follow me on social media and subscribe to my email list! I have many more patterns coming soon, so stay tuned. Happy Crocheting!
COPYRIGHT: This pattern is owned by Crafty Kitty Crochet (Melissa Moore). Any reselling or distribution of this pattern is prohibited. Sale of items made using this pattern is welcomed, but I do ask that credit/a link be provided back to my site, craftykittycrochet.com.
Comments (26)
traffic people
May 11, 2019 at 10:28 am
Summer is here! The sand, sea and sun make me want to go to the beach. This kimono cardigan is great for everyday wear to go out or inside the house made with breathable cotton yarn and so light weight with the easy crochet stitch.
Diane
February 16, 2023 at 4:52 pm
I don’t understand why you would need 100 stitches for the front. It’s 2 pieces, so shouldn’t it be 50 each panel?
Melissa
February 16, 2023 at 6:48 pm
Hi Diane! This is because the rows actually work up the length of the piece. Each row you work is top to bottom (or vice versa) of the piece. So the front panels are 100 because all the pieces should be the same length. Please let me know if that helps and if you have any other questions! Thank you! ~ Melissa
How to Make the Double Crochet Stitch – Video Tutorial – Crafty Kitty Crochet
June 23, 2019 at 11:47 am
[…] use the double crochet pretty frequently in my patterns! My Kimono Cardigan uses the double crochet almost exclusively. And the double crochet can be used to make other, […]
Bunny
September 4, 2019 at 1:56 am
The colors are really inviting. This is a design I actually think I can master thanks for posting.
Melissa
September 7, 2019 at 1:49 pm
So glad to hear it! Thank you so much!
Shazz
October 16, 2019 at 3:36 pm
looking frward to making this for myself
Melissa
October 16, 2019 at 4:59 pm
Thanks Shazz! I hope you like the pattern!!!
Karan Mullis
May 11, 2020 at 12:43 am
mullis.k@yahoo.com
Melissa
May 11, 2020 at 2:19 am
Hi Karan, I’m glad you decided to make this pattern! As for sewing, I don’t have a real strategy for doing it – I just put the two pieces together, thread my yarn needle, and sew through the two pieces from front to back. Then I bring the needle back around to the front and repeat! I hope that helps, and please let me know if you’d still like to go over it. My email is craftykittycrochet@gmail.com ! Thanks! ~ Melissa
Terri
April 1, 2021 at 10:29 pm
Hi, this is a beautiful sweater! One question – the front panels are tapered on one end – which end is connected at the top of the shoulder? Is the taper at the neckline, or at the bottom front opening? Can’t wait to make this!
Thank you!
Melissa
April 1, 2021 at 10:35 pm
Hi Terri! I’m so happy you’ll be making one of these cardigans soon! That’s a great question – the tapered end is connected to the top of the sweater, at the neckline. There should be a photo in the pattern that shows that the tapered-downward parts go closest to the center of the sweater when you are sewing on the front panels! But if you run into any trouble when assembling them, just let me know and I’ll do my best to help! Thank you and hope you love the pattern 🙂 ~ Melissa
Sarah F
April 10, 2026 at 3:03 pm
Hi Terri – I had the same question – I have all of my pieces done and am ready to sew together. So the tapered parts of the front panels essentially make the ‘neck’ of the cardigan? is that the way you connected them?
Melissa
April 10, 2026 at 4:09 pm
Hi Sarah! Yes, that’s what the tapered panels are for! Hope that helps! ~ Melissa
Linda
April 20, 2021 at 2:16 pm
Melissa,
I like this pattern, colors are nice. I have a habit of changing patterns, using smaller hook and doing hdc insteadof dc. Works OK. Question, Size for widt is 26- 27 inches. Is that measurement for the whole sweater, front and back ? Thanks
Melissa
April 20, 2021 at 2:30 pm
Hi Linda! So happy to hear it! Good question – the width is for the front of the piece, laying flat – not the full circumference of the piece. Hope that helps and that you love the pattern! Thanks! ~ Melissa
Linda
April 22, 2021 at 5:40 pm
thanks, is that for both front peices or just one. Rough idea for width of back and for both sleeves? Thanks for your help
Melissa
April 22, 2021 at 6:51 pm
Hi Linda, just saw your email and replied! So, the total width of the piece – front and back panels with sleeves attached – will be roughly twice the 26-27″ inch measurement. So about 52-54″ around the entire piece. The 26-27″ measurement is just for the piece laying flat, on one side! Hope that helps! Thanks and enjoy the pattern!!! ~ Melissa
Linda
April 22, 2021 at 9:17 pm
Thanks, that does help. Gives me rough idea and can just eyeball the rest.
Melissa
April 22, 2021 at 10:29 pm
I’m so glad to hear it! If you’re adjusting the hook/stitch you could also try making it a different size if you want to customize it even further! 🙂 Hope you love the pattern!
Linda e Olewine
August 15, 2021 at 2:55 pm
I don’t like sewing things together but really like this pattern. Have a probel putting it together though. TRied you way of sewing, but didn’t work so well, tried crocheting it together and a whip stitch. Set it aside for a while till I get urge to try again.
Melissa
August 17, 2021 at 1:54 pm
Hi Linda, so glad you like the pattern! A whip stitch is definitely a good alternative to sewing the pieces individually. I hope it goes great for you once you pick it back up – please let me know if you have any questions! ~ Melissa
Kay
June 1, 2023 at 6:38 am
Hi Melissa,
Well, I have finally done it. I made your pattern in a different as I’m in Australia and I wanted something a little warmer. I also added a couple of things to it. I went around the whole Cardigan with a single crochet just to give it a border, then around the body of it, I did another roe of double crochet and it’s done in contrast colour so it looks nice. I have also crocheted on cuffs to pull in the extra large loose ended sleeves. My family and friends all think it’s love;y. I really like it too. Thank you for being so patient with me and putting up the instructions again when I couldn’t find them. This is my first time in trying to make anything like this. I was going to share a photo, but it doesn’t seem to let me. But thank you for your help, the easy to understand guide of what to do. ♥️
Melissa
June 1, 2023 at 1:14 pm
Hi Kay, that’s great news! I love the idea of a border, cuffs and contrast! You are so welcome and thank YOU for using my pattern! I’m thrilled that you’re happy with it! If you’d like, feel free to tag me on Instagram or Facebook in a photo – there are links in the header of my website – so that I can see your lovely work!! Again, thank you for sharing this good news and all your sweet compliments with me!!! ~ Melissa
Shelia
July 31, 2023 at 2:20 pm
I don’t get why it’s only 24 rows for front and 47 for back
Melissa
July 31, 2023 at 2:21 pm
Hi Shelia! Great question – the front is actually two panels of 24 rows, and the back is one big panel of 47 rows. Hope that helps! Let me know if I can help with the pattern in any way! ~ Melissa