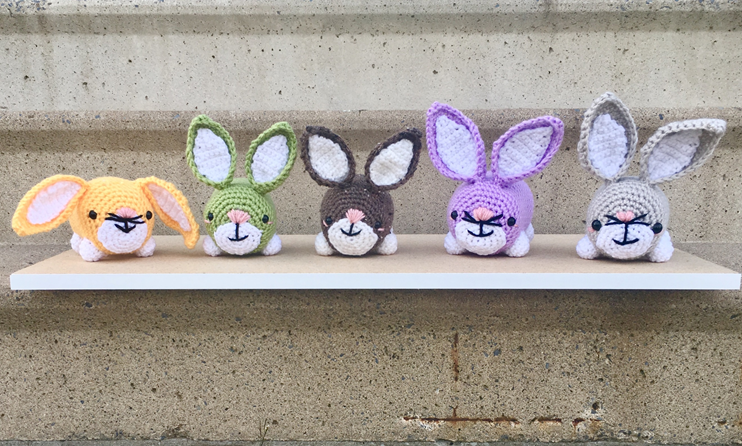
Amigurumi Bunny Crochet Pattern
As a companion to my Amigurumi Little Lamb pattern, here is a tiny bunny that is sure to brighten up your spring! These bunnies are super cute, easy, and quick to make – so you can make a whole bunch just in time for Easter with this pattern!
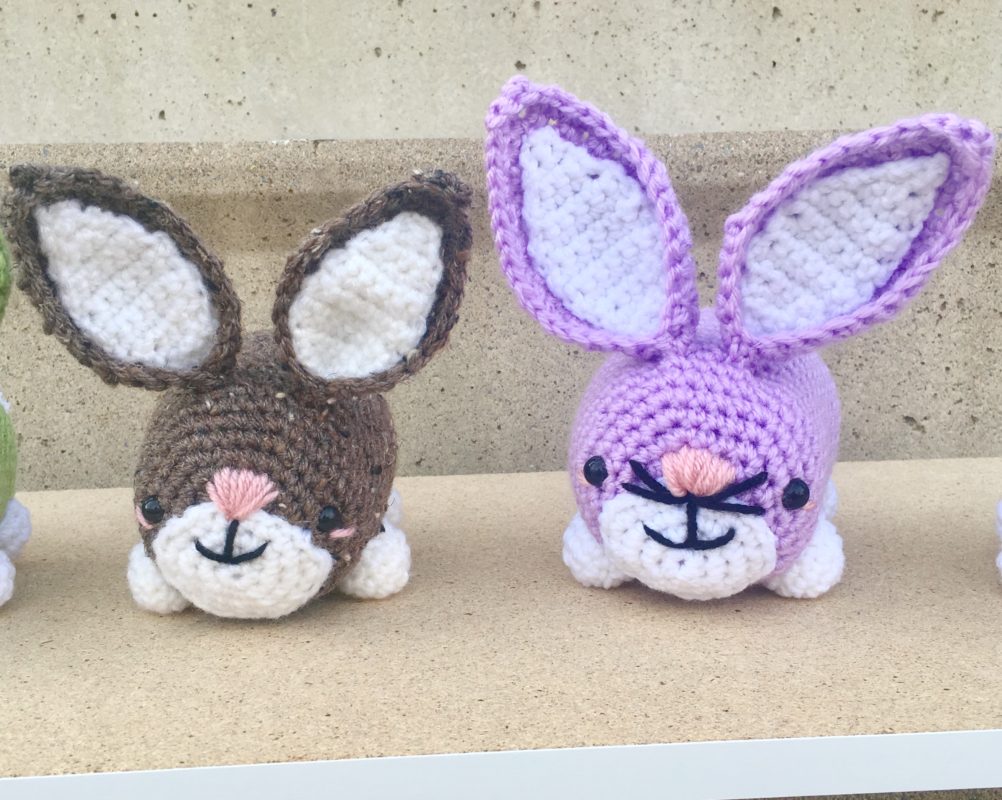
The method of making the body/base of the Bunny is really simple – it’s basically a large ball (or maybe closer to a rounded square) that all the parts like the face, ears, feet, etc. are sewn onto. I think this gives it a really cute and simplistic look that is very true to what Amigurumi characters are all about! Plus, I’m all about keeping things nice and easy and fun in my patterns, and having a simple base like this really helps with that.
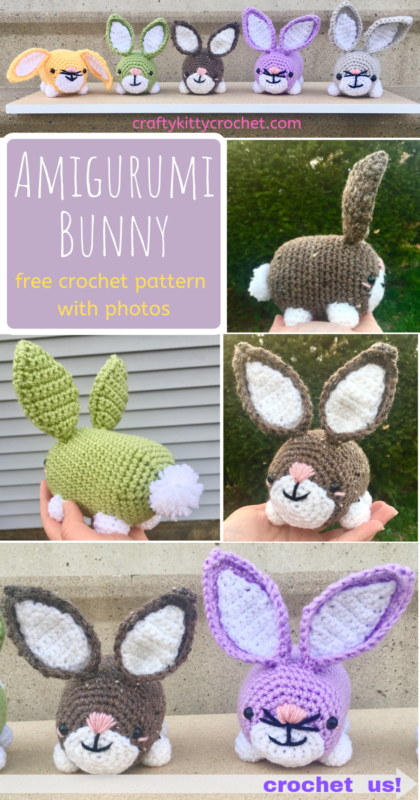
(Pin it for later!)
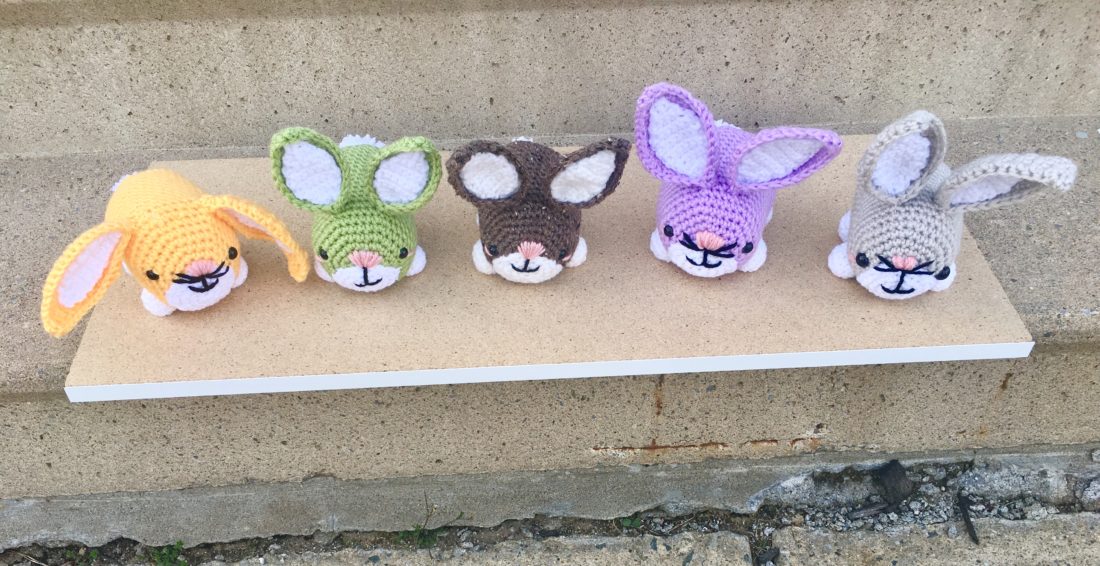
When choosing yarns for this bunny pattern, I knew I wanted eye-catching pastels, but also a few really soothing neutral tones for more “woodland” looking bunnies. I turned to a favorite of mine, the Lion Brand Vanna’s Choice collection! And yes, that is Vanna White on the front of the yarn label! If anyone else out there has fond childhood memories of watching Wheel of Fortune like I do, then it will be an added bonus that the lovely Vanna also happens to have her own line of yarn now! I love that it’s so soft but also affordable for more utility-oriented projects like amigurumi. Plus, it’s available in tons of colors! For this project, I chose Lilac, Dusty Green, Duckie, Linen, Barley, and White. Find some on Amazon below!!
Ready to crochet some cuteness? Then let’s get started!
Supplies
- Size D/ 3.25 mm crochet hook
- 1 skein Lion Brand Vanna’s Choice for Main Color (Linen, Lilac, Ducky, Sweet Pea, Barley, and White shown here)
- 1 skein Lion Brand Vanna’s Choice for Contrast Color (White and Pink shown here)
- Small amounts of Lion Brand Vanna’s Choice in Black and Pink for Mouth, Nose, and Blush
- Fiberfill Stuffing
- Scissors
- Yarn needle
Abbreviations
Beg = beginning
Ch = chain
Sc = single crochet
Sc2tog = single crochet 2 together
St(s) = stitch(es)
Rem = remaining
Rep = repeat
Rnd = round
Size
About 5” in length
Gauge
Exact Gauge is not essential to this project.
Instructions
Head/Body
(This piece is worked in continuous rnds; do not join or turn. You may wish to use a stitch marker and move it up at the beg of each new rnd.)
Rnd 1 – with Main Color, make a magic ring. 6 sc in ring (6 sc)
Rnd 2 – 2 sc in each st (12 sc)
Rnd 3 – 2 sc in next st, sc in next. Rep around (18 sc)
Rnd 4 – 2 sc in next st, sc in next 2 sts. Rep around (24 sc)
Rnd 5 – 2 sc in next st, sc in next 3 sts. Rep around. (30 sc)
Rnd 6 – 2 sc in next st, sc in next 4 sts. Rep around (36 sc)
Rnd 7 – 2 sc in next st, sc in next 5 sts. Rep around (42 sc)
Rnds 8 – 22 – sc in each st around (42 sc)
Attach safety eyes, begin stuffing.
Rnd 23 – Sc2tog over next 2 sts, sc in next 5 sts (last two photos below show sc2tog and how to “squeeze” piece while making decreases to prevent large gaps in sts) (36 sc)
Rnd 24 – Sc2tog over next 2 sts, sc in next 4 sts (30 sc)
Rnd 25 – Sc2tog over next 2 sts, sc in next 3 sts (24 sc)
Rnd 26 – Sc2tog over next 2 sts, sc in next 2 sts (18 sc)
Rnd 27 – Sc2tog over next 2 sts, sc in next st (12 sc)
Finish stuffing.
Rnd 28 – Sc2tog over next 2 sts; rep around (6 sc)
Rnd 29 – Sc2tog over next 2 sts. Leave rem sts unworked. (5 sc)
Fasten off, leaving long tail to use to sew rem gap from end of Rnd 29 closed.


Outer Ear (make 2)
Row 1 – with Main Color, ch 2. 2 sc in 2nd ch from hook. Ch 1, turn (2 sc)
Row 2 – sc in each st across. Ch 1, turn (2 sc)
Row 3 – 2 sc in first st and last st. Ch 1, turn (4 sc)
Row 4 – sc in each st across. Ch 1, turn (4 sc)
Row 5 – 2 sc in first st, sc in next 2 sts, 2 sc in last st. Ch 1, turn (6 sc)
Row 6 – sc in each st across. Ch 1, turn (6 sc)
Row 7 – 2 sc in first st, sc in next 4 sts, 2 sc in last st. Ch 1, turn (8 sc)
Row 8 – sc in each st across. Ch 1, turn (8 sc)
Rows 9 – 13 – sc in each st across. Ch 1, turn (8 sc per row)
Row 14 – sc2tog over next 2 sts, sc in next 4 sts, sc2tog over last 2 sts. Ch 1, turn (6 sc)
Row 15 – sc in each st across. Ch 1, turn (6 sc)
Row 16 – sc2tog over next 2 sts, sc in next 2 sts, sc2tog over last 2 sts. Ch 1, turn (4 sc)
Row 17 – sc in each st across. (4 sc)
Crochet evenly around entire piece. Fasten off, leaving long tail for sewing.

Inner Ear (make 2)
Row 1 – with Contrast Color, ch 2. 2 sc in 2nd ch from hook. Ch 1, turn (2 sc)
Row 2 – sc in each st across. Ch 1, turn (2 sc)
Row 3 – 2 sc in first st and last st. Ch 1, turn (4 sc)
Row 4 – sc in each st across. Ch 1, turn (4 sc)
Row 5 – 2 sc in first st, sc in next 2 sts, 2 sc in last st. Ch 1, turn (6 sc)
Rows 6 – 10 – sc in each st across. Ch 1, turn (6 sc per row)
Row 14 – sc2tog over next 2 sts, sc in next 2 sts, sc2tog over last 2 sts. Ch 1, turn (4 sc)
Row 15 – sc in each st across. Ch 1, turn (4 sc)
Row 16 – sc2tog twice. (2 sc)
Row 17 – sc in each st across. (2 sc)
Fasten off, leaving long tail for sewing.


Snout
(This piece is worked in continuous rnds; do not join or turn. You may wish to use a stitch marker and move it up at the beg of each new rnd.)
Rnd 1 – with Contrast Color, make a magic ring. 6 sc in ring (6 sc)
Rnd 2 – 2 sc in each st (12 sc)
Rnd 3 – 2 sc in next st, sc in next. Rep around (18 sc)
Rnd 4 – 2 sc in next st, sc in next 2 sts. Rep around (24 sc)
Fasten off, leaving long tail for sewing. Stretch piece considerably width-wise in order to make Snout shape.


Feet (make 4)
(This piece is worked in continuous rnds; do not join or turn. You may wish to use a stitch marker and move it up at the beg of each new rnd.)
Rnd 1 – with Contrast Color, make a magic ring. 6 sc in ring (6 sc)
Rnd 2 – 2 sc in each st (12 sc)
Rnds 3 – 4 – sc in each st around (12 sc per rnd)
Fasten off, leaving long tail for sewing to Body.

Finishing
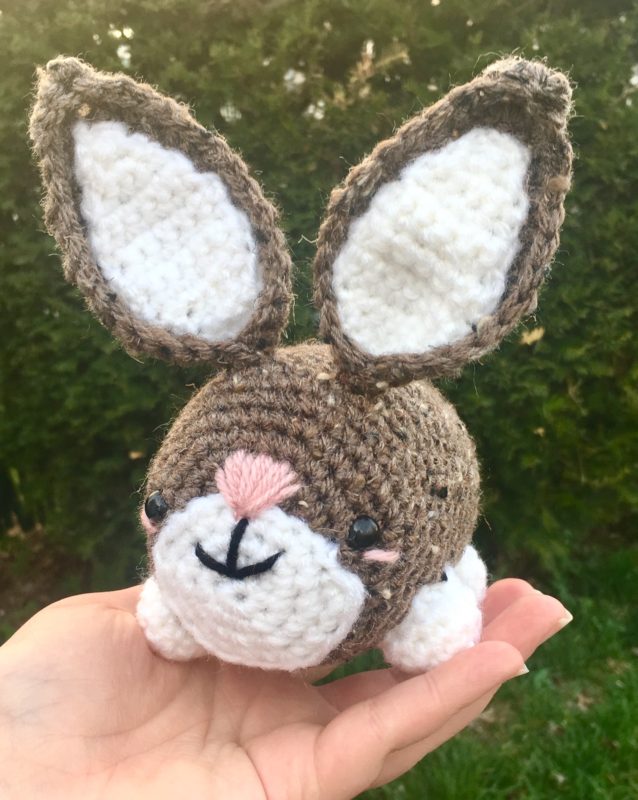
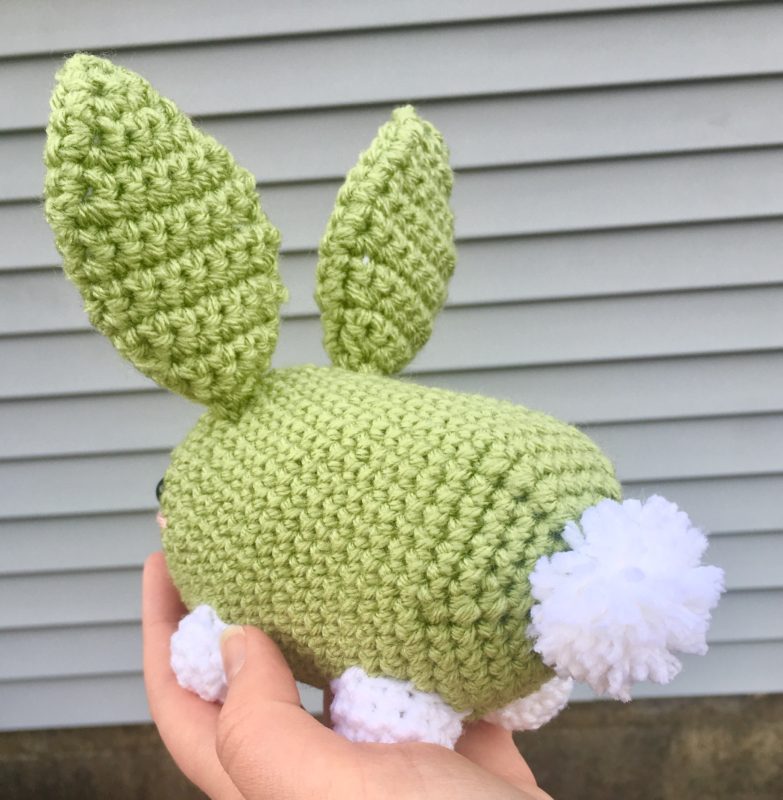
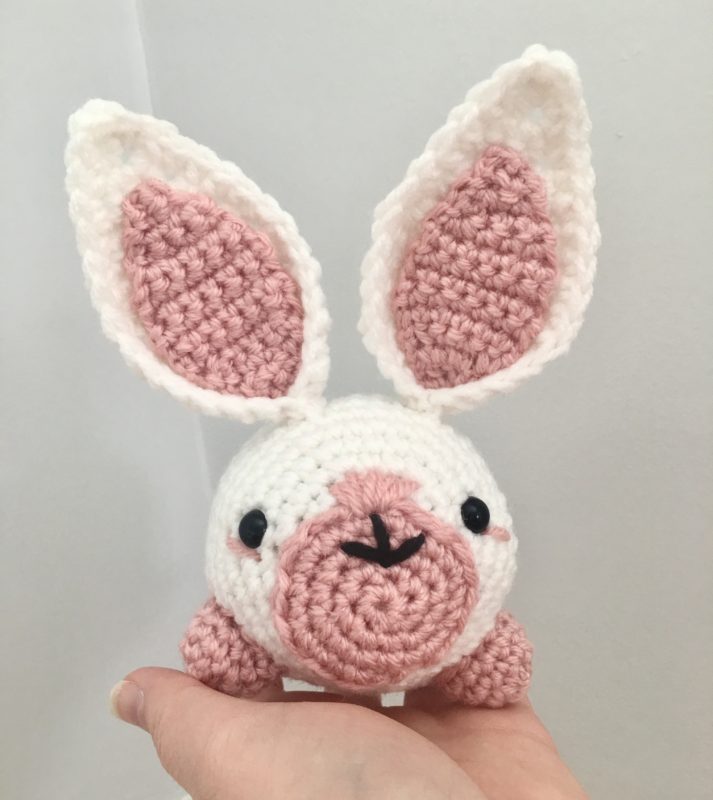
Sew Inner Ears to Outer Ears. Sew Snout onto Body, lining up top of Snout with center of beg Magic Ring of Body. With Pink, sew Nose above Snout (bottom center point of Nose should be at top of Snout). With Black, sew small vertical line below Nose, with two smaller horizontal lines on either side of bottom of that line. With Pink, sew small horizontal line on outer corner of each Eye for Blush. Sew Ears to top of Body near center. Sew Feet to bottom of Body. Make a small pom pom using a pom pom maker or using method in photos below; sew to back of Body for Tail. Weave in all ends (or tie knots and hide them inside sts of Body.)


Here is the finished Bunny!
I hope you enjoyed crocheting these little bunnies along with me! If you like fun, free patterns, please be sure to subscribe to my email list and follow me on social media – I have lots more fun patterns like this one coming soon! Happy Crocheting!
COPYRIGHT: This pattern is owned by Crafty Kitty Crochet (Melissa Moore). Any reselling or distribution of this pattern is prohibited. Sale of items made using this pattern is welcomed, but I do ask that credit/a link be provided back to my site, craftykittycrochet.com.


Comments (3)
Big and Little Cactus Crochet Pattern – Crafty Kitty Crochet
May 4, 2019 at 9:17 pm
[…] fan of the lovely Vanna’s Choice by Lion Brand while making my amigurumi bunnies (pattern HERE) this spring. So I knew I wanted an excuse to use it again for another project! I went with […]
Easter Bunny Applique – Crochet Pattern – Crafty Kitty Crochet
March 20, 2020 at 10:32 pm
[…] may remember that last year I came out with two fun spring/Easter themed projects: my Amigurumi Bunny and Amigurumi Sheep! Crocheting is a great way to celebrate the spring season. There’s still […]
Spring Sherbet Bunny – Amigurumi Crochet Pattern ~ Crafty Kitty Crochet
March 2, 2021 at 6:06 pm
[…] Easter animals that this season has to offer. (If you love spring too, be sure to check out another Amigurumi Bunny pattern of mine, my Amigurumi Sheep, and my Cherry Blossom Hat and Scarf […]