Halloween Scarf CAL (Crochet-Along) Part 1 – Pumpkin!
I’m happy to present to you this Halloween Scarf Crochet-Along that I’ve been working on since the summertime! I wanted to design something that anyone could wear – kids, adults, boys, girls, etc. – that captured the spooky goodness of Halloween! The entire scarf is made up of four frightfully fun characters – a Pumpkin, Ghost, Bat, and Cat. These characters are easy to make and super cute to wear! Another great feature is that each character is double-sided; so if the scarf gets twisted around (and they always do) you don’t have to worry about a “wrong” side showing.
I’ll be releasing the scarf one character at a time here on my blog, so be sure to check back often to crochet more characters with me and complete your scarf!
Ready to get started with this ghoulishly good crochet-along? Then grab your hooks and your Pumpkin Spice coffees and let’s go!
(NOTE: You can purchase an ad-free, PDF copy of the ENTIRE pattern in my shop here!)
Supplies:
Size F/5 3.75 mm Crochet Hook
Yarn Needle
Scissors
Red Heart Super Saver in:
– Black (eyes/mouths)
– Pumpkin (Pumpkin body)
*NOTE! I am in love with the “Pumpkin” colorway of Red Heart Super Saver! It is a Halloween staple, in my opinion. Right now, you can get a “Jumbo” skein from Amazon for less than $6 – that’s enough to make an entire pumpkin patch!
Caron Simply Soft in Dark Sage (Pumpkin Stem)
Stitch markers (optional)
Abbreviations:
Beg = beginning
Ch = chain
Hdc = half double crochet
Rep = repeat
Rnd = round
Sc = single crochet
Sk = skip
Sl st = slip stitch
St(s) = stitch(es)
Size:
Pumpkin: approx. 4.5” wide by 5” tall (including stem)
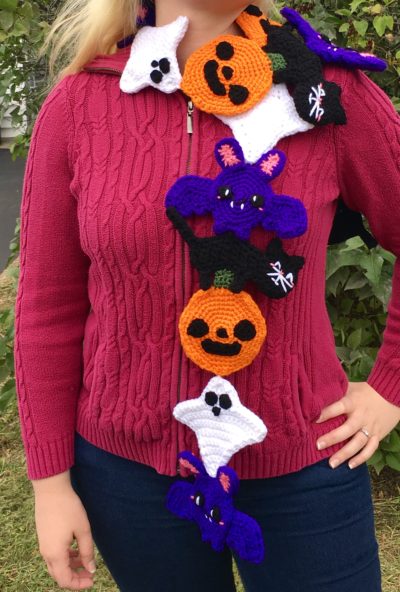
Total Scarf length once all characters are attached together (keep checking back for more character patterns!): approx. 66.5” long
Gauge:
Exact gauge is not essential to this project.
*NOTE: the Pumpkin is double-sided, meaning that it has a face/body on one side, as well as on the other side. The pattern explains how to sew two sides together to make one complete Pumpkin. There are four Pumpkins total on the scarf.
Instructions
Body (Make 8)
Note: Body of Pumpkin is worked in continuous rnds; do not join. You may choose to use stitch markers at the end of each rnd.
Rnd 1 – Make a magic ring, 6 sc in ring (6 sc)
Rnd 2 – 2 sc in each st around (12 sc)
Rnd 3 – 2 sc in next st, sc in next; rep around (18 sc)
Rnd 4 – 2 sc in next st, sc in next 2 sts; rep around (24 sc)
Rnd 5 – 2 sc in next st, sc in next 3 sts; rep around (30 sc)
Rnd 6 – 2 sc in next st, sc in next 4 sts; rep around (36 sc)
Rnd 7 – 2 sc in next st, sc in next 5 sts; rep around (42 sc)
Rnd 8 – 2 sc in next st, sc in next 6 sts; rep around (48 sc)
Rnd 9 – Sc over next 3 sts, *hdc over next 4 sts, sl st in next*. Rep from * to * two more times, but do not sl st after last rep. Sc over next 9 sts. **Sl st in next st, hdc over next 4 sts.** Rep from ** to ** two more times. Sl st in next st. Sc over next 6 sts. Fasten off, leave a long tail for sewing. (48 sts)
Eyes (Make 16)
Row 1 – Ch 2. 2 sc in 2nd ch from hook. Ch 1, turn (2 sc)
Row 2 – 2 sc in each st across, ch 1, turn (4 sc)
Row 3 – Working around piece, sc 1 up side. Sc in tip, ch 1, sc again in tip. 1 sc down other side. Ch 1, join with sl st to first st of previous row (4 sc)
Fasten off, leave a long tail for sewing to Pumpkin. Weave in tail from beg ch only.


Nose (Make 8)
Row 1 – Ch 2, 2 sc in 2nd ch from hook. (2 sc)
Fasten off, leave a long tail for sewing to Pumpkin. Weave in tail from beg ch only.

Mouth (Make 8)
Row 1 – Ch 7. In 2nd ch from hook, Hdc 3. Hdc across next 4 sts. In last st, Hdc 3. Fasten off, leave a long tail for sewing to Pumpkin. Weave in tail from beg ch only.


Stem (Make 8)
Row 1 – In first st of the top-center group of hdc sts from Rnd 9 of Pumpkin, attach green. Ch 1, *Sc 4 across. Ch 1, turn.* Rep from * to * two more times. Fasten off, leave a long tail for sewing. Weave in tail from beg ch only.


Assembly
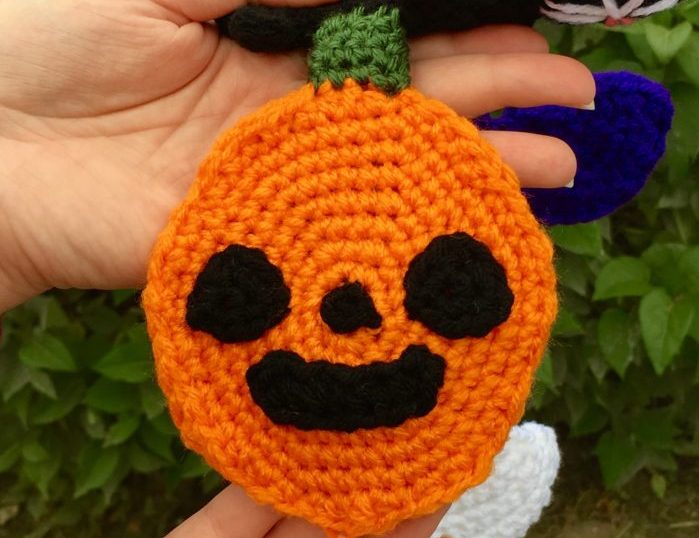
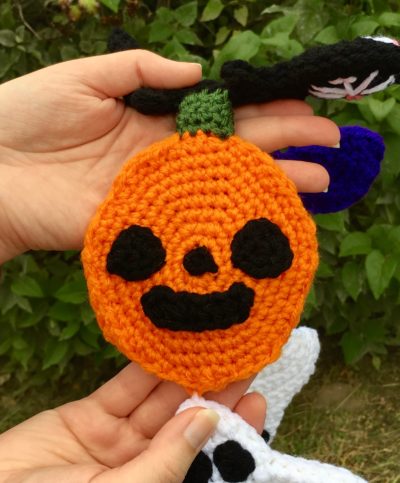
Arrange eyes, nose and mouth as pictured- nose should be on Rnd 1 of Pumpkin where magic ring was made. Eyes should be on same rnd, near right/left edges. Mouth should be about 2 sts below in the center. Sew all onto pumpkin and tie off ends on back of pumpkin.


Put wrong sides together and sew two pumpkins together. Use long tails left over from body and stem. When finished, weave in ends from body and leave a tail at the top center of the stem for sewing onto the next character in scarf pattern.


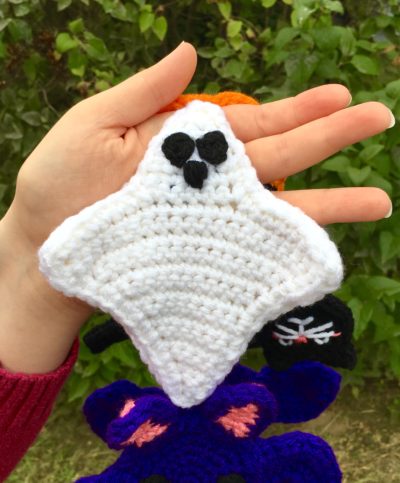
Here is the finished pumpkin, and a sneak peak at the finished scarf! Again, stay tuned for more fun characters coming soon!
COPYRIGHT: This pattern is owned by Crafty Kitty Crochet (Melissa Moore). Any reselling or distribution of this pattern is prohibited. Sale of items made using this pattern is welcomed, but I do ask that credit/a link be provided back to my site, craftykittycrochet.com.


Comments (4)
Halloween Scarf CAL (Crochet-Along) Part 2 – Ghost! – Crafty Kitty Crochet
April 18, 2020 at 4:19 pm
[…] It’s time for my Ghost Post!! Here is Part 2 of my Halloween Scarf CAL – the terrific and terrifying Ghost! This ghost is designed to have your typical “floating ghost” kind of look, and my favorite thing about him is that he looks like he’s making that corny “ooooOOOOooo” noise that ghosts make always make on TV, and in cartoons and movies. This ghost is the perfect accent to this spooky scarf that we’ve been crocheting! (See the adorable Pumpkin we made in Part 1 of this Halloween Scarf CAL!) […]
Halloween Scarf CAL (Crochet-Along) Part 3 – Bat! – Crafty Kitty Crochet
April 18, 2020 at 4:20 pm
[…] out the other two character patterns of the scarf that have been released so far on my blog: the Pumpkin and the […]
Halloween Scarf CAL (Crochet-Along) Part 4 – Black Cat! – Crafty Kitty Crochet
April 18, 2020 at 4:22 pm
[…] way, you can find the patterns for the other characters in this scarf in my previous posts – Pumpkin, Ghost, and […]
Halloween Scarf CAL (Crochet-Along) Part 2 – Ghost! ~ Crafty Kitty Crochet
April 25, 2021 at 3:24 pm
[…] It’s time for my Ghost Post!! Here is Part 2 of my Halloween Scarf CAL – the terrific and terrifying Ghost! This ghost is designed to have your typical “floating ghost” kind of look, and my favorite thing about him is that he looks like he’s making that corny “ooooOOOOooo” noise that ghosts make always make on TV, and in cartoons and movies. This ghost is the perfect accent to this spooky scarf that we’ve been crocheting! (See the adorable Pumpkin we made in Part 1 of this Halloween Scarf CAL!) […]