
Twinkling Turkey Amigurumi – Crochet Pattern
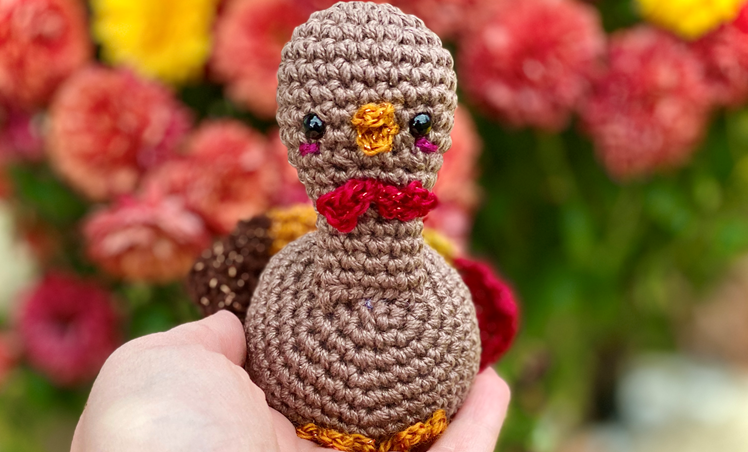
If you’re looking for a cute, easy and quick Thanksgiving crochet project, then you are in for a gobblin’ good time with this super cute amigurumi Twinkling Turkey! It’s just the right size as part of your decor for your big celebration and feast, or to give away as a cute stuffed toy to the little one in your life!
Why “twinkling” turkey, you might ask? Well, because when I was designing this turkey, I decided to make the feathers, beak, feet, and giblets using sparkle yarn. Because even if I’m making something as classic as a Thanksgiving turkey, you just know I need to be extra magical about it!
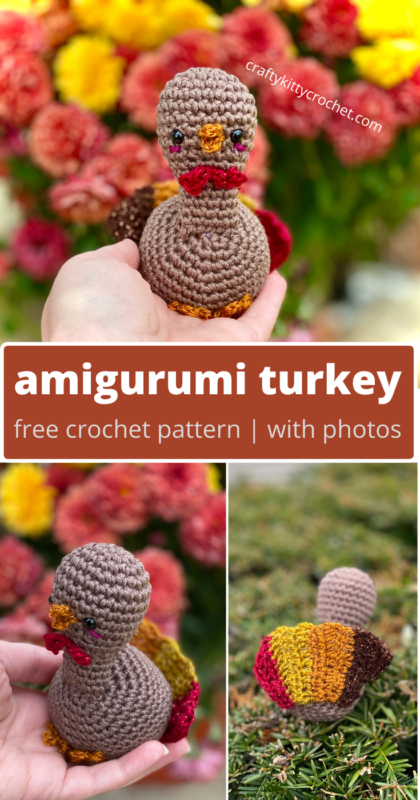
Pin it for later!
This turkey is such a cute conversation piece and works up with very little effort! Several of the appendages, like the feet and beak, are just a small series of chain stitches. So you can make a whole bunch of these cute little gobblers without neglecting all the prep in the kitchen for your Thanksgiving feast!
When I was designing this turkey, I knew I wanted to use a yarn that would give lots of definition in the stitches. I’ve been a big fan of Lion Brand 24/7 Cotton for this in the past, and I just happened to have an excellent turkey color in my stash – Taupe (on Amazon HERE!)
As for the sparkle yarn, I found myself wanting small bits of lots of different colored yarns to add all the accents. That’s when I remembered seeing some Lion Brand Bon Bons in Jo-Ann’s on a recent yarn run. They’re tiny little skeins of yarn that come in a themed pack! You can buy a pack that’s all neutral/earth tones, all brights, all pastels, etc. So you know once I had my choice of which to buy, I HAD to go with the glittery one! I think the “Party” pack (on Amazon HERE) did just the trick in mixing some beautiful deep fall colors with sparkly metallic thread. It really made my turkey extra unique!
The possibilities are really endless when it comes to uses for this little guy! It would look so cute as part of a centerpiece on the table for Thanksgiving dinner, or in any other part of your home as some seasonal decor. Like I said earlier, it’s a great stuffed toy to give to those little ones who might be visiting your home for the Thanksgiving holiday! Or here’s an idea – how about giving these turkeys away as thoughtful, homemade gifts / favors to the guests at your Thanksgiving dinner? What a great way to commemorate the holiday!
So who else is up to this turkey task? Let’s not wait another second!!!
Supplies
Size D/3 / 3.25 mm crochet hook
Lion Brand 24/7 cotton in Taupe
Lion Brand Bon Bons in Party
1 pair of 6 mm safety eyes
Fiberfill stuffing
Scissors
Yarn needle
Abbreviations
*= indicates beginning/end of a section to be repeated
Ch = chain
Dc = double crochet
Hdc = half double crochet
Rep = repeat
Rem = remaining
Rnd = round
Sc = single crochet
Sc2tog = single crochet 2 together
Sl St = slip stitch
St(s) = stitch(es)
Gauge
Exact gauge is not essential to this project.
Size
About 4.5 inches in length
Instructions
Head
This piece is worked in continuous rnds; do not join. You may wish to use a stitch marker and move it up at the beginning of each new rnd.
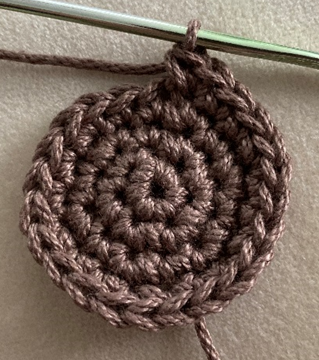
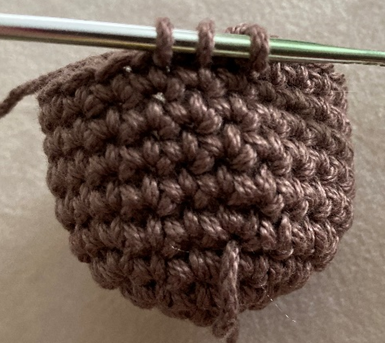
Rnd 1 – With Taupe, make a magic ring. 6 sc in ring. (6 sc)
Rnd 2 – 2 sc in each st around. (12 sc)
Rnd 3 – 2 sc in next st, sc in next st; rep around. (18 sc)
Rnd 4 – 2 sc in next st, sc in next 2 sts; rep around. (24 sc)
Rnds 5 – 9 – sc in each st around. Attach safety eyes. (24 sc per rnd)
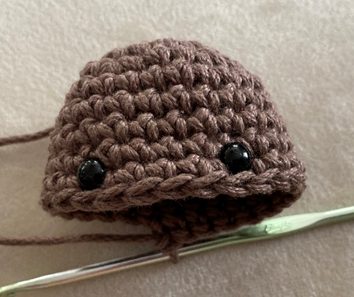
Rnd 10 – sc2tog over next 2 sts, sc in next 2 sts; rep around. (18 sc)
Rnd 11 – sc in each st around. (18 sc)
Rnd 12 – sc2tog over next 2 sts, sc in next st; rep around (12 sc)
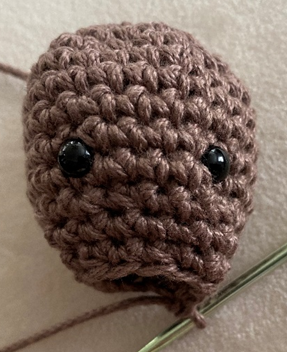
Rnds 13 – 17 – sc in each st around. Stuff Head. (12 sc per rnd)
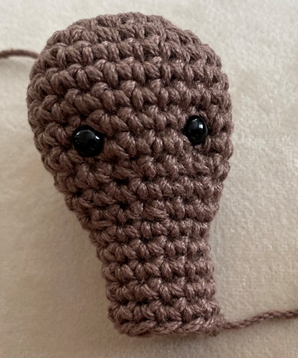
Fasten off, leaving long tail for sewing.
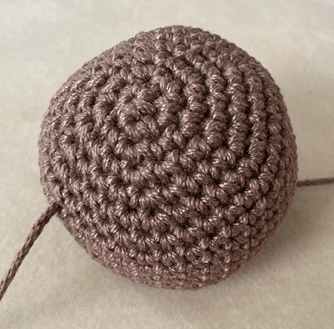
Body
This piece is worked in continuous rnds; do not join. You may wish to use a stitch marker and move it up at the beginning of each new rnd.
Rnd 1 – With Taupe, make a magic ring. 6 sc in ring. (6 sc)
Rnd 2 – 2 sc in each st around. (12 sc)
Rnd 3 – 2 sc in next st, sc in next st; rep around. (18 sc)
Rnd 4 – 2 sc in next st, sc in next 2 sts; rep around. (24 sc)
Rnd 5 – 2 sc in next st, sc in next 3 sts; rep around. (30 sc)
Rnd 6 – 2 sc in next st, sc in next 4 sts; rep around. (36 sc)
Rnds 7 – 12 – sc in each st around. (36 sc per rnd)
Rnd 13 – sc2tog over next 2 sts, sc in next 4 sts; rep around. Begin stuffing (30 sc)
Rnd 14 – sc2tog over next 2 sts, sc in next 3 sts; rep around. (24 sc)
Rnd 15 – sc2tog over next 2 sts, sc in next 2 sts; rep around. (18 sc)
Rnd 16 – sc2tog over next 2 sts, sc in next st; rep around. Finish stuffing (12 sc)
Rnd 17 – sc2tog in each st around. (6 sc)
Rnd 18 – sc2tog over next 2 sts. Leave rem sts unworked. (5 sc)
Fasten off, leaving long tail for sewing rem gap closed.
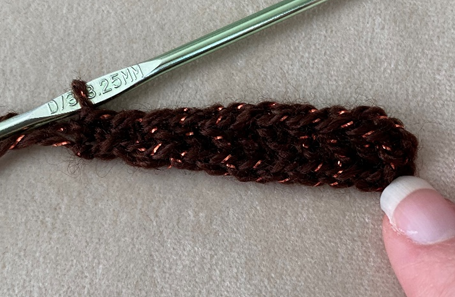
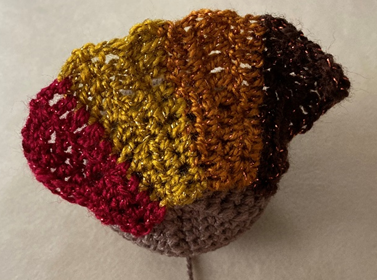
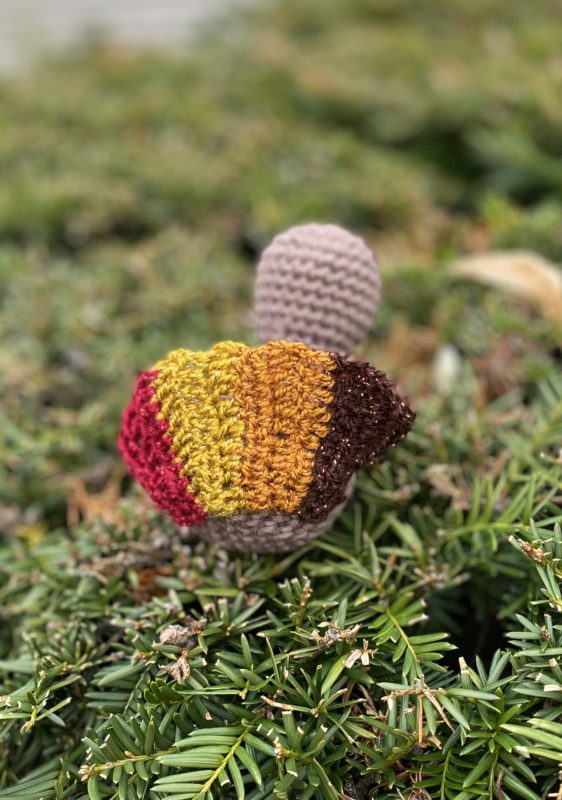
Feathers
With one color of Party, ch 12.
Row 1 – dc in 3rd ch from hook, and in next 4 sts. Hdc in next 3 sts. Sc in last 2 sts. Ch 1, turn (5 dc, 3 hdc, 2 sc)
Row 2 – sc in next 2 sts; hdc in next 3 sts; dc in last 5 sts. Ch 2, turn (2 sc, 3 hdc, 5 dc)
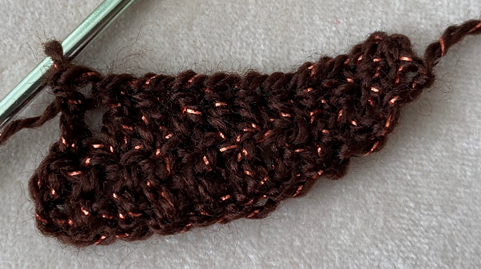
Row 3 – dc in next 5 sts; hdc in next 3 sts; sc in last 2 sts. Attach another color of Party in last st. Ch 1, turn (5 dc, 3 hdc, 2 sc)
Row 4 – sc in next 2 sts; hdc in next 3 sts; dc in last 5 sts. Ch 2, turn (2 sc, 3 hdc, 5 dc)
Row 5 – dc in next 5 sts; hdc in next 3 sts; sc in last 2 sts. Ch 1, turn (5 dc, 3 hdc, 2 sc)
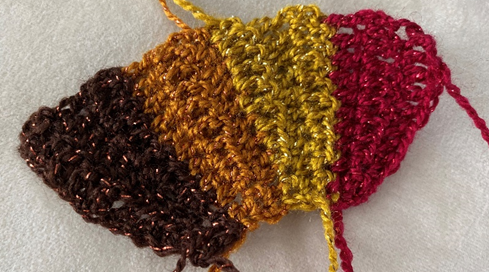
Row 6 – sc in next 2 sts; hdc in next 3 sts; dc in last 5 sts. Attach another color of Party in last st. Ch 2, turn (5 dc, 3 hdc, 2 sc)
Rows 7 – 12 – rep Rows 4 – 6. Do not ch 2 or attach another color at end of Row 12.
Fasten off each color, leaving long tails for sewing to Body.
Foot (make 2)
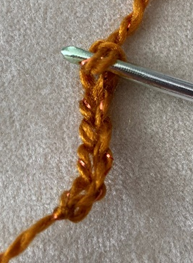
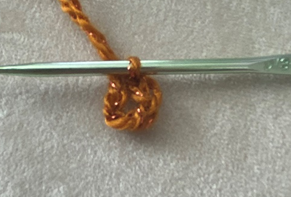
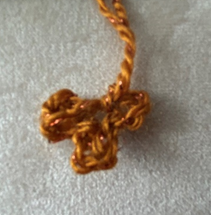
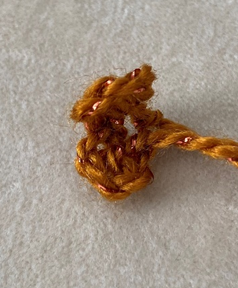
With Orange color of Party, ch 5. Sl st into first ch. *Ch 4, sl st into first ch from beg ch-5.* Rep from * to * once.
Fasten off, leaving long tail for sewing.
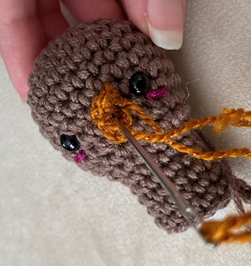
Beak
With Orange color of Party, ch 4, sl st into first ch. Ch 3, sl st into first ch from beg ch-4.
Fasten off, leaving long tail for sewing.
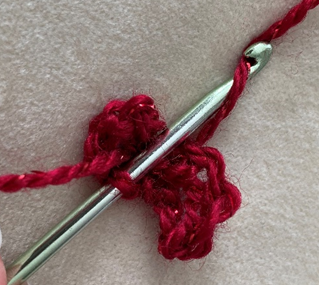
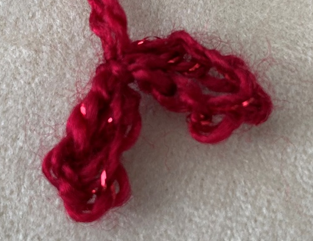
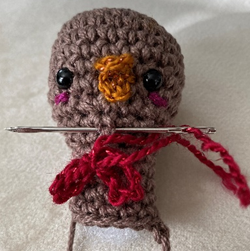
Giblets
With Red color of party, ch 7. Sl St into first ch. Ch 6, sl st into first ch from beg ch-7. Sl st around middle of two chains made.
Fasten off, leaving long tail for sewing.
Finishing
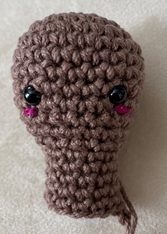
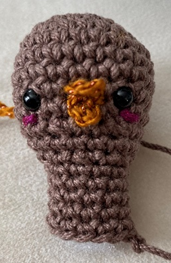
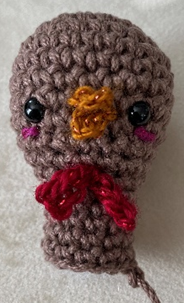
With Pink color of Party, make small horizontal lines under each eye for Blush.
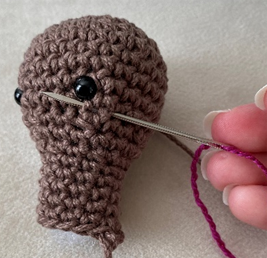
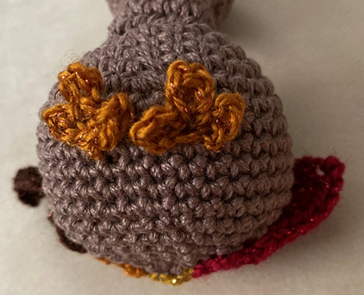
Sew Beak between eyes and fold slightly, so that it looks like two halves of a beak.
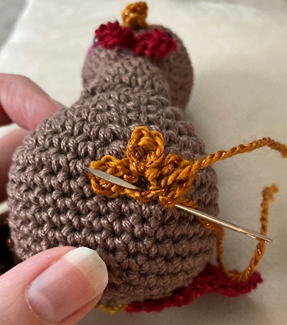
Sew Giblets underneath Beak, near where long neck begins.
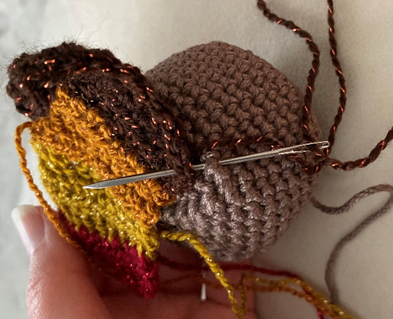
Sew Feathers to back of Body, lining up bottom of Feathers with center of Body. Use each rem color tail to sew corresponding color to Body.
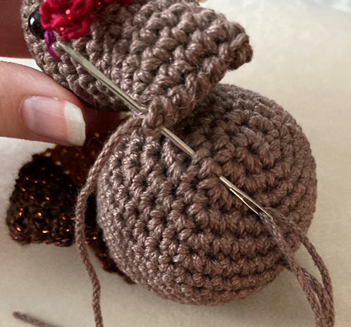
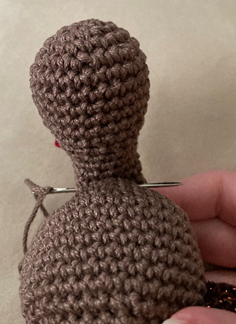
Press bottom edges of Head slightly, so that they are flat, and sew Head to front of Body, lining up bottom of Head to center of Body. Sew up through a few sts of the neck to secure Head to Body.
Line up Feet with center of Body, and sew to bottom of Body.
Weave in all ends or tie off and hide knots inside sts.
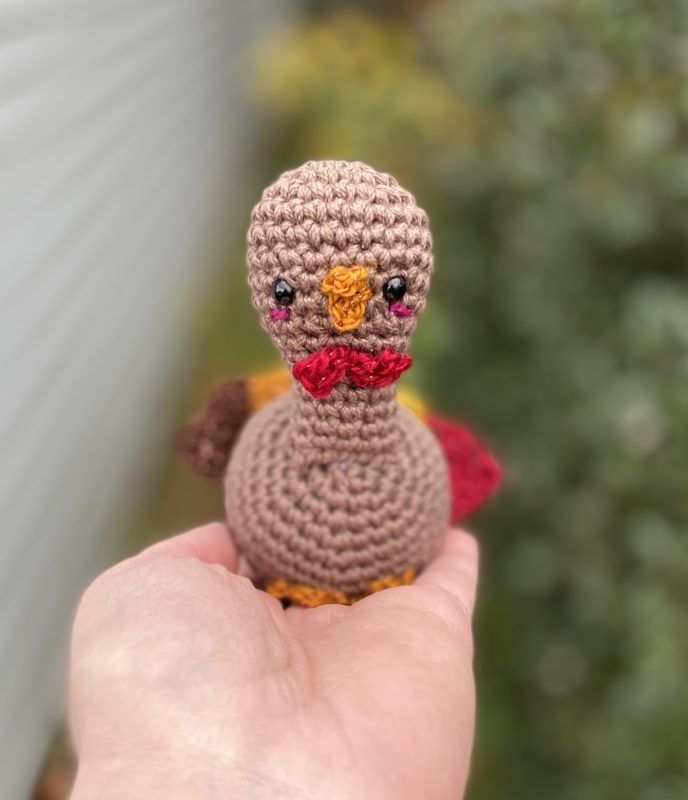
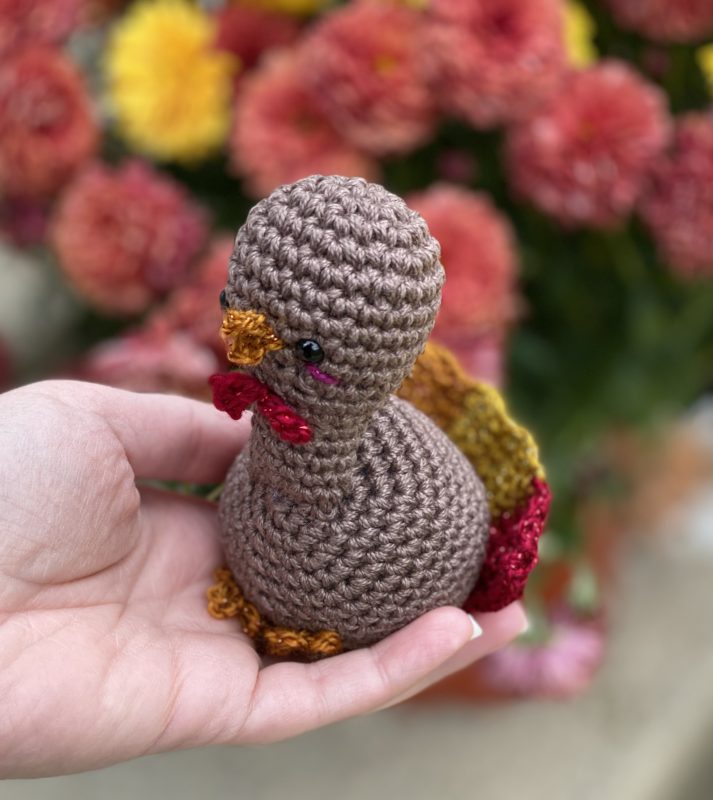
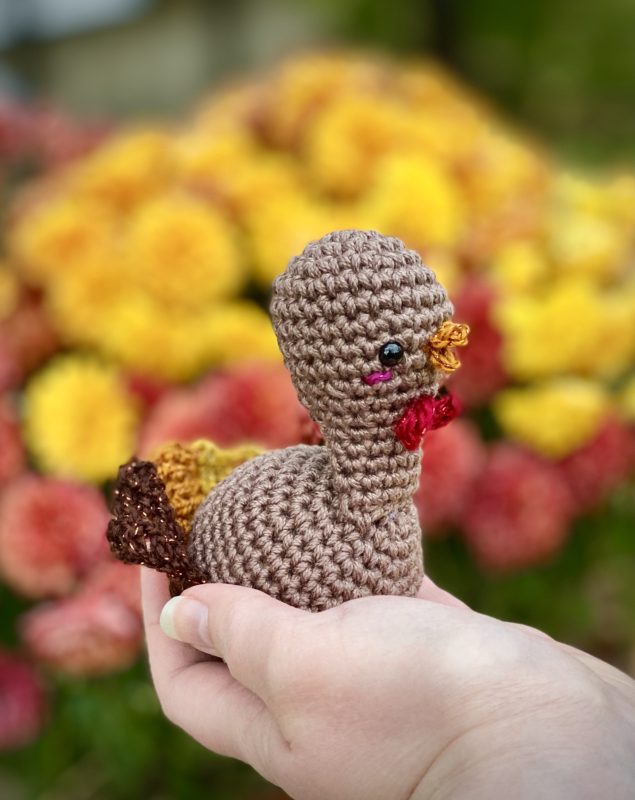
Here is the finished turkey!
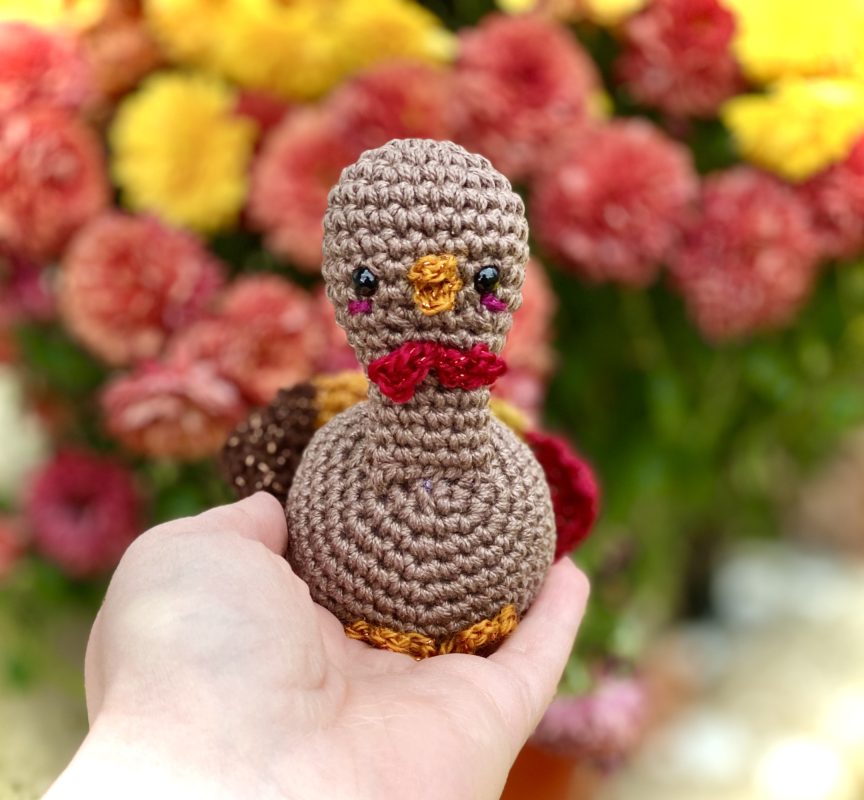
I hope you enjoyed crocheting this turkey along with me! If you love fun, free crochet patterns like this one, please be sure to subscribe to my email list and follow me on social media to keep up to date on all my latest patterns. I have so many more fun ones like this coming soon!
Happy Crocheting!
COPYRIGHT: This pattern is owned by Crafty Kitty Crochet (Melissa Moore). Any reselling or distribution of this pattern is prohibited. Sale of items made using this pattern is welcomed, but I do ask that credit/a link be provided back to my site, craftykittycrochet.com.


Comments (2)
Mermaid Hand Sanitizer Cozy – Crochet Pattern ~ Crafty Kitty Crochet
November 12, 2020 at 8:30 pm
[…] The yarn I used for these cozies is one of a kind and I’m so pleased with the look it produced for these! It’s Lion Brand Bon Bons. Sound familiar? I also used it for my Twinkling Turkey Amigurumi! […]
Best Thanksgiving Crochet Patterns (Turkeys, Pumpkins, and More!) –
August 29, 2022 at 10:46 pm
[…] another stuffed pattern: The Twinkling Turkey Amirgurumi! Isn’t this guy so cute? This pattern is easy and works up quickly. Since they’re so […]